The Multi-accounts module enables the management of multiple loyalty program accounts for individual users. This functionality seamlessly handles various accounts, allowing for efficient administration or configuring different loyalty program incentives and benefits per account. With this capability, configured mechanisms of the loyalty program can target specific customer accounts. For example, the customer can earn points for a particular action or redeem a reward only for a specific account.
Integrated with various purchase-related modules, including Incentivized Purchase, Burn rules, Checkout accept, and Expiring points modules streamlines account management and configuration.
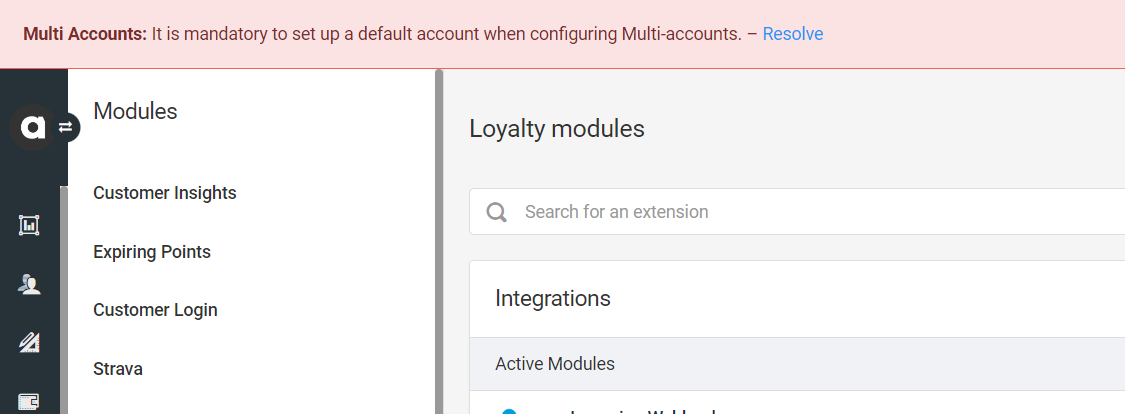
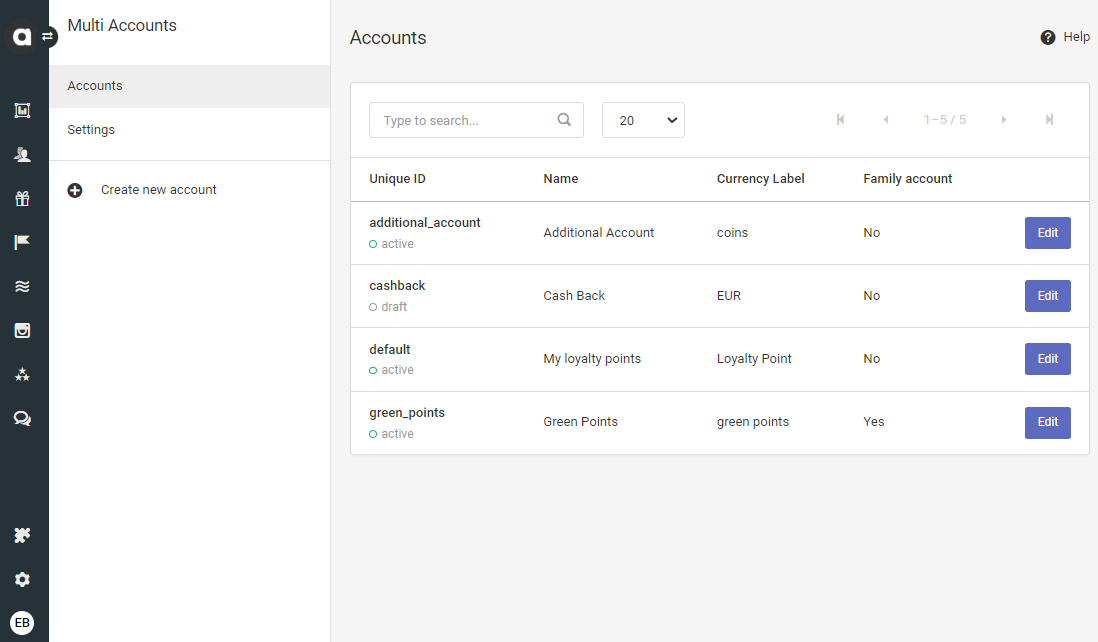
To find the configuration page, navigate to the Modules menu and search for the Multi-accounts module. Upon opening the page, you’ll find the list of accounts already set up, displaying the following information:
Unique ID | A unique ID that distinguishes this account from any other user account. Immediately below the unique ID, you can find a text label specifying if the account is Active or Inactive. |
Name | The name assigned to the account when it was created |
Currency label | The currency acronym indicates the currency this account is to be used for (e.g., EUR or USD) |
Family account | A Yes or No text field confirms whether this is a family account. A family account groups two or more customers together to form an affiliate account so that they can pool their resources. |
Configuring Multi-accounts
Create a new account
By clicking Create new account in the module sidebar, you can initiate the setup of a new account. All configuration fields and criteria for each are detailed in the section below.
Basic settings
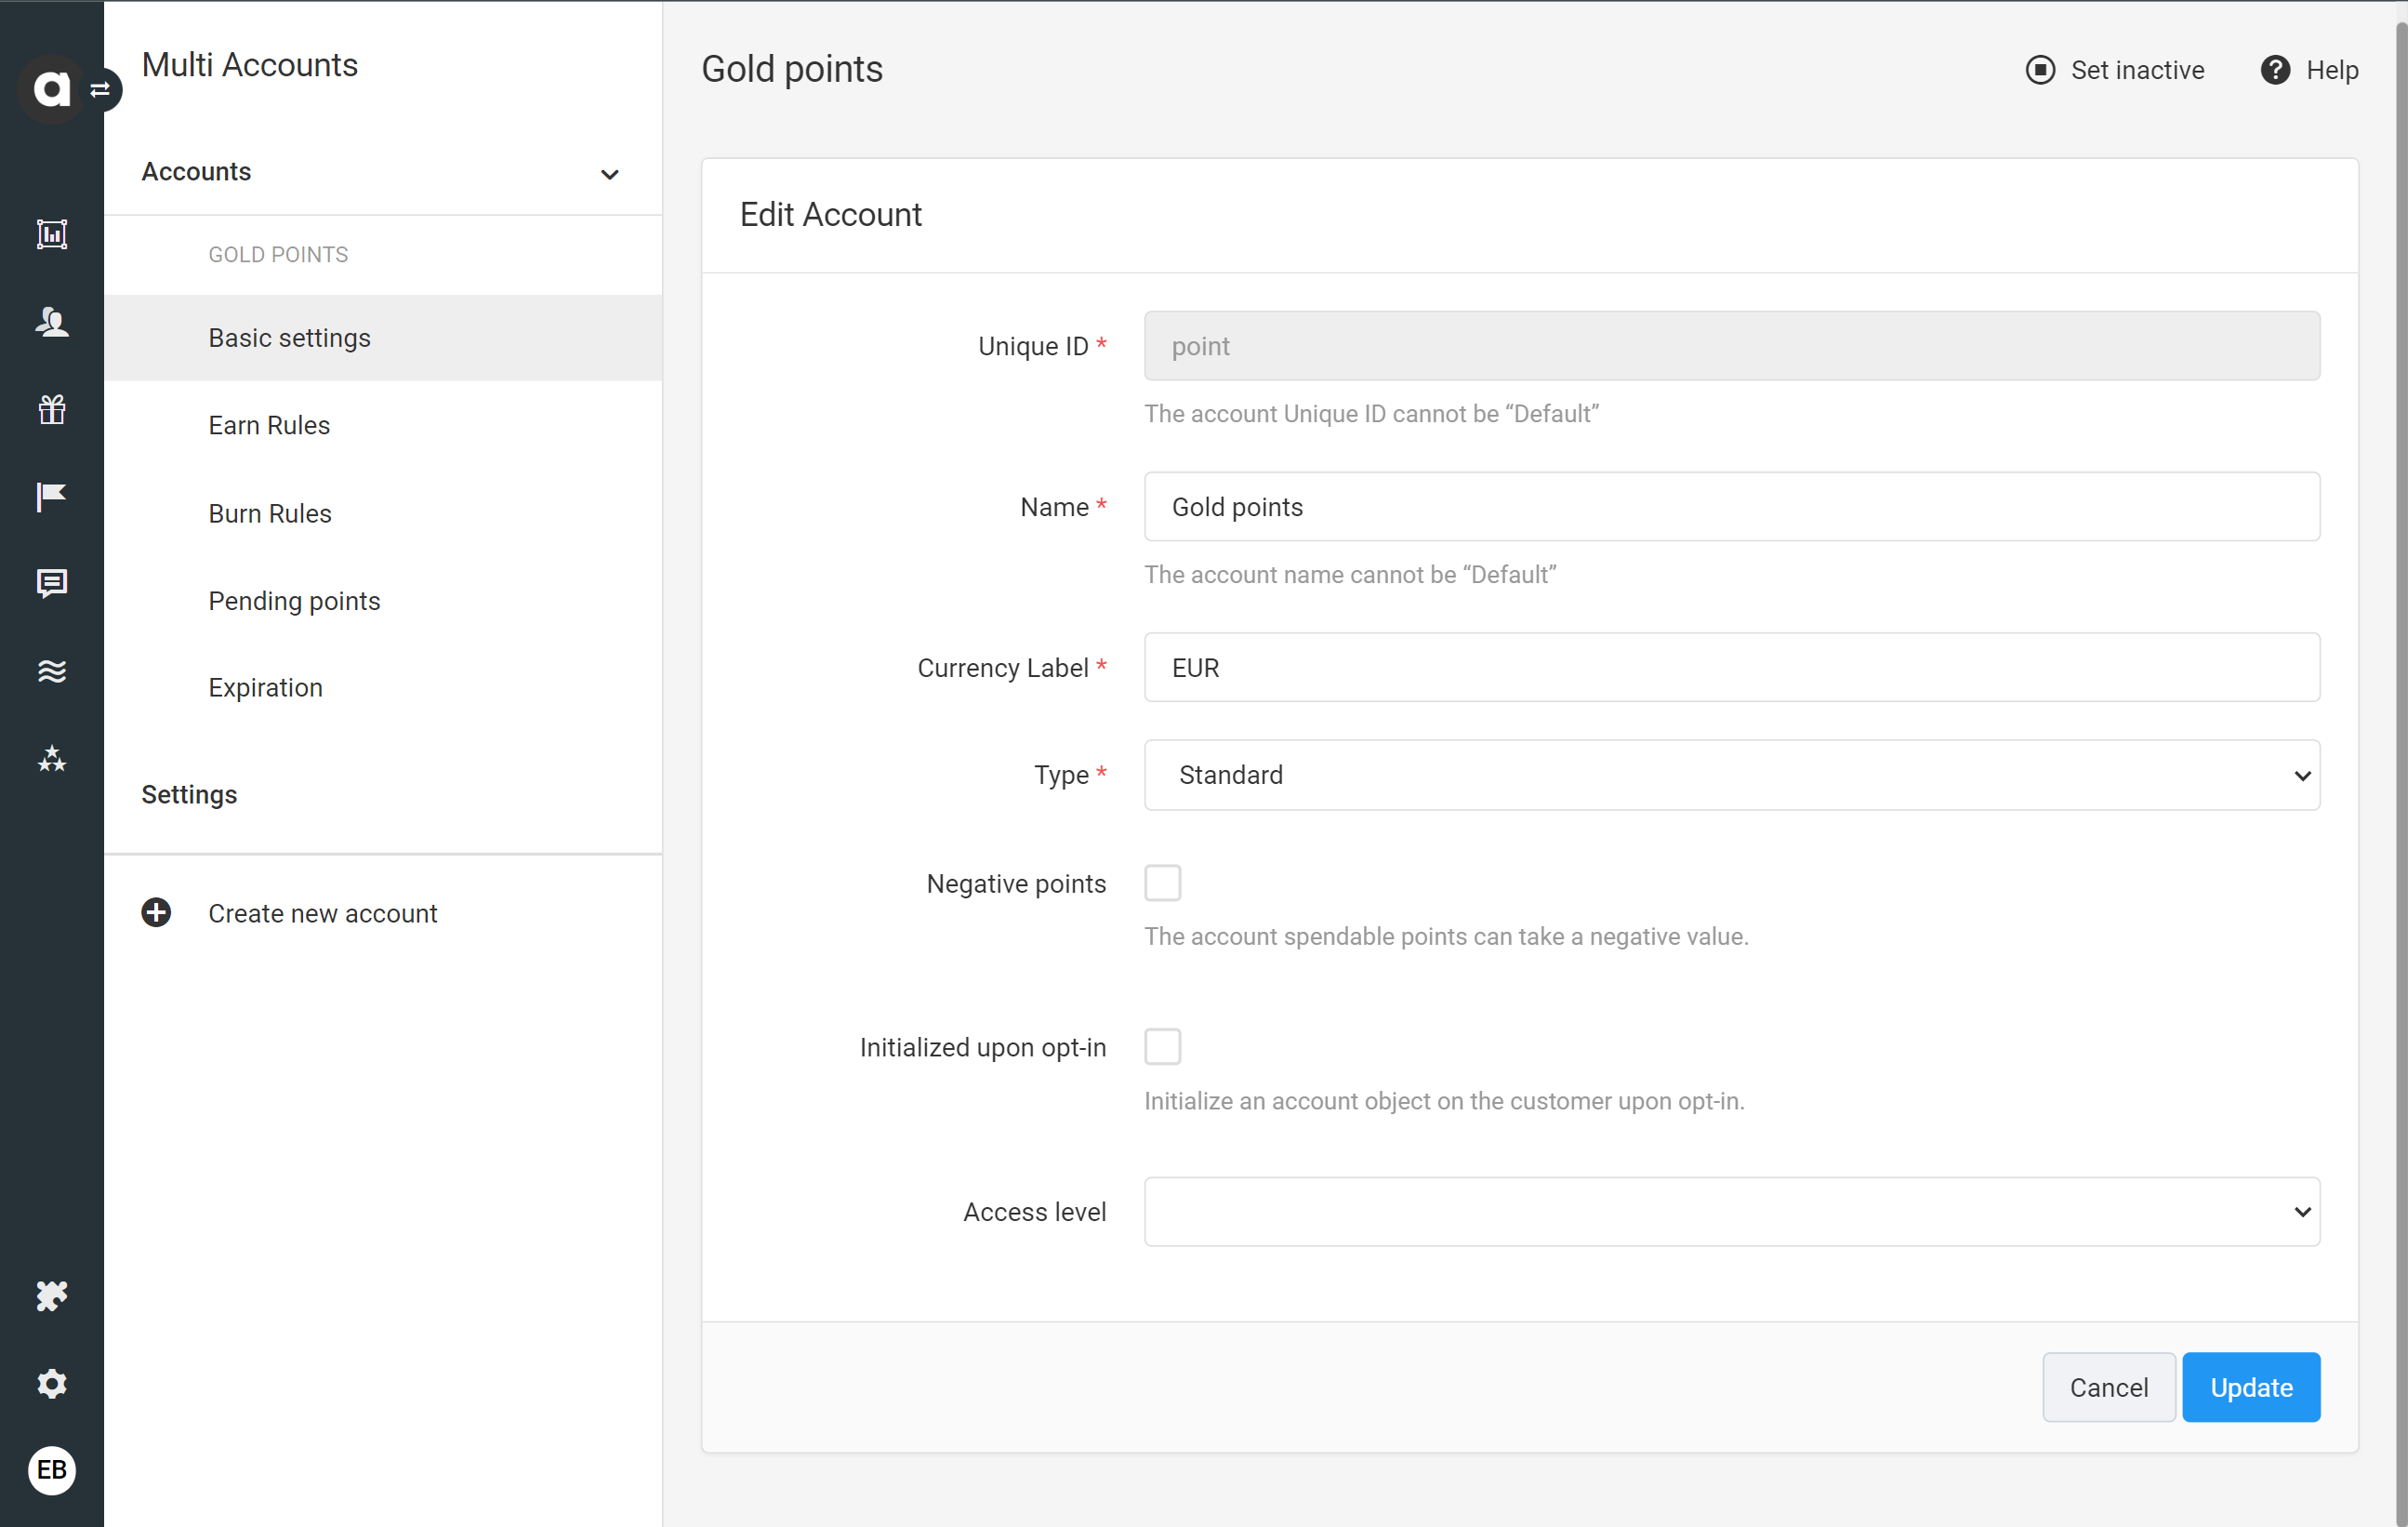
The Basic settings screen provides the following configuration fields:
Unique ID
A mandatory field that assigns a unique identifier to the account, distinguishing it from other user accounts. It accepts lowercase characters, underscores (_), and numbers. The ID must not exceed 64 characters.Name
A mandatory field for the human-readable name of the account. It will be displayed at the top left during account editing. Enter any text with mixed characters (string). The option to name an account as default is disabled to prevent confusion between a Default account and one named default.Currency label
A mandatory field specifying the currency acronym of the account, such as EUR or USD. It accepts any string uniquely identifying a specific currency. ISP 4219 codes are recommended.Type
The account type can be either Standard or Status Points, serving informative and administrative purposes only in the Management UI.Standard: Refers to accounts with standard points earned through various customer actions rewarded with points in the loyalty program (e.g., shopping, completing challenges, writing reviews).
Status Points: Refers to accounts with status points earned by progressing in the Tier system (through checkouts in spend-based tiers or earning points in points-based tiers).
Negative points
Tick the checkbox to allow customers to have a negative point balance. This applies only if their points are reduced via a Point spend or Point sub event, or if points are revoked through a Refund item event. Other actions that deduct points, such as reward claims, will not be allowed if the customer does not have a sufficient point balance.Initialized upon opt-in
If enabled, the account object is automatically assigned to customers upon their registration in the loyalty program.Access level
This option enables additional permissions for functions and visibility. Leaving it blank makes the account visible to any platform user.
Click the Create button to save your settings. The account will be saved with an inactive status.
Earn rules
If the Incentivized purchase module is enabled in your workspace, you’ll see the Earn rules tab, which uses the configuration interface of the Incentivized purchase module.
Burn rules
Navigate to the Burns rules tab to access the configuration page of the Burn rules module, provided it’s enabled in your loyalty program.
Pending points
Configuring pending points introduces an additional verification step between the submission of a checkout event and the subsequent point allocation. A Pending points tab inherits the configuration interface of the Checkout accept module, allowing you to establish a specific Checkout accept mechanism for all the accounts added in the Multi-accounts module.
Expiration
If your loyalty program includes point expiration, the configuration of the Expiring points module is integrated into the Expiration tab of the account editors. This enables you to set up specific point expiration mechanisms for each of your accounts. Please note that the expiration date for refunded points configuration option can be set under Multi-account settings, it is not available on a per-account level.
Activate an account
As mentioned earlier, after creating the account, it will be saved as inactive after creating it, indicating that it won’t be accessible to customers and will only be visible in the list of accounts on the Multi-accounts module configuration page.
You can activate the account by clicking Set active on the upper right-hand side of the reward setup page and confirming the activation in the subsequent dialog.
If you prefer not to activate the account immediately after saving, you can always find the activation button on the account editor page.
Managing accounts
Search for a specific account
When dealing with numerous pages of accounts, rather than scrolling through each one, you can use the Type to search… field at the upper left corner to search for a specific account(s).
Entering a string of text characters in the Type to search… field enables searching based on the unique ID or the account name values.
If needed, click the Accounts label at the top left corner to remove the search filter and display all accounts again.
Edit an existing account
Navigate to the Multi-accounts page
Click the Edit button of the account that you want to edit
Make the necessary edits to the account
Save your changes by clicking Update
Deactivate an account
If you want to stop using an account, you can deactivate it anytime:
Navigate to the Multi-accounts page
Click the Edit button of the account that you want to deactivate
Click the Set inactive button on the upper right-hand side of the page
Confirm your choice in the dialog that appears
Archive an account
You can delete an inactive account from the Management UI by archiving it.
Go to the Multi-accounts page
Click the inactive account you want to archive
Click on the Archive button on the upper right-hand side of the page
Confirm your choice in the dialog that appears
Archiving is irreversible. Once an account is archived, it cannot be restored anymore.
Settings
Default account
The Settings tab provides a Default account selector dropdown field, which is a mandatory setting.
To set the default account:
Select the desired account from the dropdown list.
The account you create first will automatically be set as the default account until you intentionally select another and click the Update button on the Settings page.
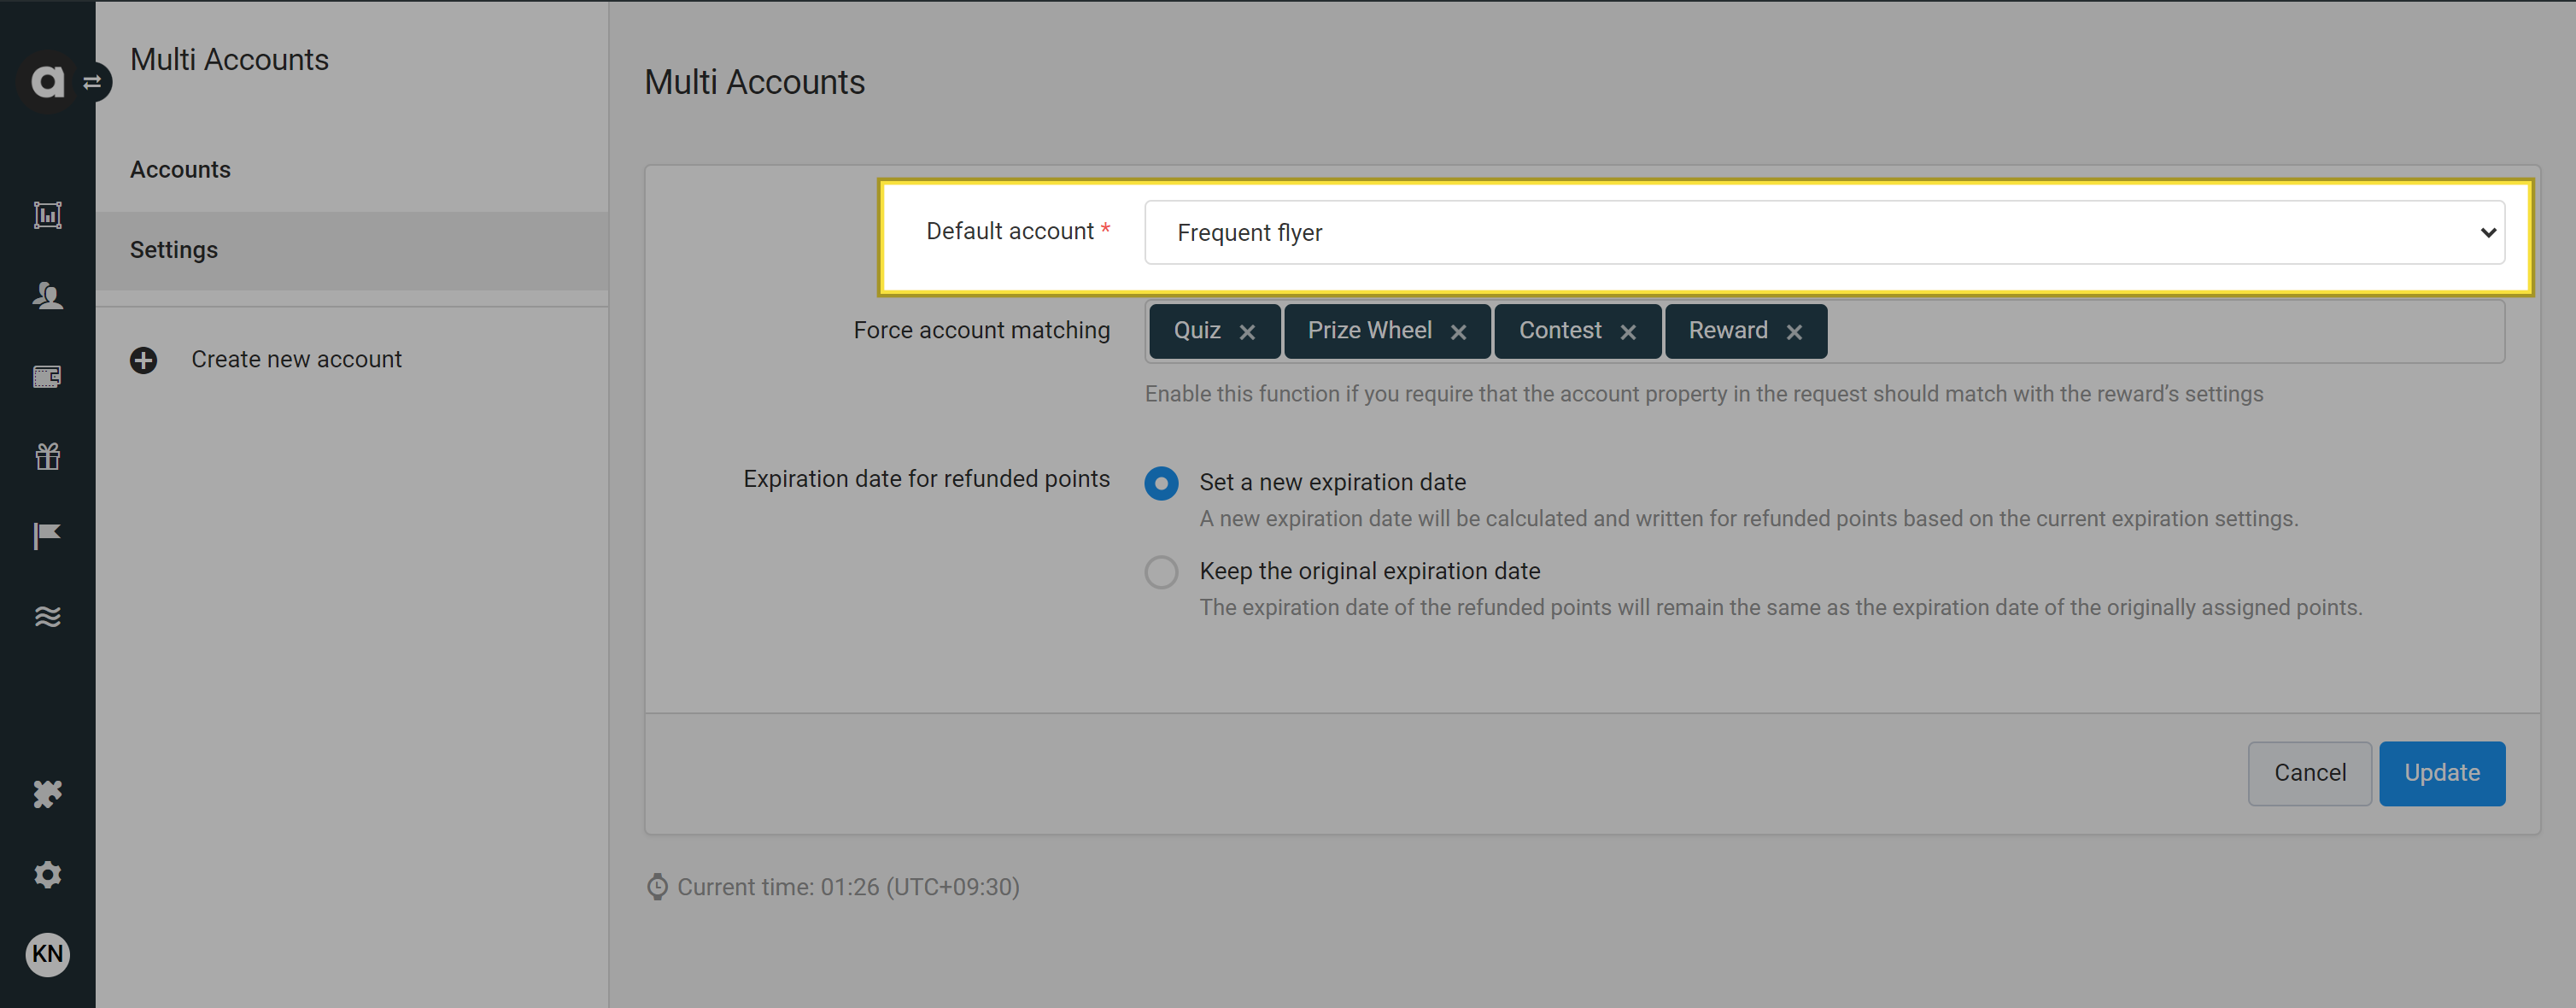
If the default account hasn't been configured, a warning message will remind you at the top of the Management UI interface. Clicking the Resolve button will open the Settings page of the Multi-accounts module, where you can select the default account.
Once you’ve set a default account, it will be automatically selected on all Management UI configuration interfaces that involve an account selector if no other account has been previously selected on the dedicated configuration page.
Points will be credited to the selected default account if the account value is empty in the API request, except for events connected to preceding events. These events inherit the account value of the previous event:
Precending event | Events inheriting the account value |
|---|---|
Reserve | Checkout |
Checkout | Refund, Refund item, Partial refund, Checkout update, Checkout accept, Checkout reject, Checkout claim |
Reward | Reward revoke, Reward unbid |
Campaign bonus | Campaign bonus revoke |
Point spend | Point un-spend |
Reserve | Release |
Any event selected in the Action field of the Pending events module | Pending |
If the account value is sent with any of these events but is different from the account of the original event, the API will respond with an error.
Force account matching
When adding a point-burning entity such as reward, prize wheel, or contest, the event related to the entity (e.g., Reward claim, Wheel spin, Promotion enter) must have the same account value as the entity account setting. If the account is different, the request will fail due to an account mismatch. The dropdown field lists the point-burning entities available in your loyalty program if the relevant module is enabled (Rewards, Prize wheels, Contest lite, and Quizzes).
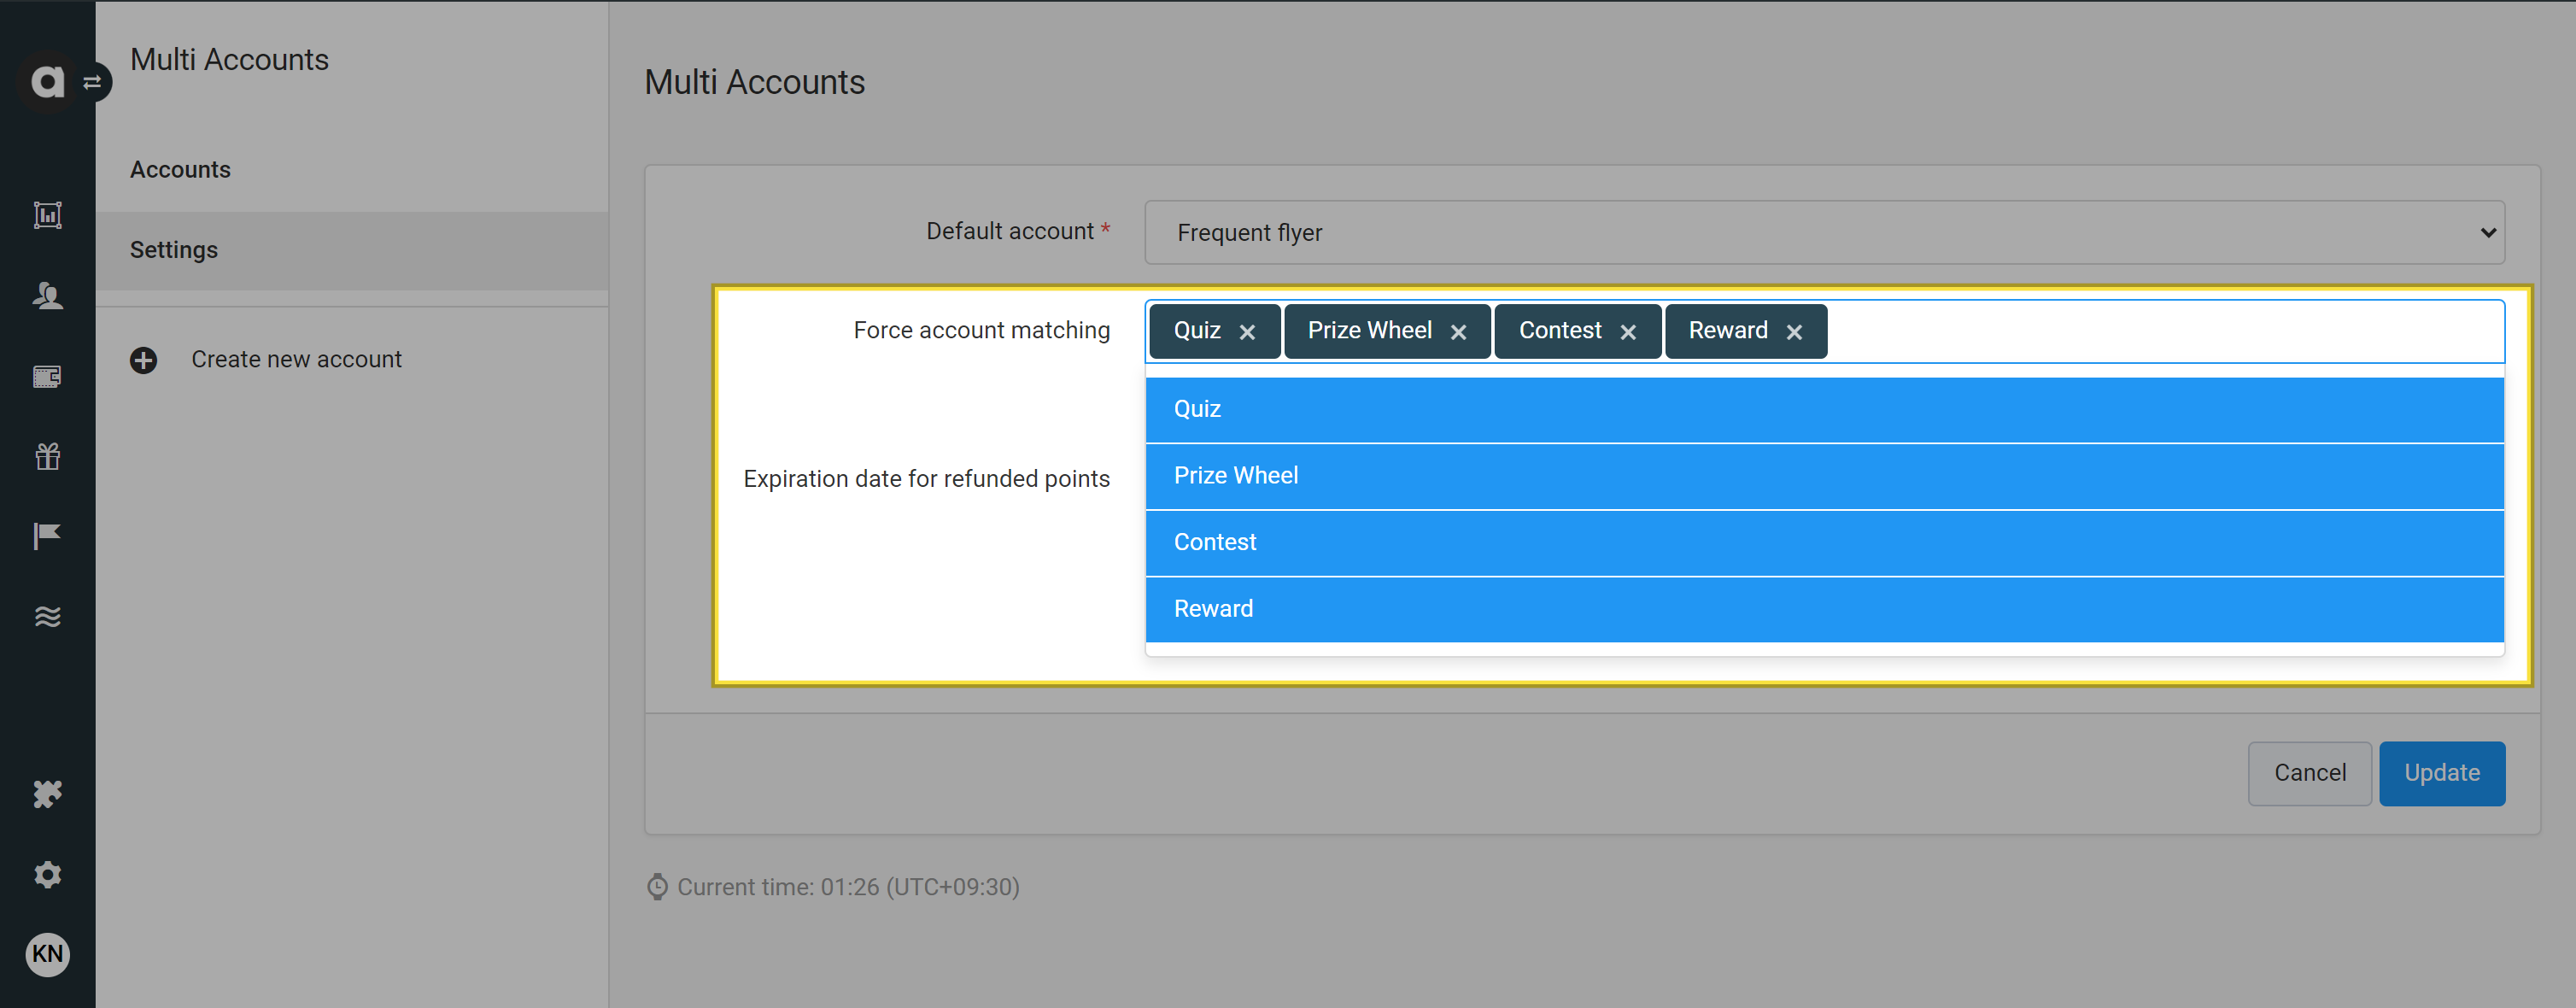
To save your settings changes, please ensure you click the Update button before leaving the page.
Keep the Checkout module settings
If you use the Checkout accept module, you can find the Keep the Checkout module settings checkbox. Enabling this option enforces the settings configured under the Checkout accept module. If this option is enabled, the account-specific configurations under the Pending points tab will be overridden by the settings of the Checkout accept module.

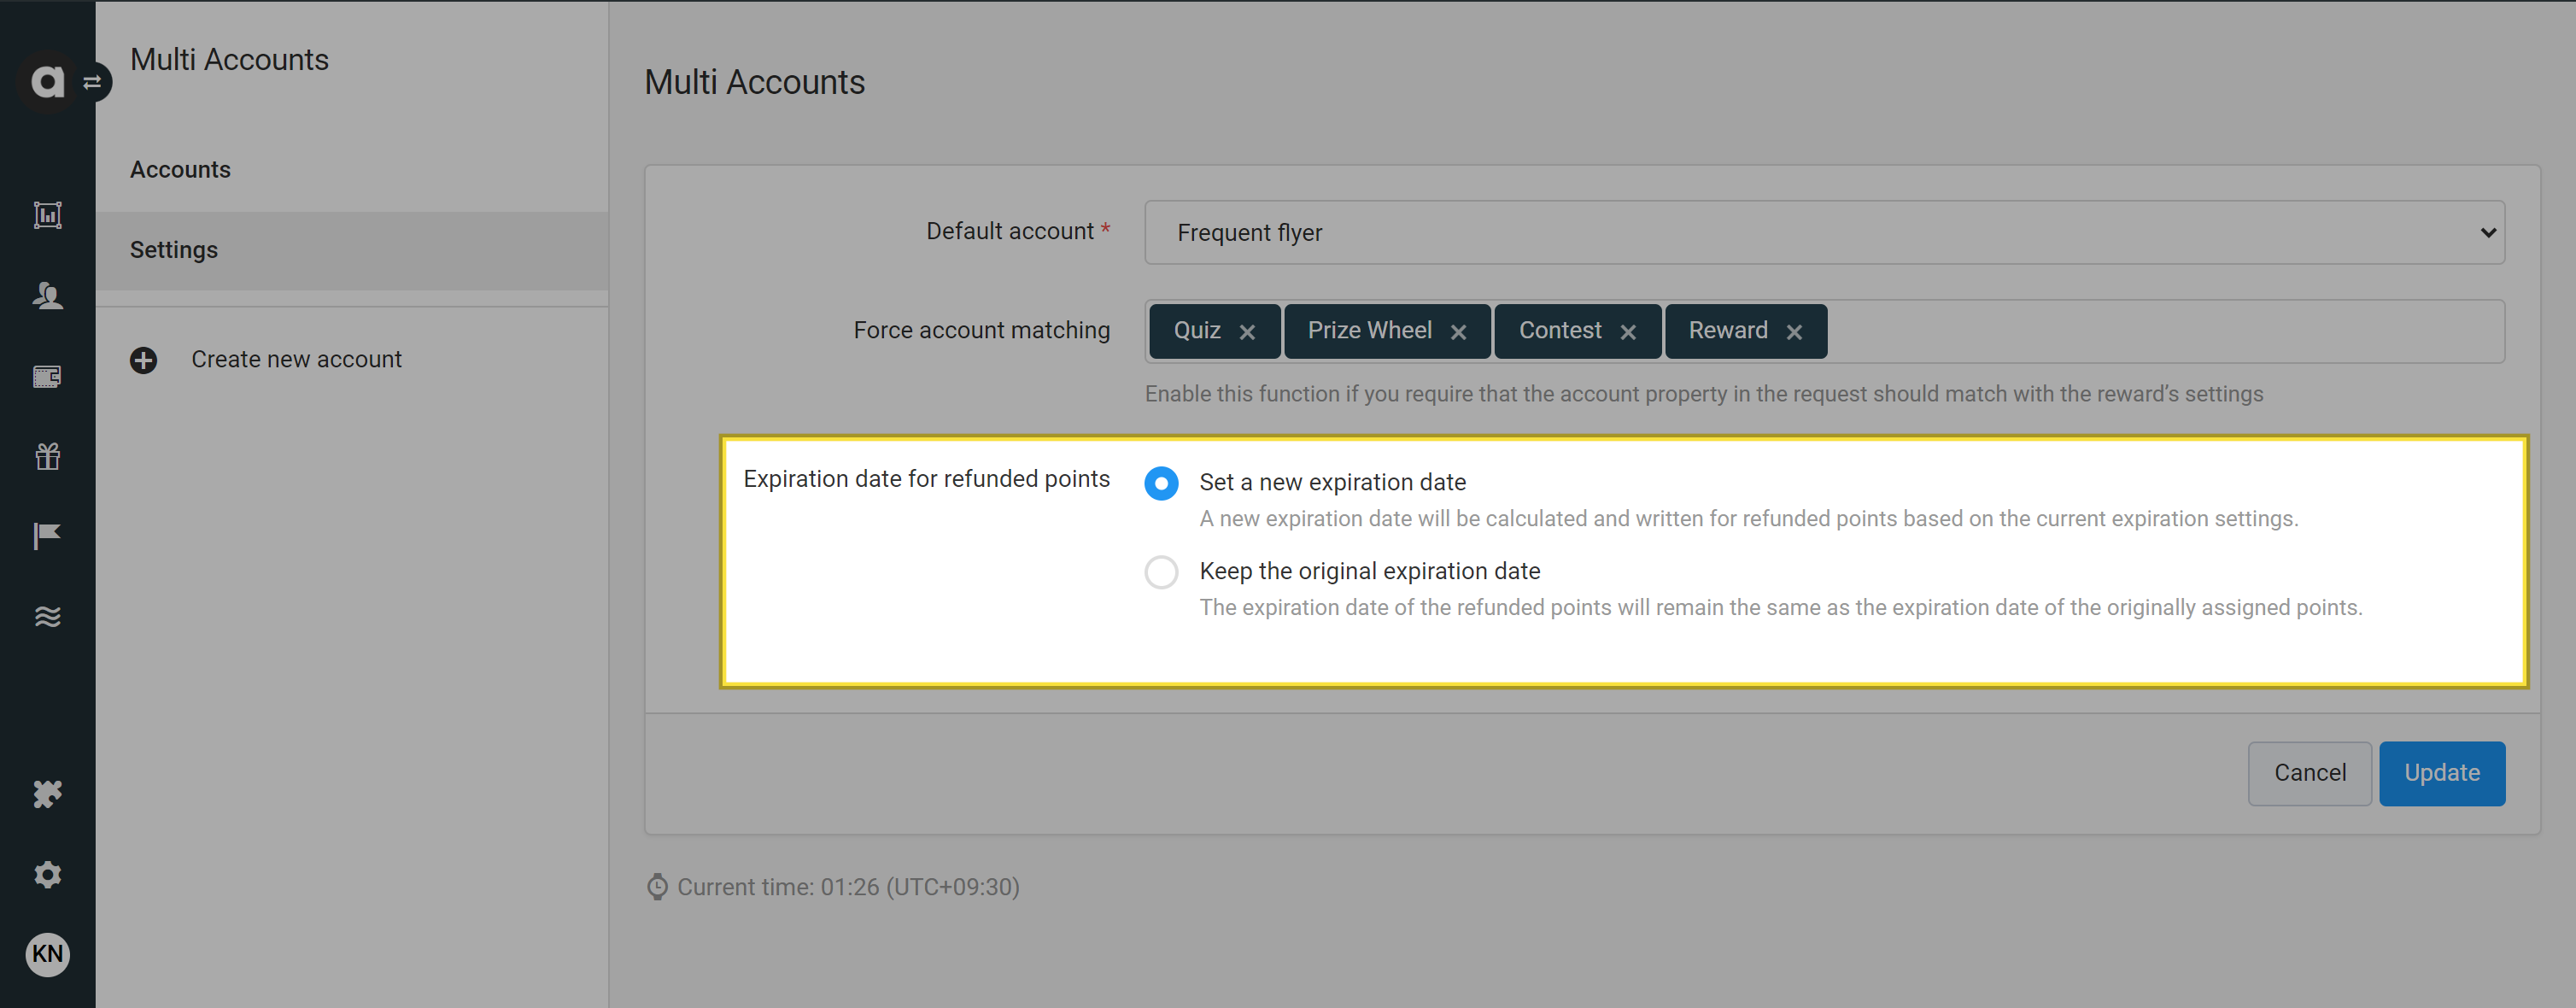
Expiration date for refunded points
This option is available if you use the Expiring points module. Please learn more about the configurable options in the Expiring points user manual.
If the Keep the original expiration date expiration option is selected under the Expiring points configuration page and a purchase is refunded, the expiration date of refunded points will remain the same as the expiration date of the originally assigned points. However, if the originally assigned points don't have an expiration date, a new expiration date will be calculated based on the current expiration settings.
Account selector fields on Management UI interfaces
If the Multi-accounts module is enabled in your loyalty program, you will encounter a mandatory Account configuration field on entity configuration pages of modules compatible with Multi-accounts. The selected account is where all the events related to the specific entity should be registered. By default, the default account is selected.
Currently, the Account field is available on the configuration interfaces of the following modules:
Quizzes – Quiz
Gamified profiling – Flows
Prize wheels – Prize wheel
Rewards – Reward
Challenges – Challenge
Contest lite – Contest
Tiers – Tier structure
Tiered campaigns – Campaign
Custom events - Corresponding event
Friend referral -
referral_pointseventGamified reviews -
review_submiteventOffline treasure hunt - Treasure hunt
Online treasure hunt - Treasure hunt
Social follow -
social_followeventPending events -
pendingevent
