The Campaign Manager is a wizard-driven management layer over Antavo's Promotion Engine and Loyalty Engine. It provides a single place to create, configure, activate, and manage business campaigns without working directly in the underlying modules. Based on the campaign setup, the Campaign Manager creates and maintains the Antavo configuration required to run the campaign, while the corresponding engine executes it.
Currently, the Promotion campaign type is available. When a Promotion campaign is activated, the Campaign Manager creates the corresponding promotion. The Promotion Engine evaluates the promotion during cart requests, while its configuration and lifecycle remain managed in the Campaign Manager. The Promotion Engine must be enabled in the workspace to create promotion campaigns.
Configurations created directly in the underlying Antavo modules are not imported into the Campaign Manager and continue to be managed in their respective modules.
Creating a campaign
To create a campaign:
Navigate to the Modules menu and open Campaign Manager
Click + Create campaign
Complete the steps of the configuration wizard
Use Continue, Back, or the step list on the left to move through the wizard. Click Save as Draft to save an incomplete configuration without creating the underlying engine configuration. The saved campaign can be resumed from the campaign list.
Basic info
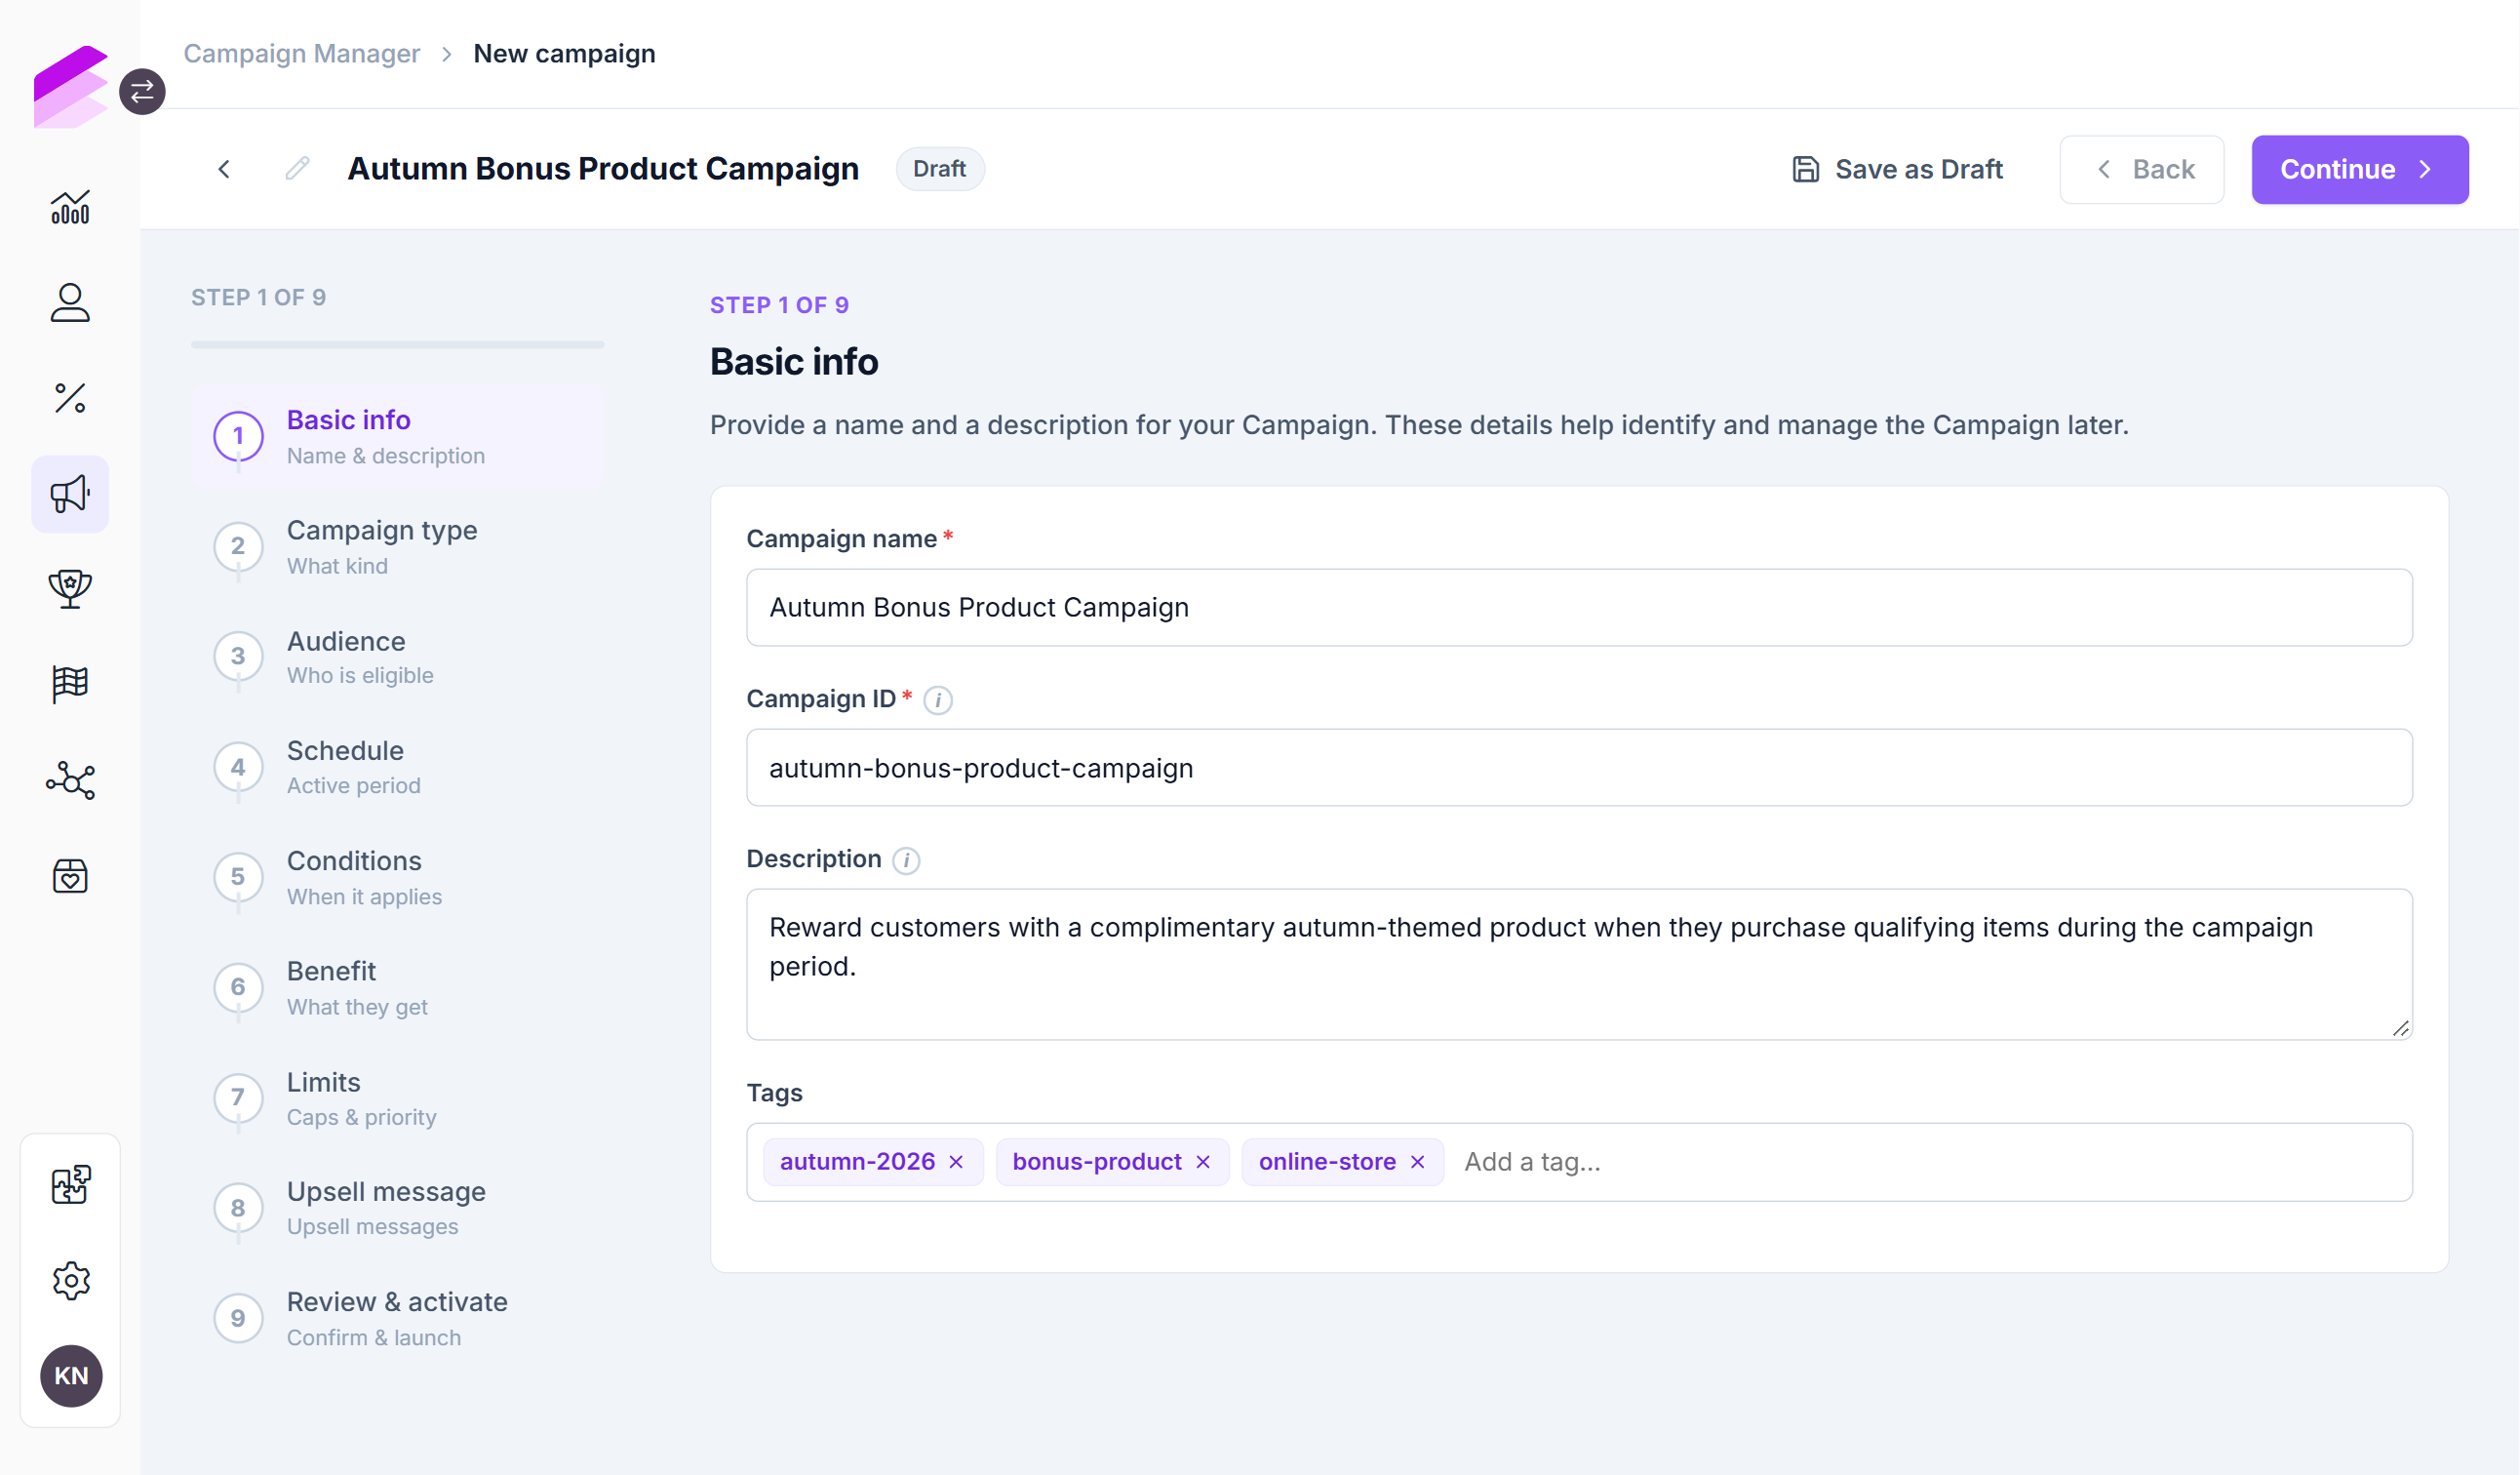
Enter the basic information used to identify the campaign:
Campaign name: Enter a descriptive name for the campaign.
Campaign ID: Review the identifier generated from the campaign name and update it if necessary before activation. The ID cannot be changed after activation.
Description: Add optional information about the purpose or setup of the campaign.
Tags: Add tags that can be used to identify and filter the campaign.
Campaign type
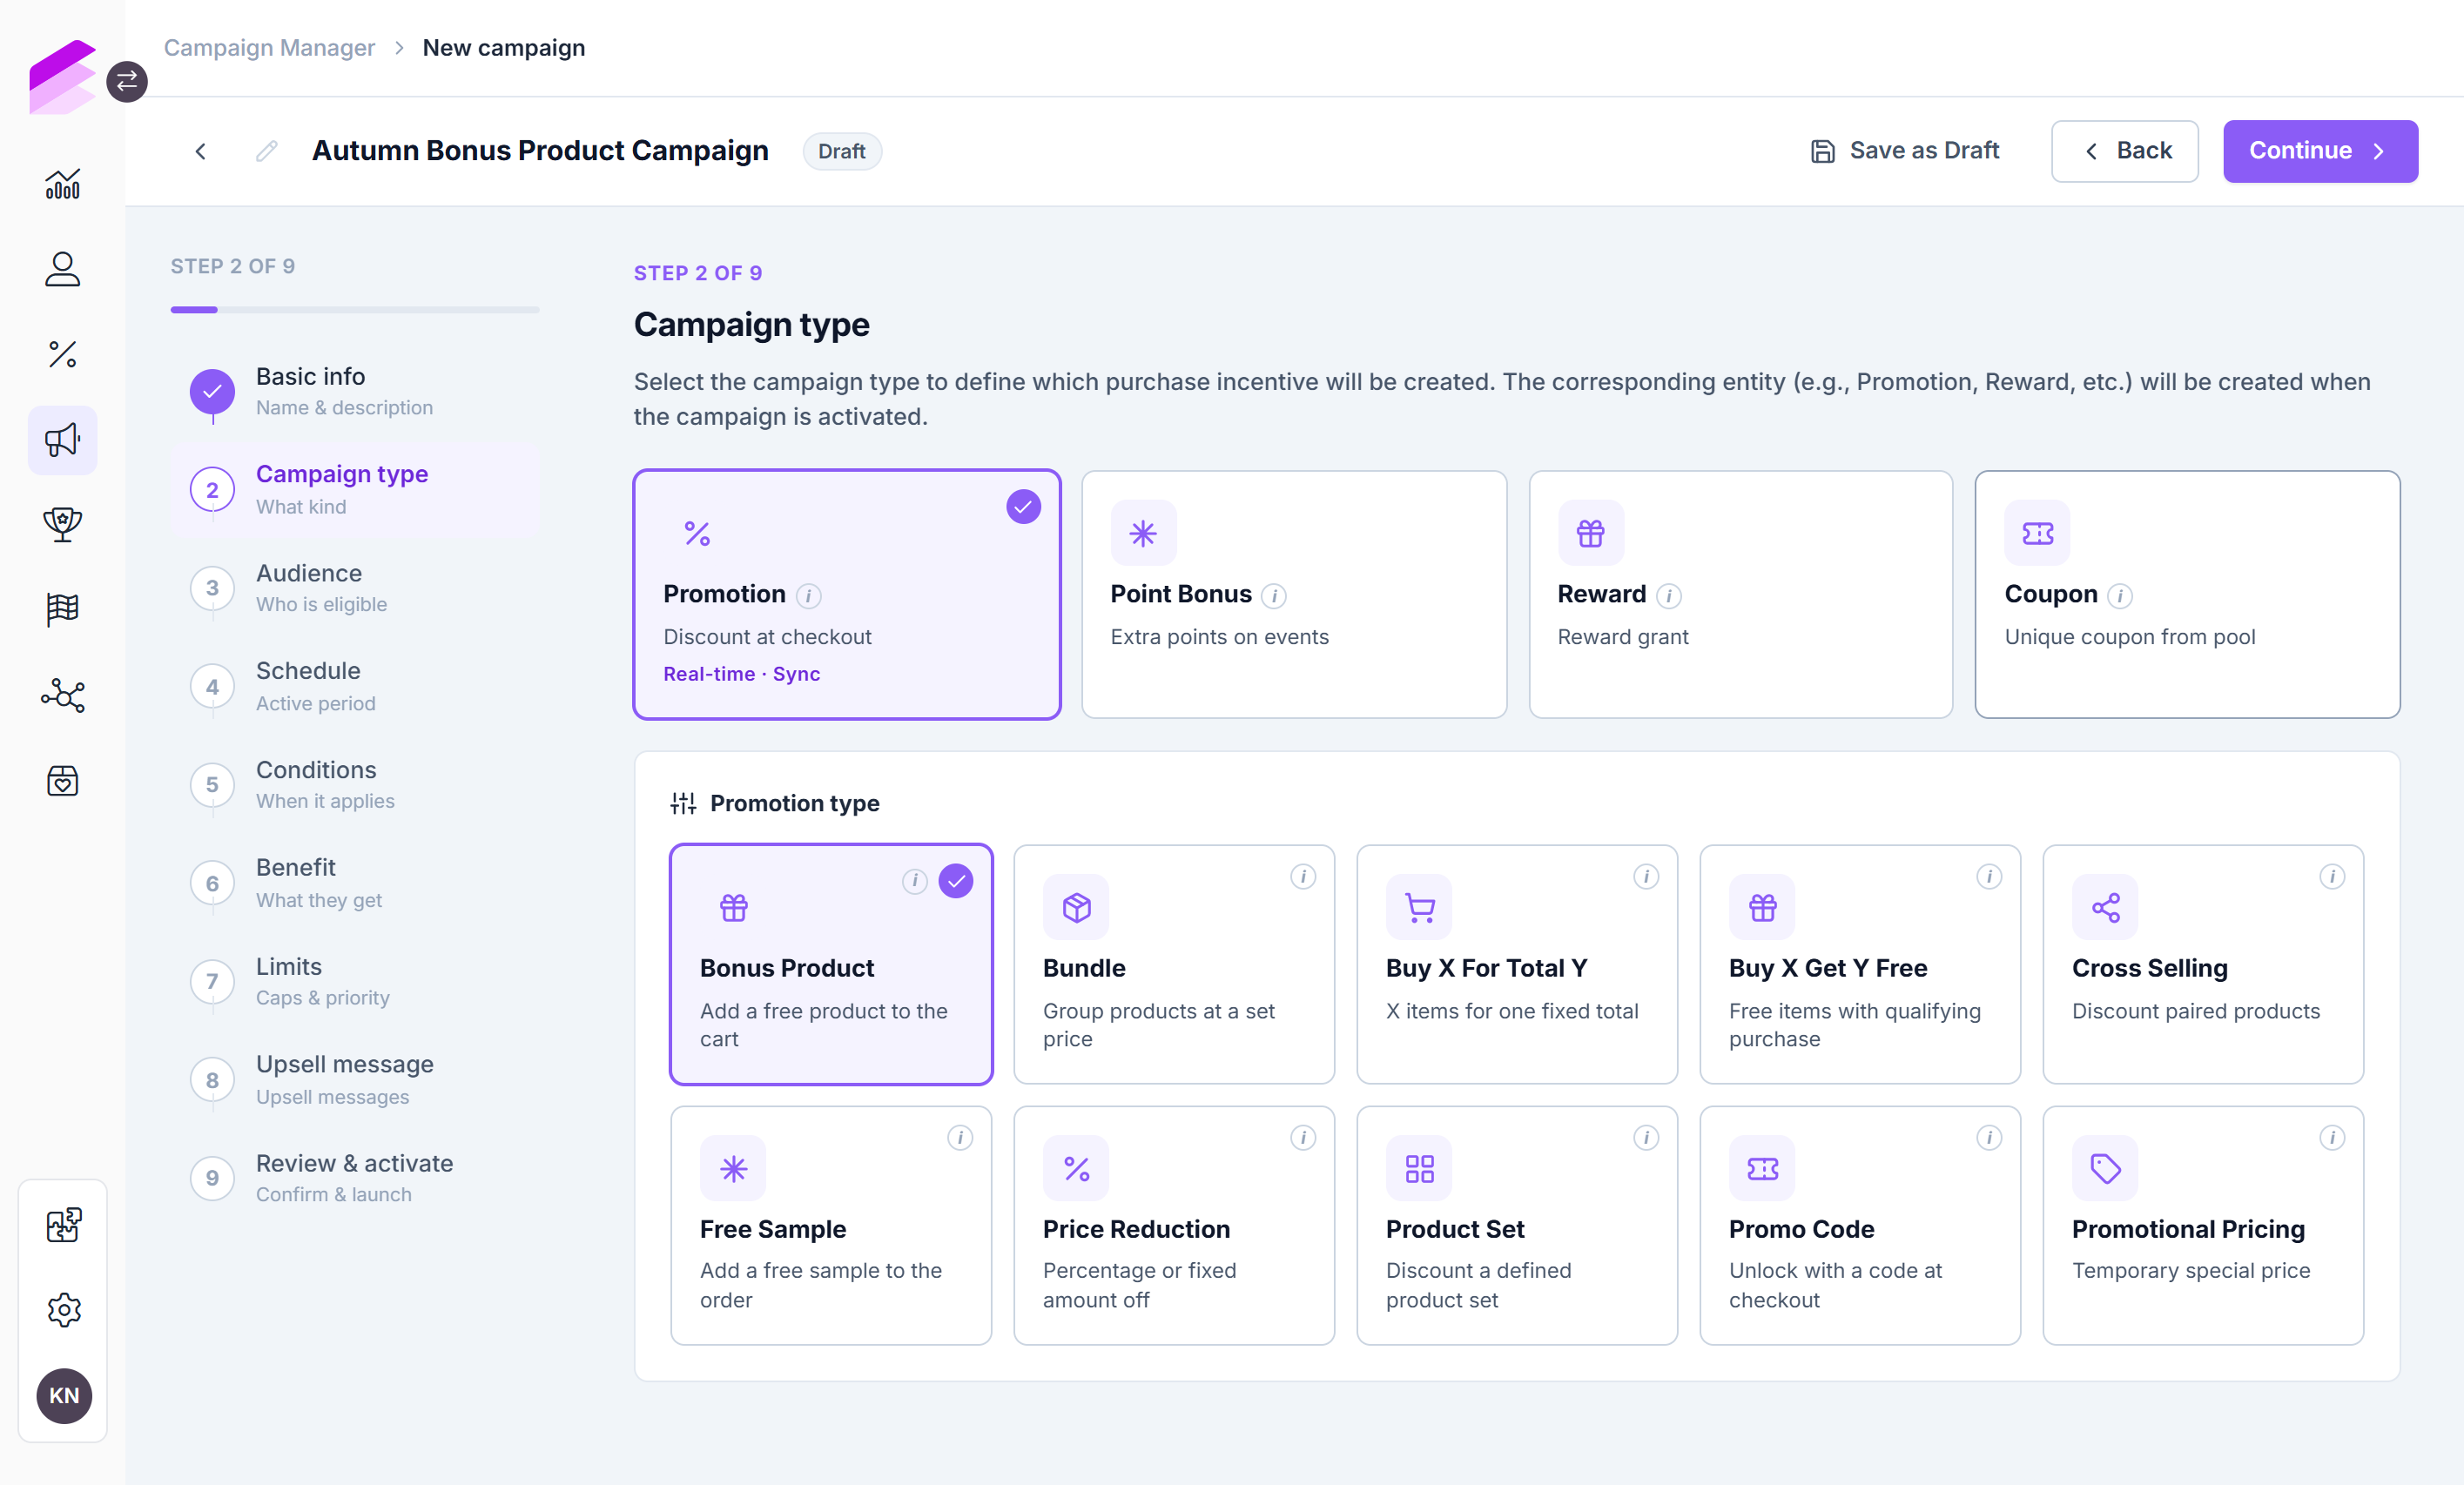
Select the mechanism that runs the campaign.
Currently, the Promotion campaign type is available. The Point bonus, Reward, and Coupon campaign types are not yet available.
The selected promotion type determines which settings are displayed in the Conditions and Benefit steps. For information about the behavior and type-specific settings of each option, see Configuring Promotions.
Audience
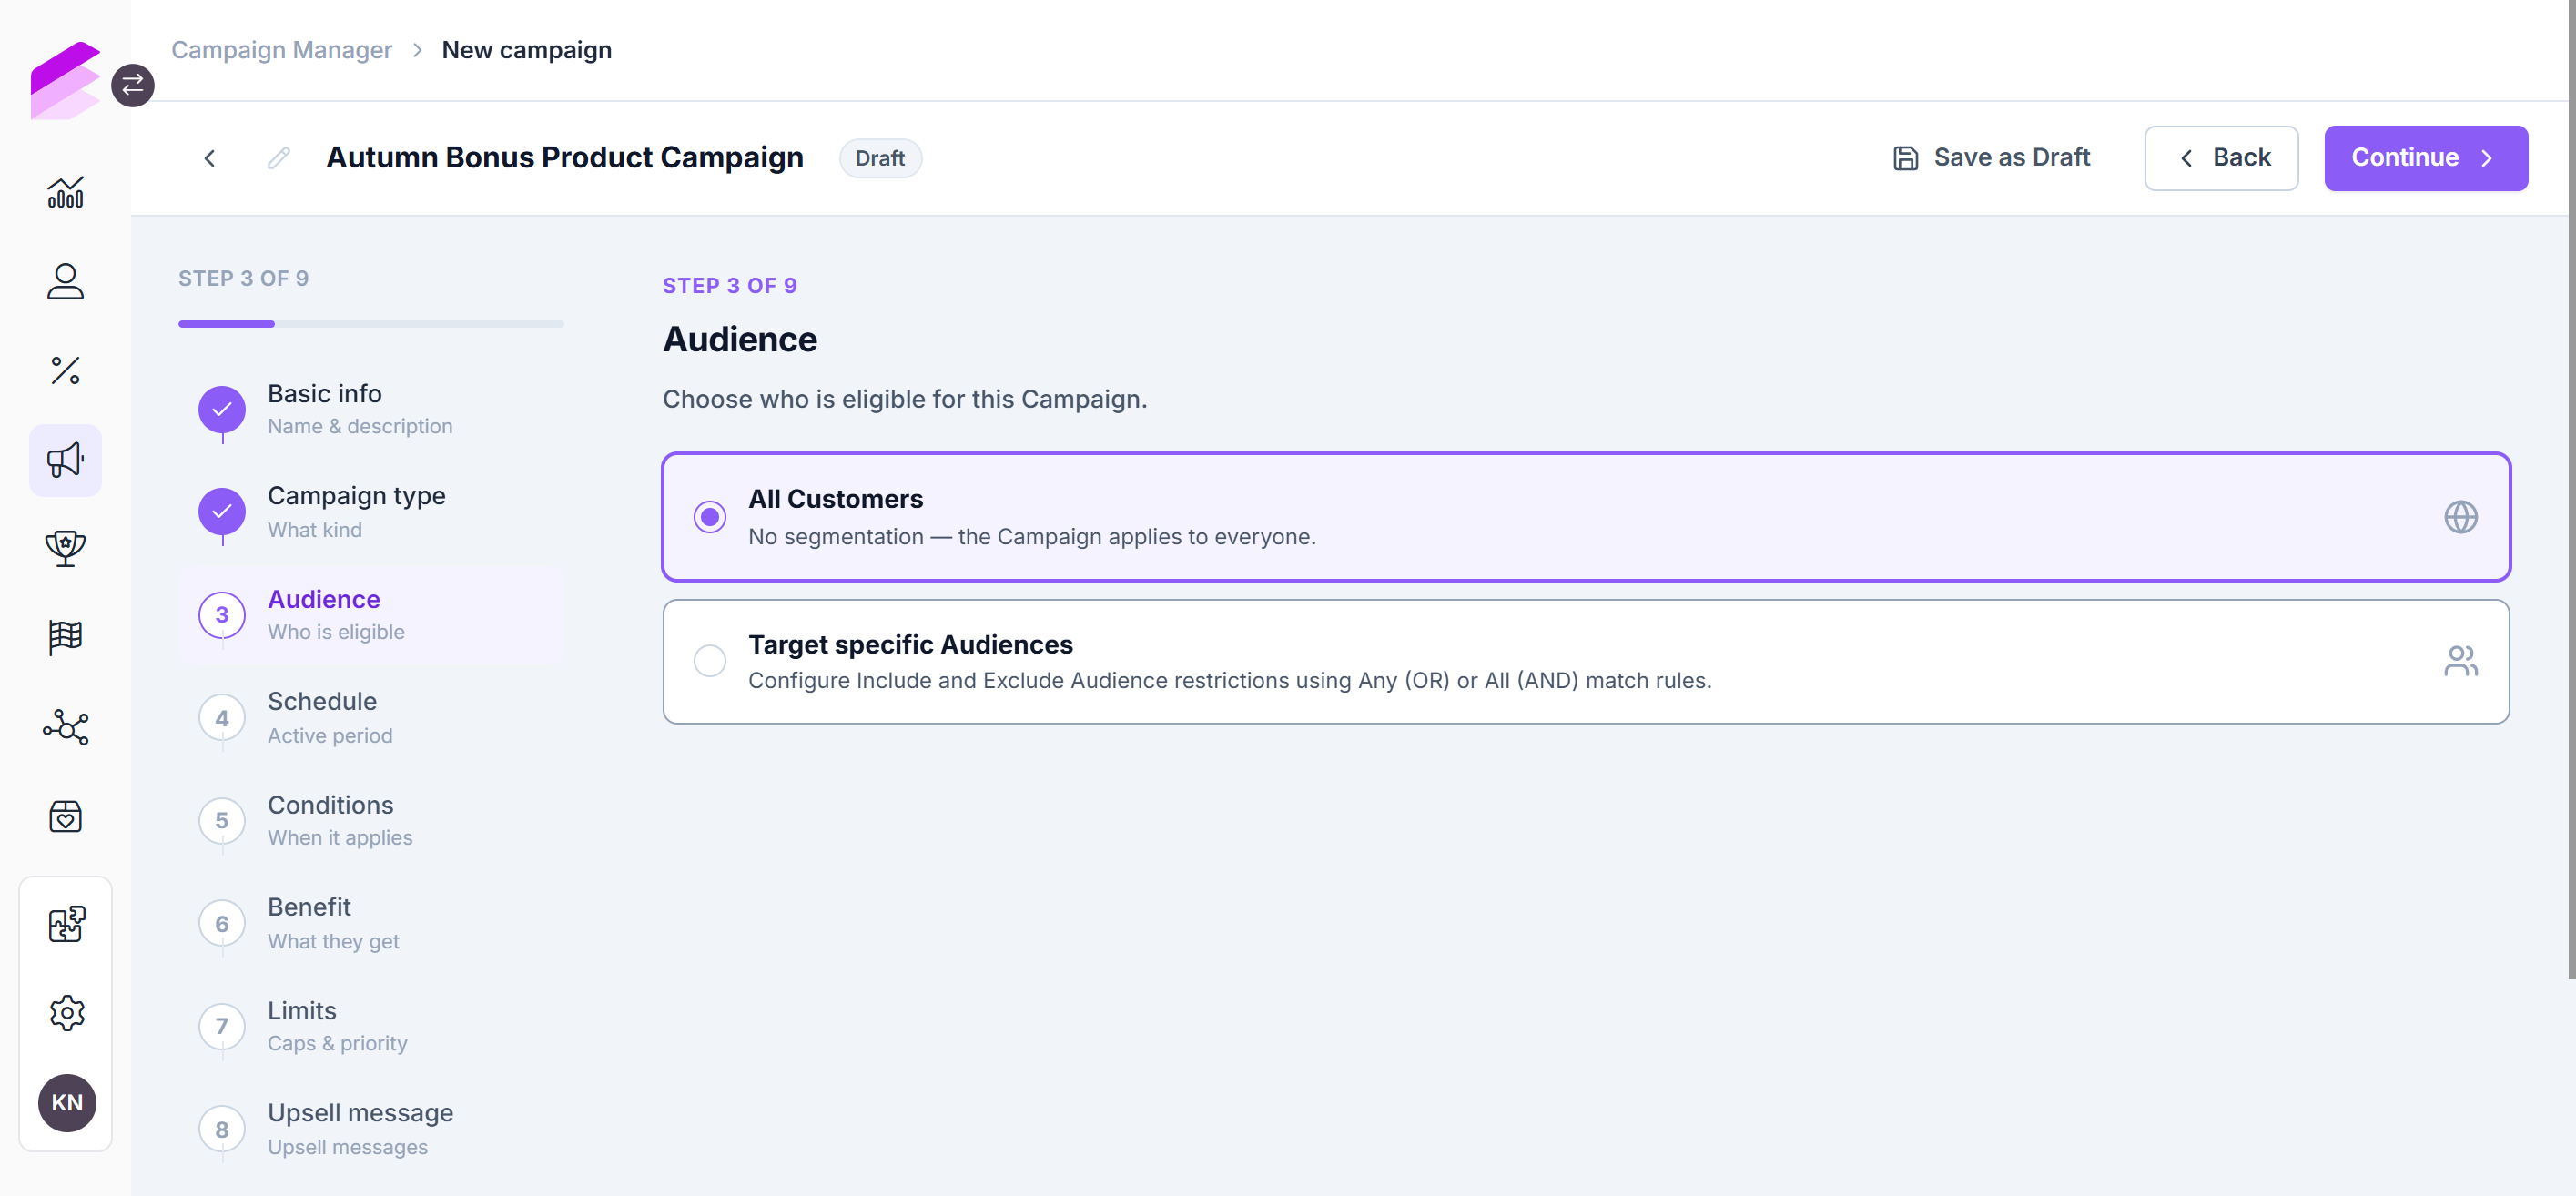
Currently, the All Customers option can be used for Promotion campaigns. The campaign can apply to any customer who meets the conditions configured in the following steps.
Targeting specific audiences is not yet available in the Campaign Manager.
Schedule
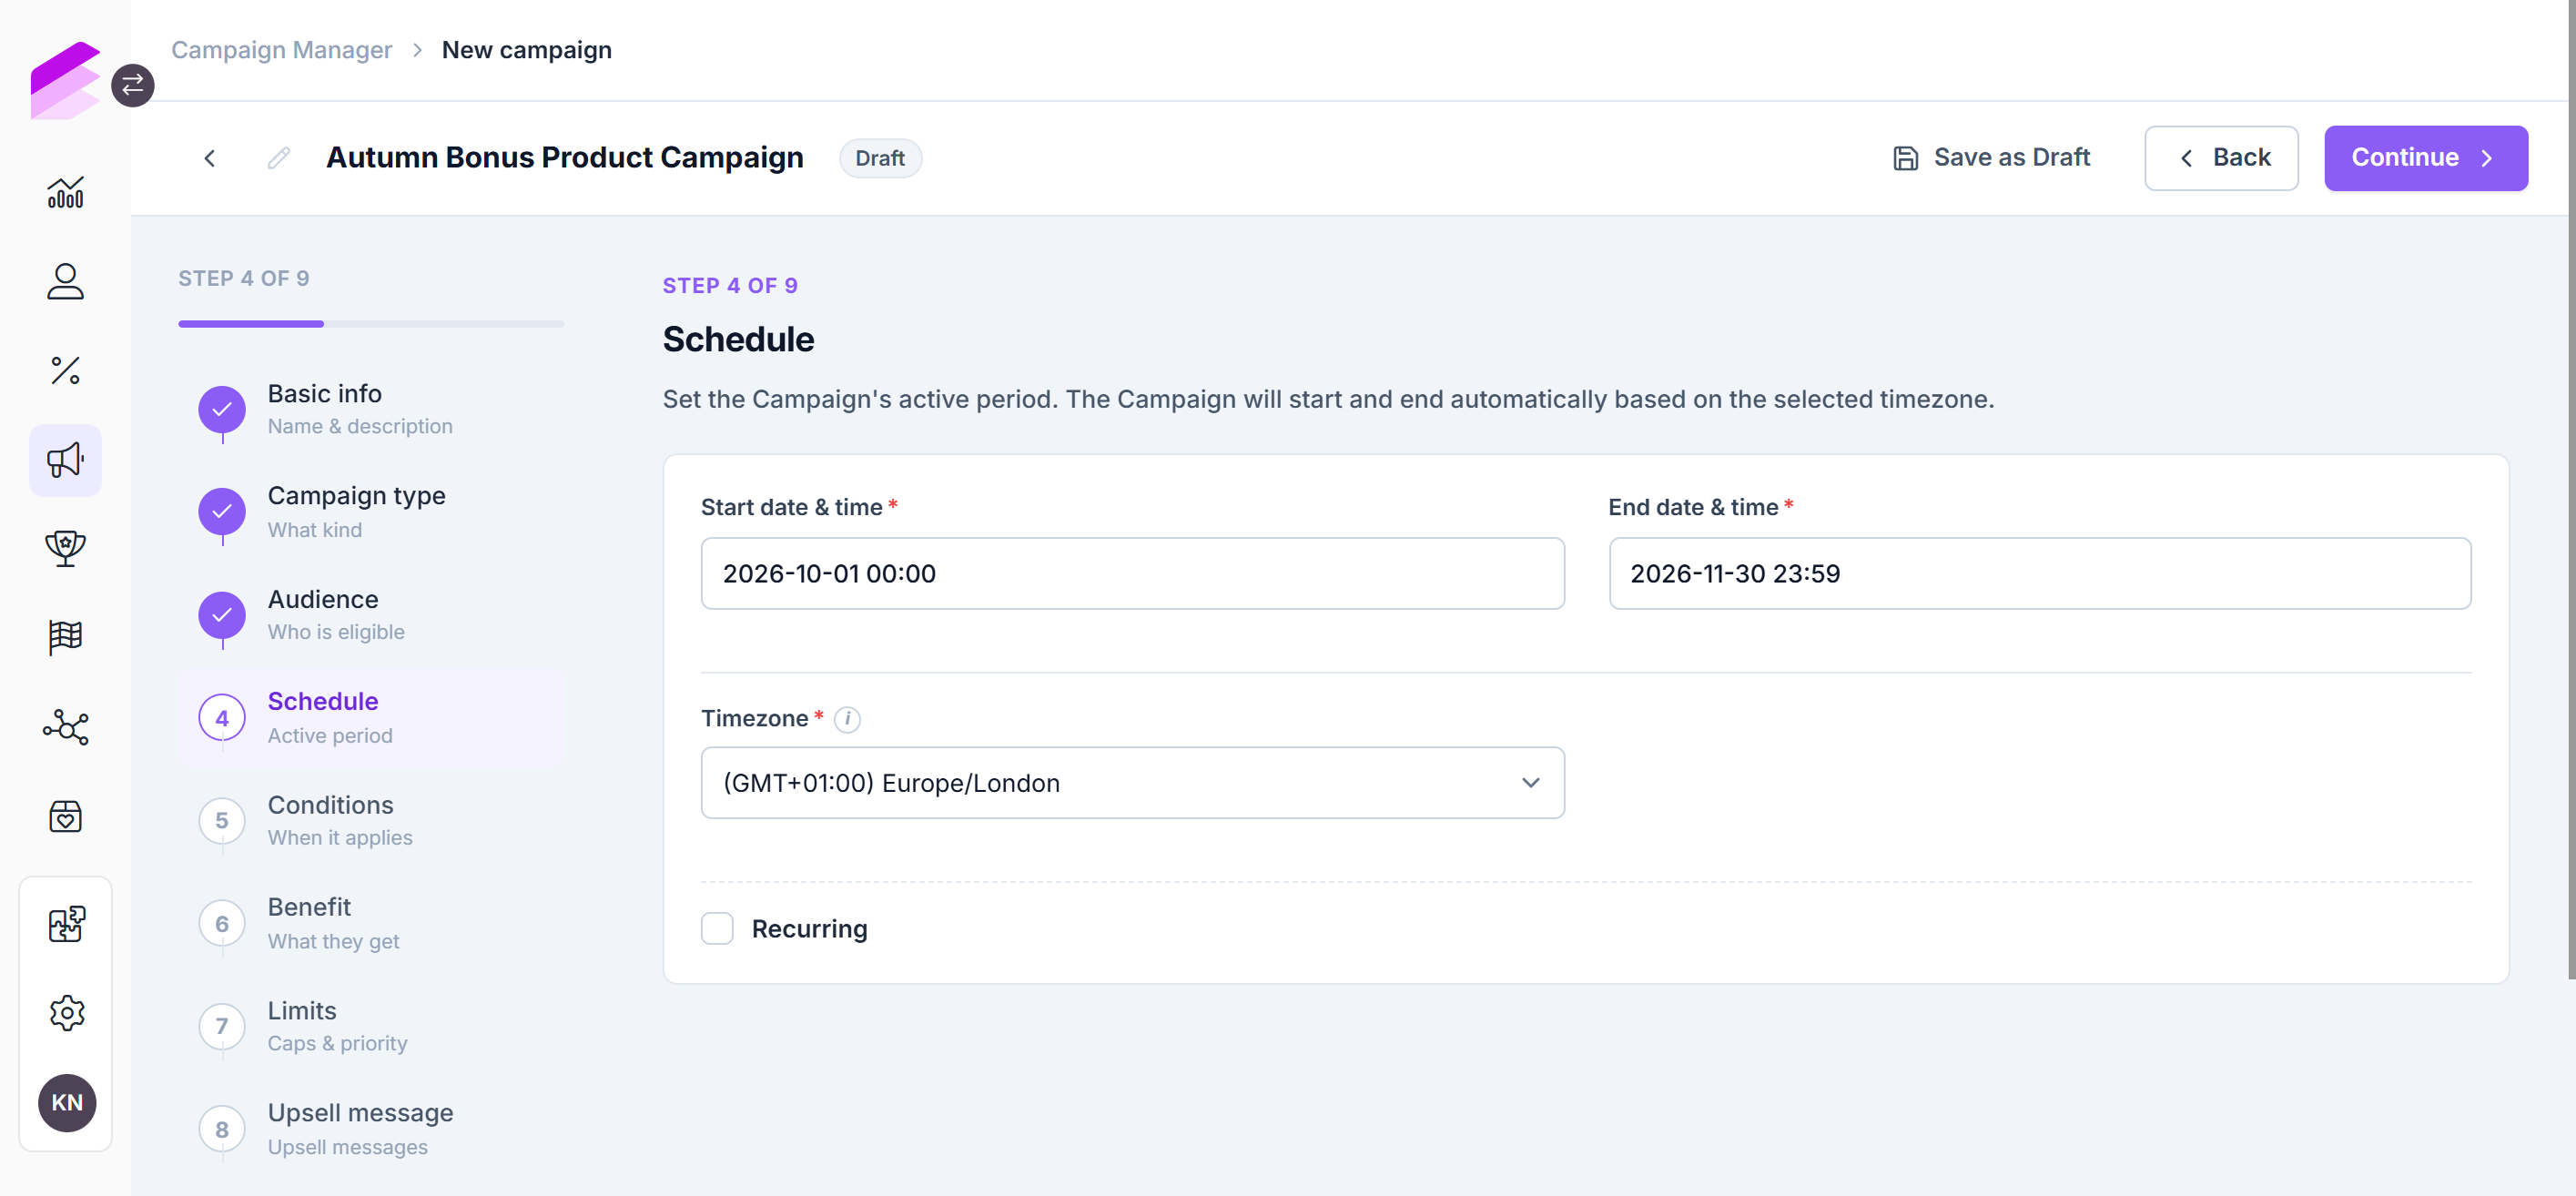
Define when the campaign can be applied. A schedule is required before a campaign can be activated.
Start date & time: Set the beginning of the campaign's active period.
End date & time: Set the end of the active period. It must be later than the start date and time.
Timezone: Select the timezone used to interpret the configured dates and times.
To repeat the campaign on a schedule, enable Recurring and configure the recurring frequency, interval, and end date of recurrence.
If the campaign is activated before its start date and time, its status is set to Scheduled. The underlying engine configuration is created during activation, but it is not evaluated until the scheduled start.
Conditions
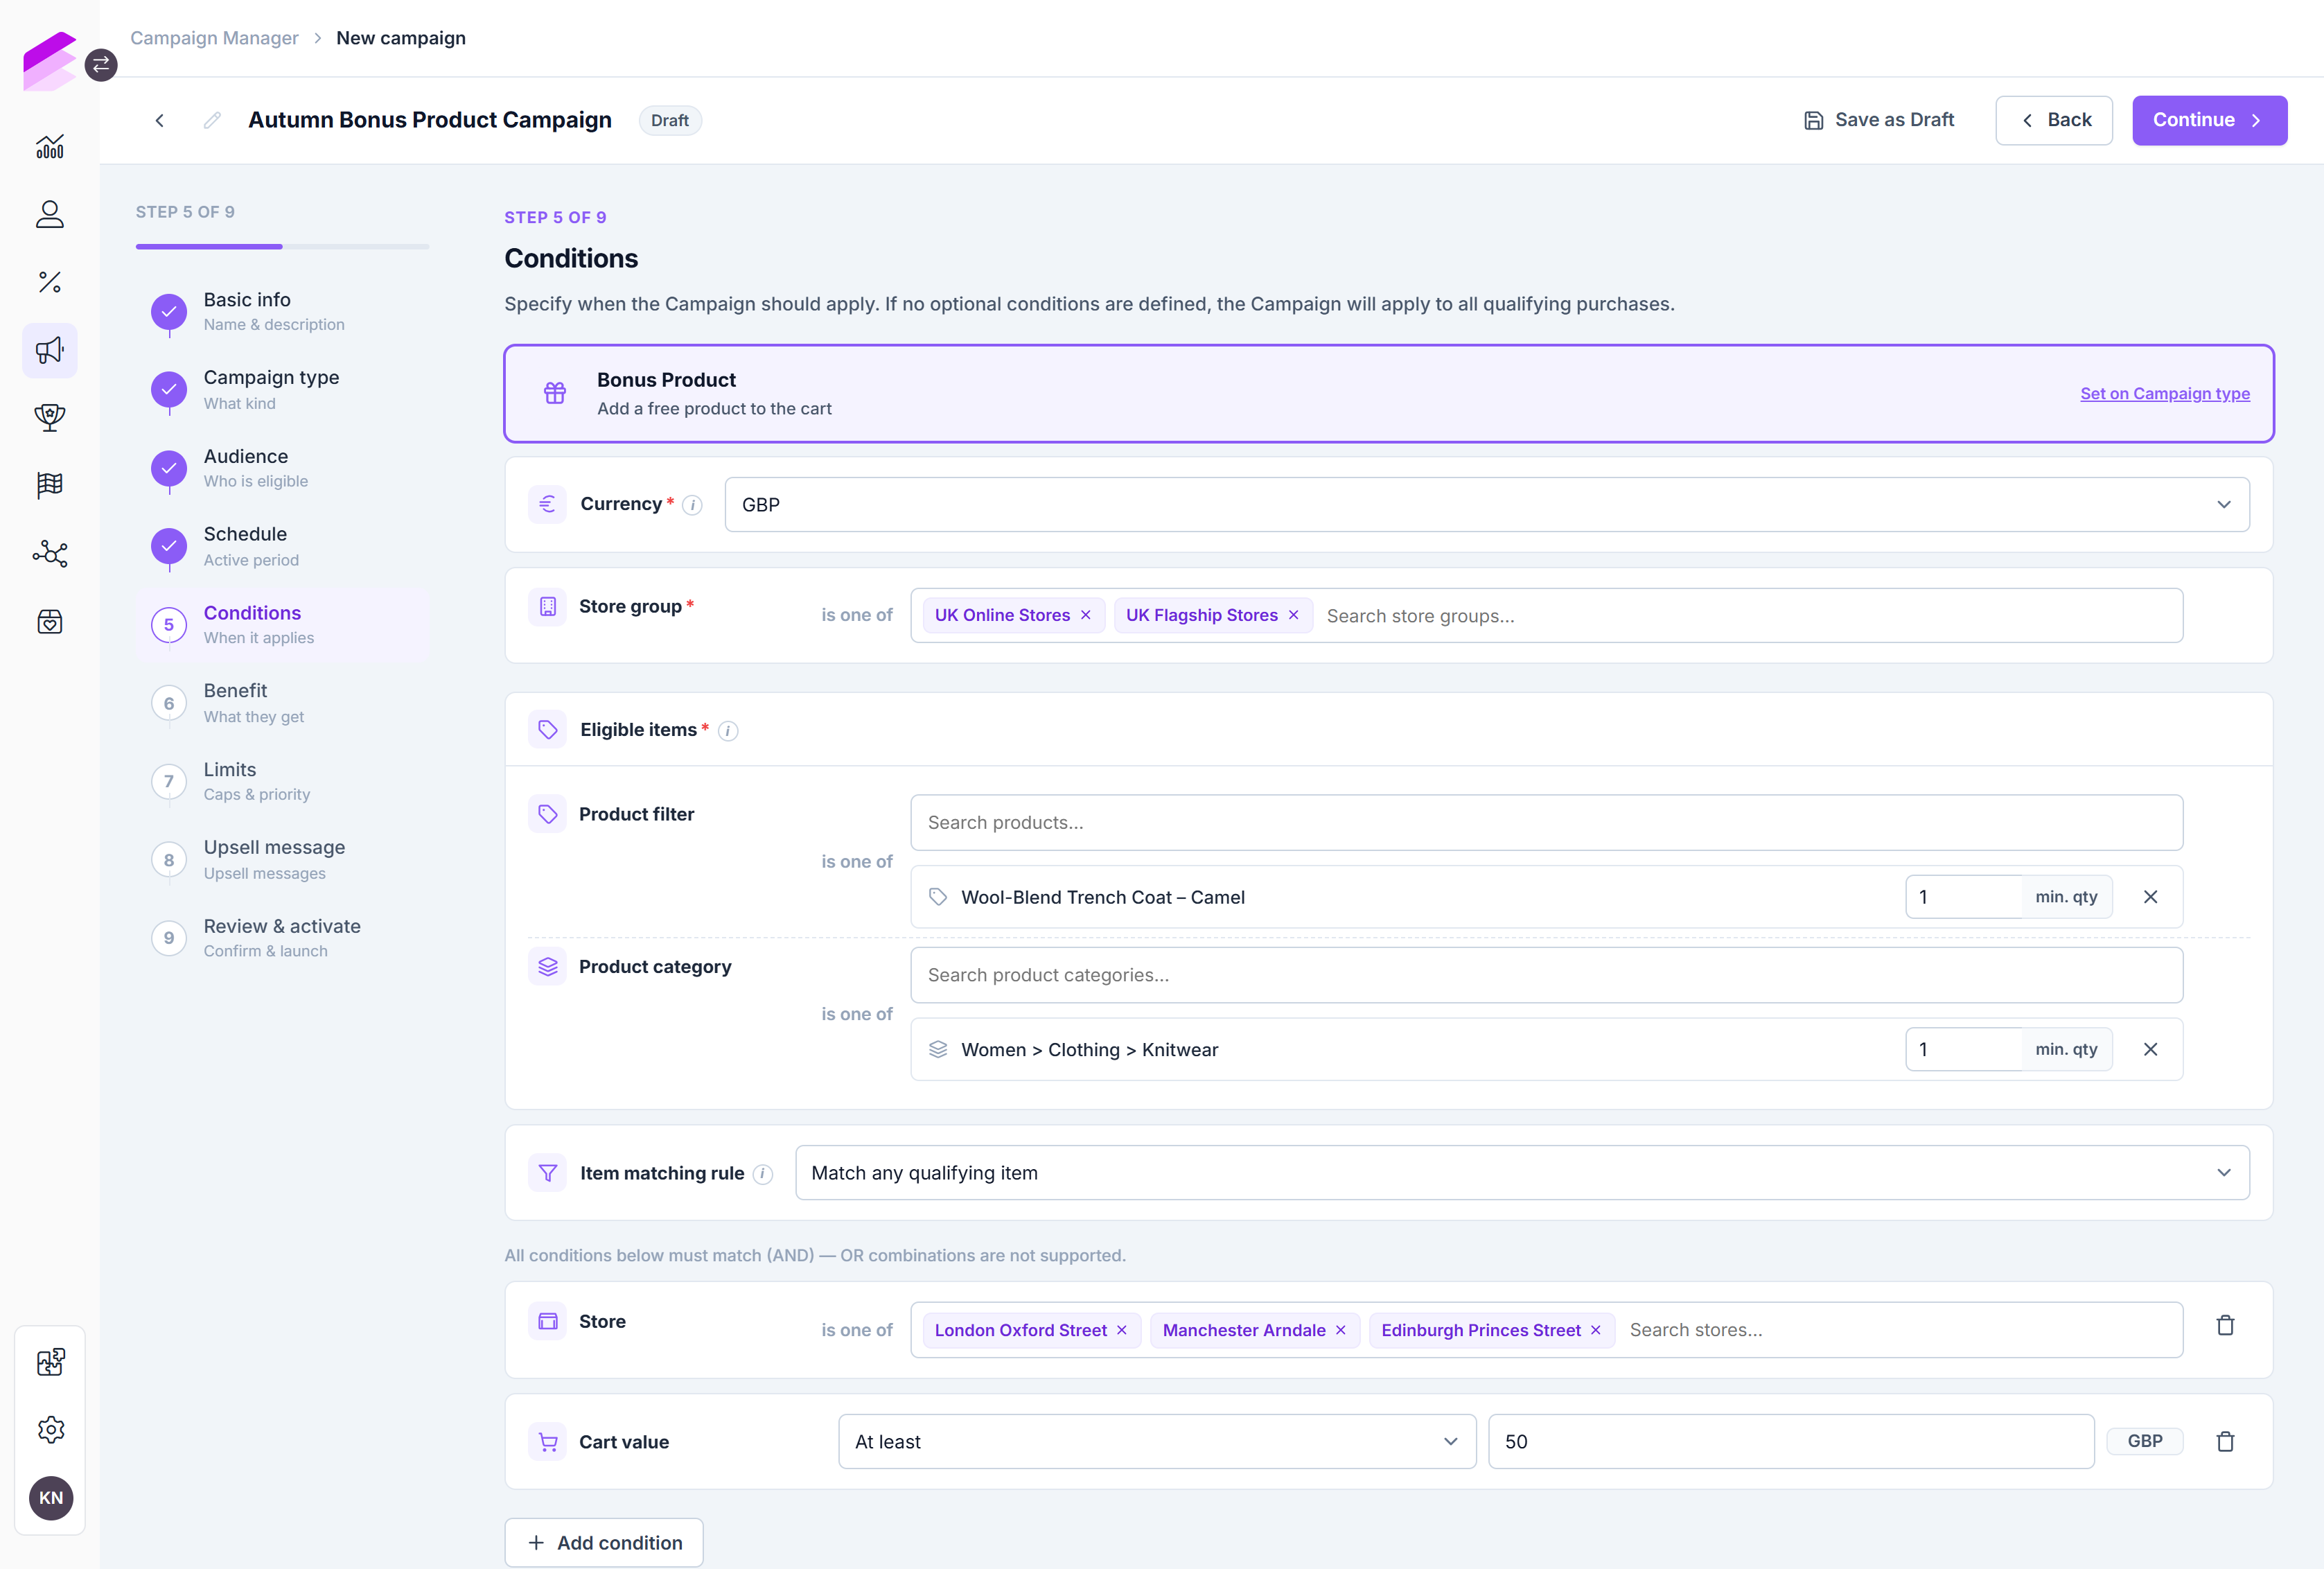
The Conditions step defines when the campaign should apply. The fields displayed depend on the type of campaign selected in the Campaign type step.
If Product Hub is enabled, products, product categories, stores, and store groups are retrieved from Product Hub. If the Product catalog and Stores modules are enabled instead, products and product categories are retrieved from Product catalog, while stores and store groups are retrieved from Stores.
For information about the available eligibility and condition settings of promotion campaigns, see Configuring Promotions.
Benefit
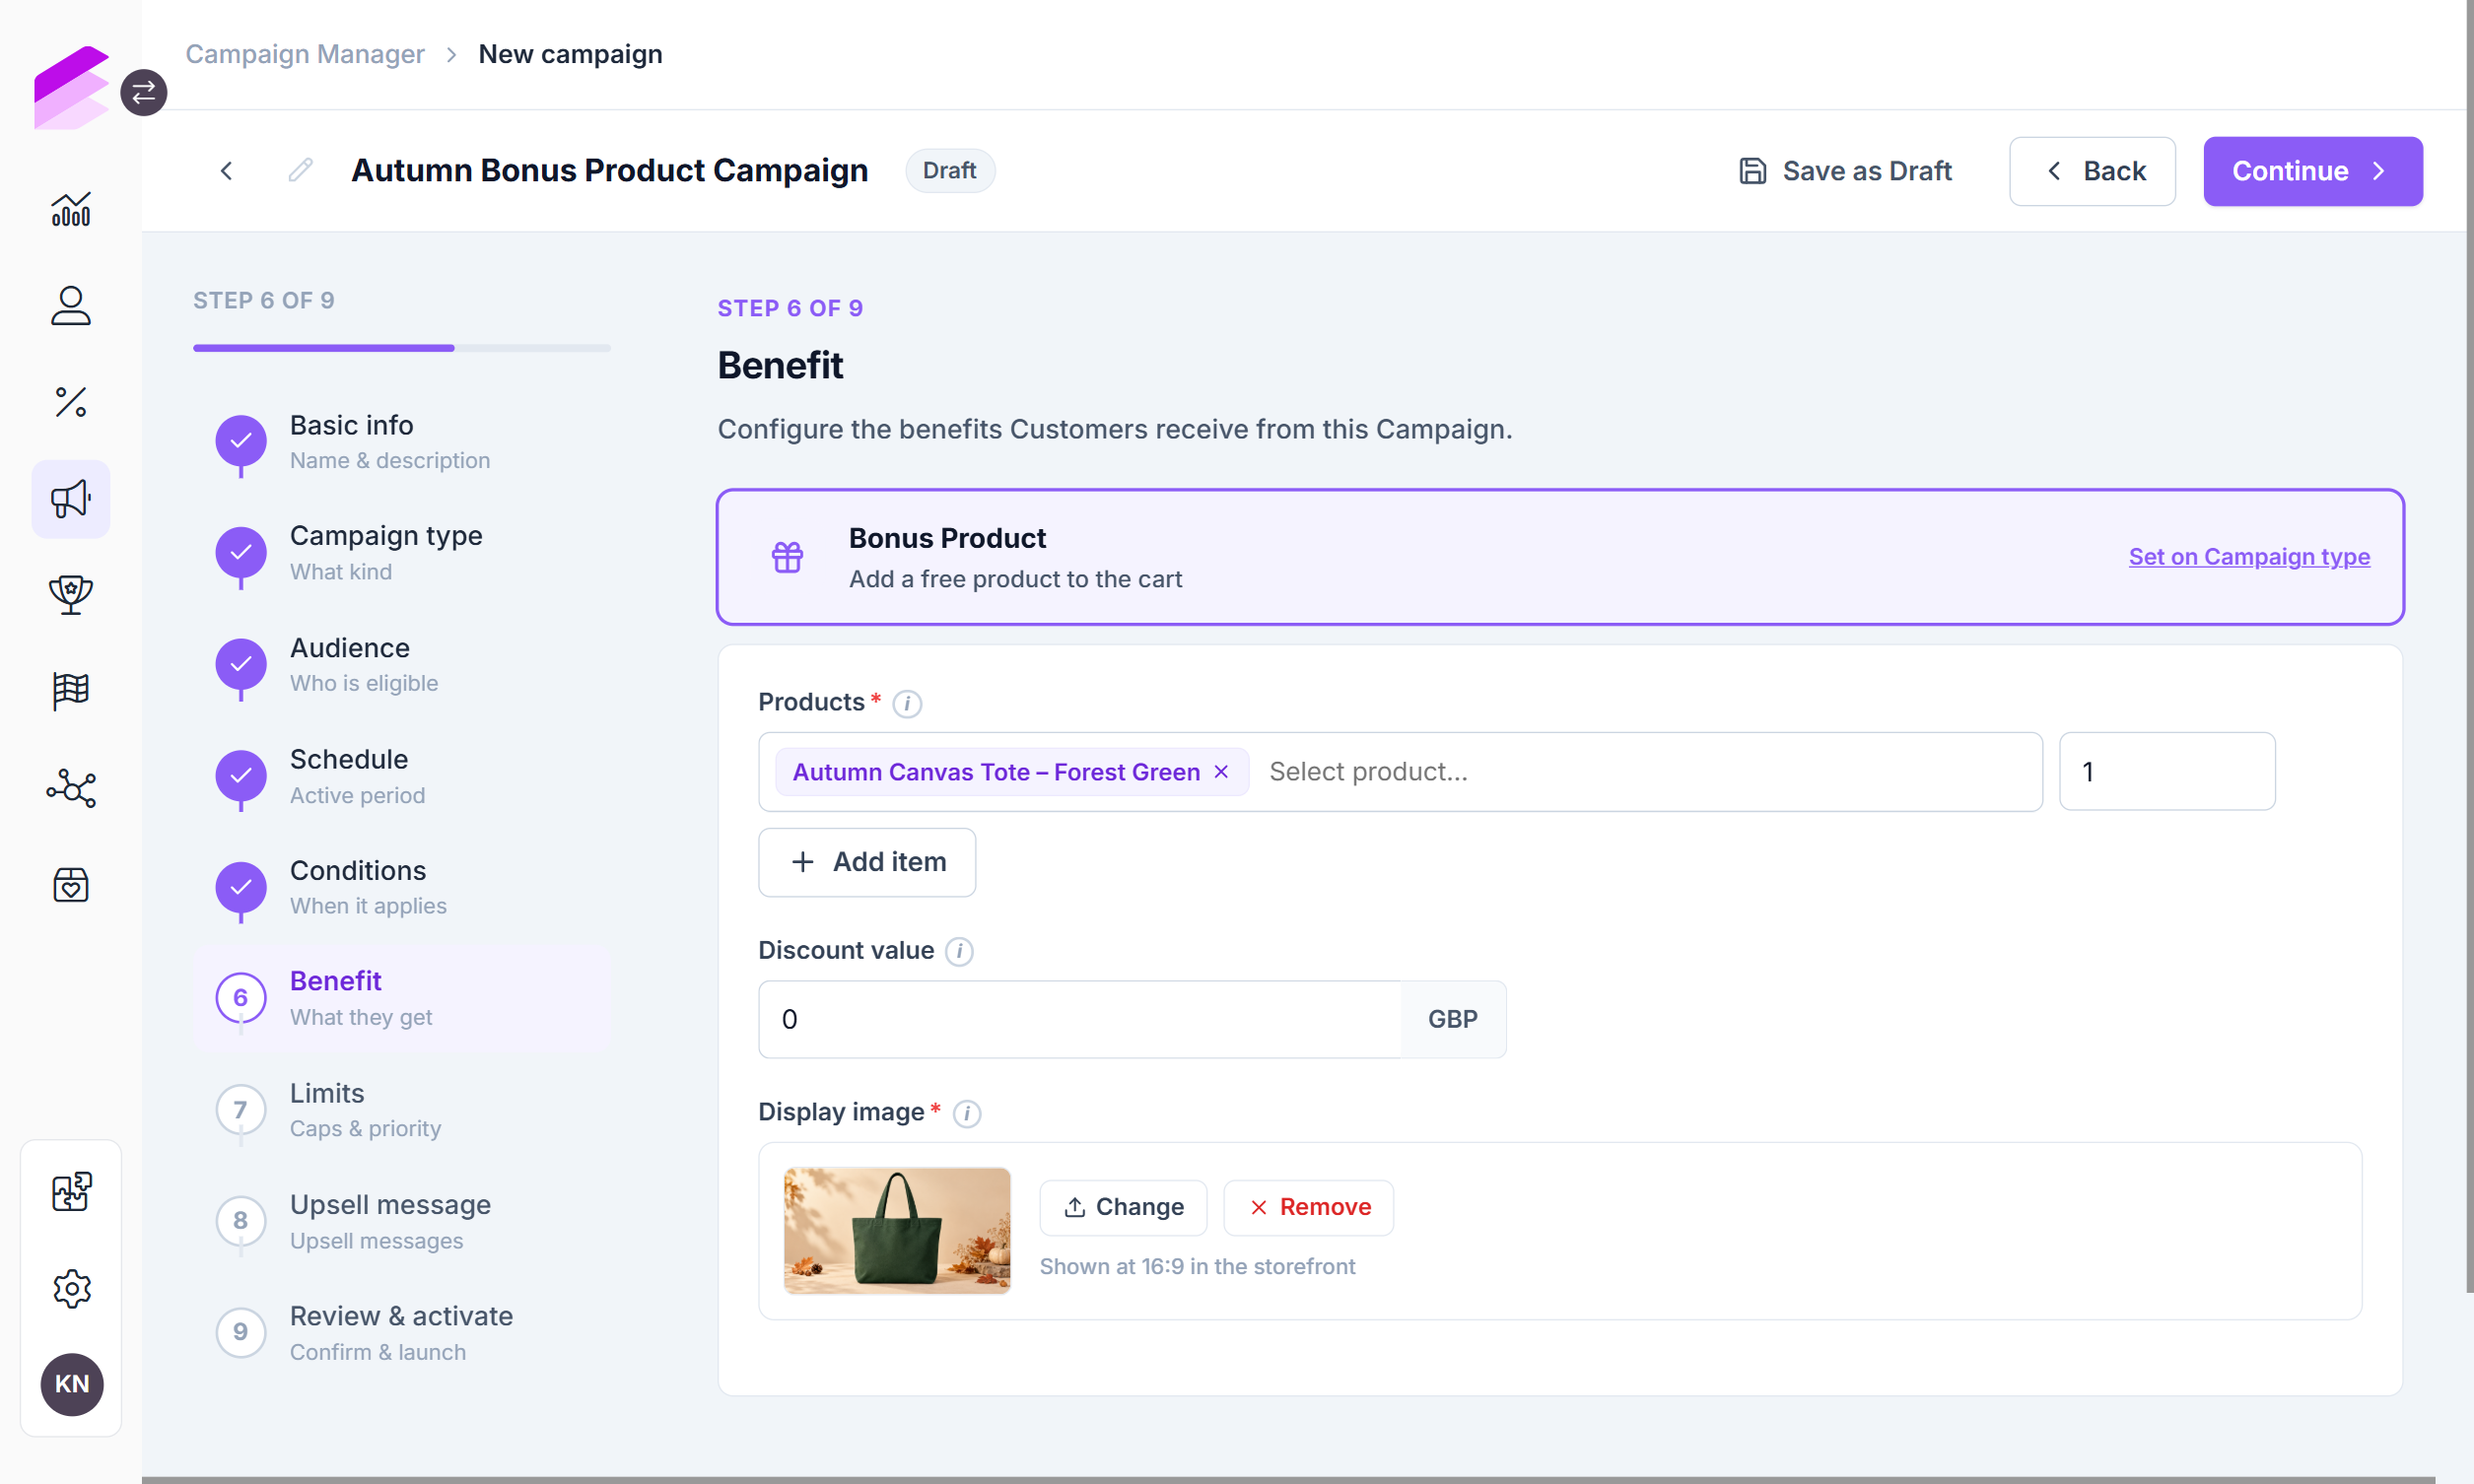
Configure what the customer receives when the campaign conditions are met. The available fields depend on the selected campaign type and the specific mechanism configured for that type.
For promotion campaigns, the promotion type is summarized at the top of the page. To use a different type while configuring the draft, return to the Campaign type step. For details about the available promotion benefit settings, see Configuring Promotions.
Limits
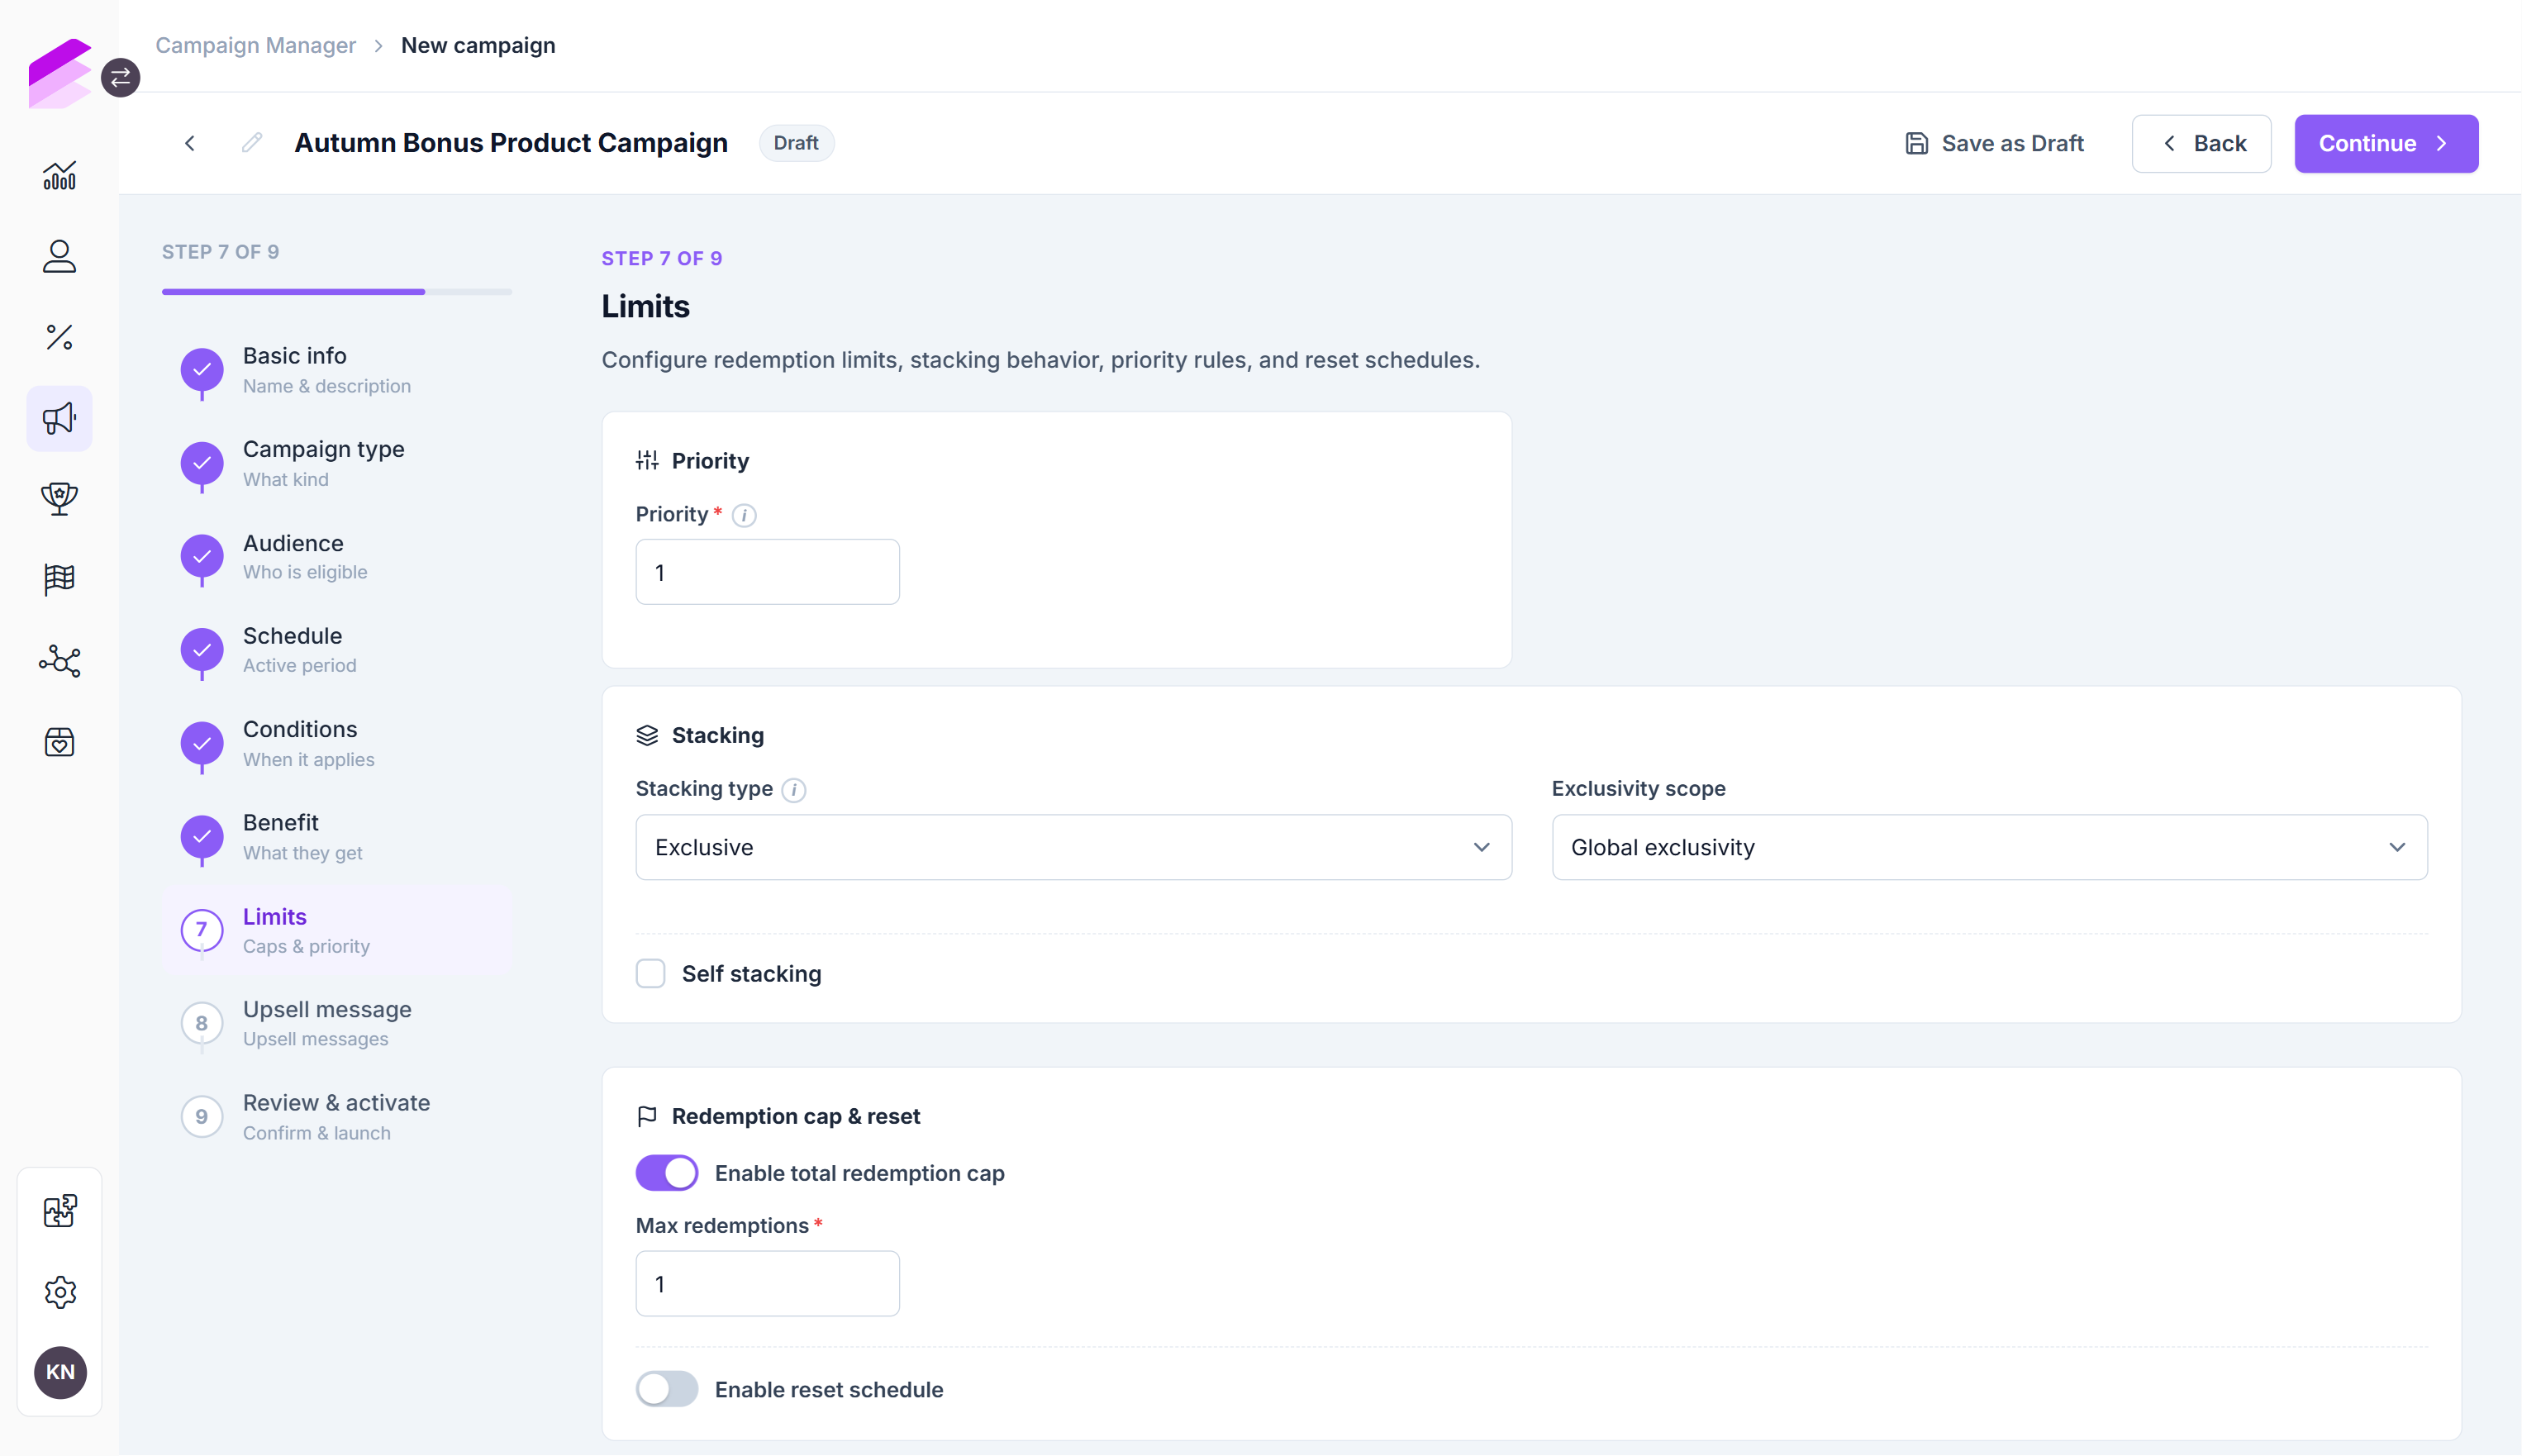
The Limits step displays the limit and priority settings supported by the selected campaign type. For information about the fields available for Promotion campaigns, see Configuring Promotions.
Upsell message
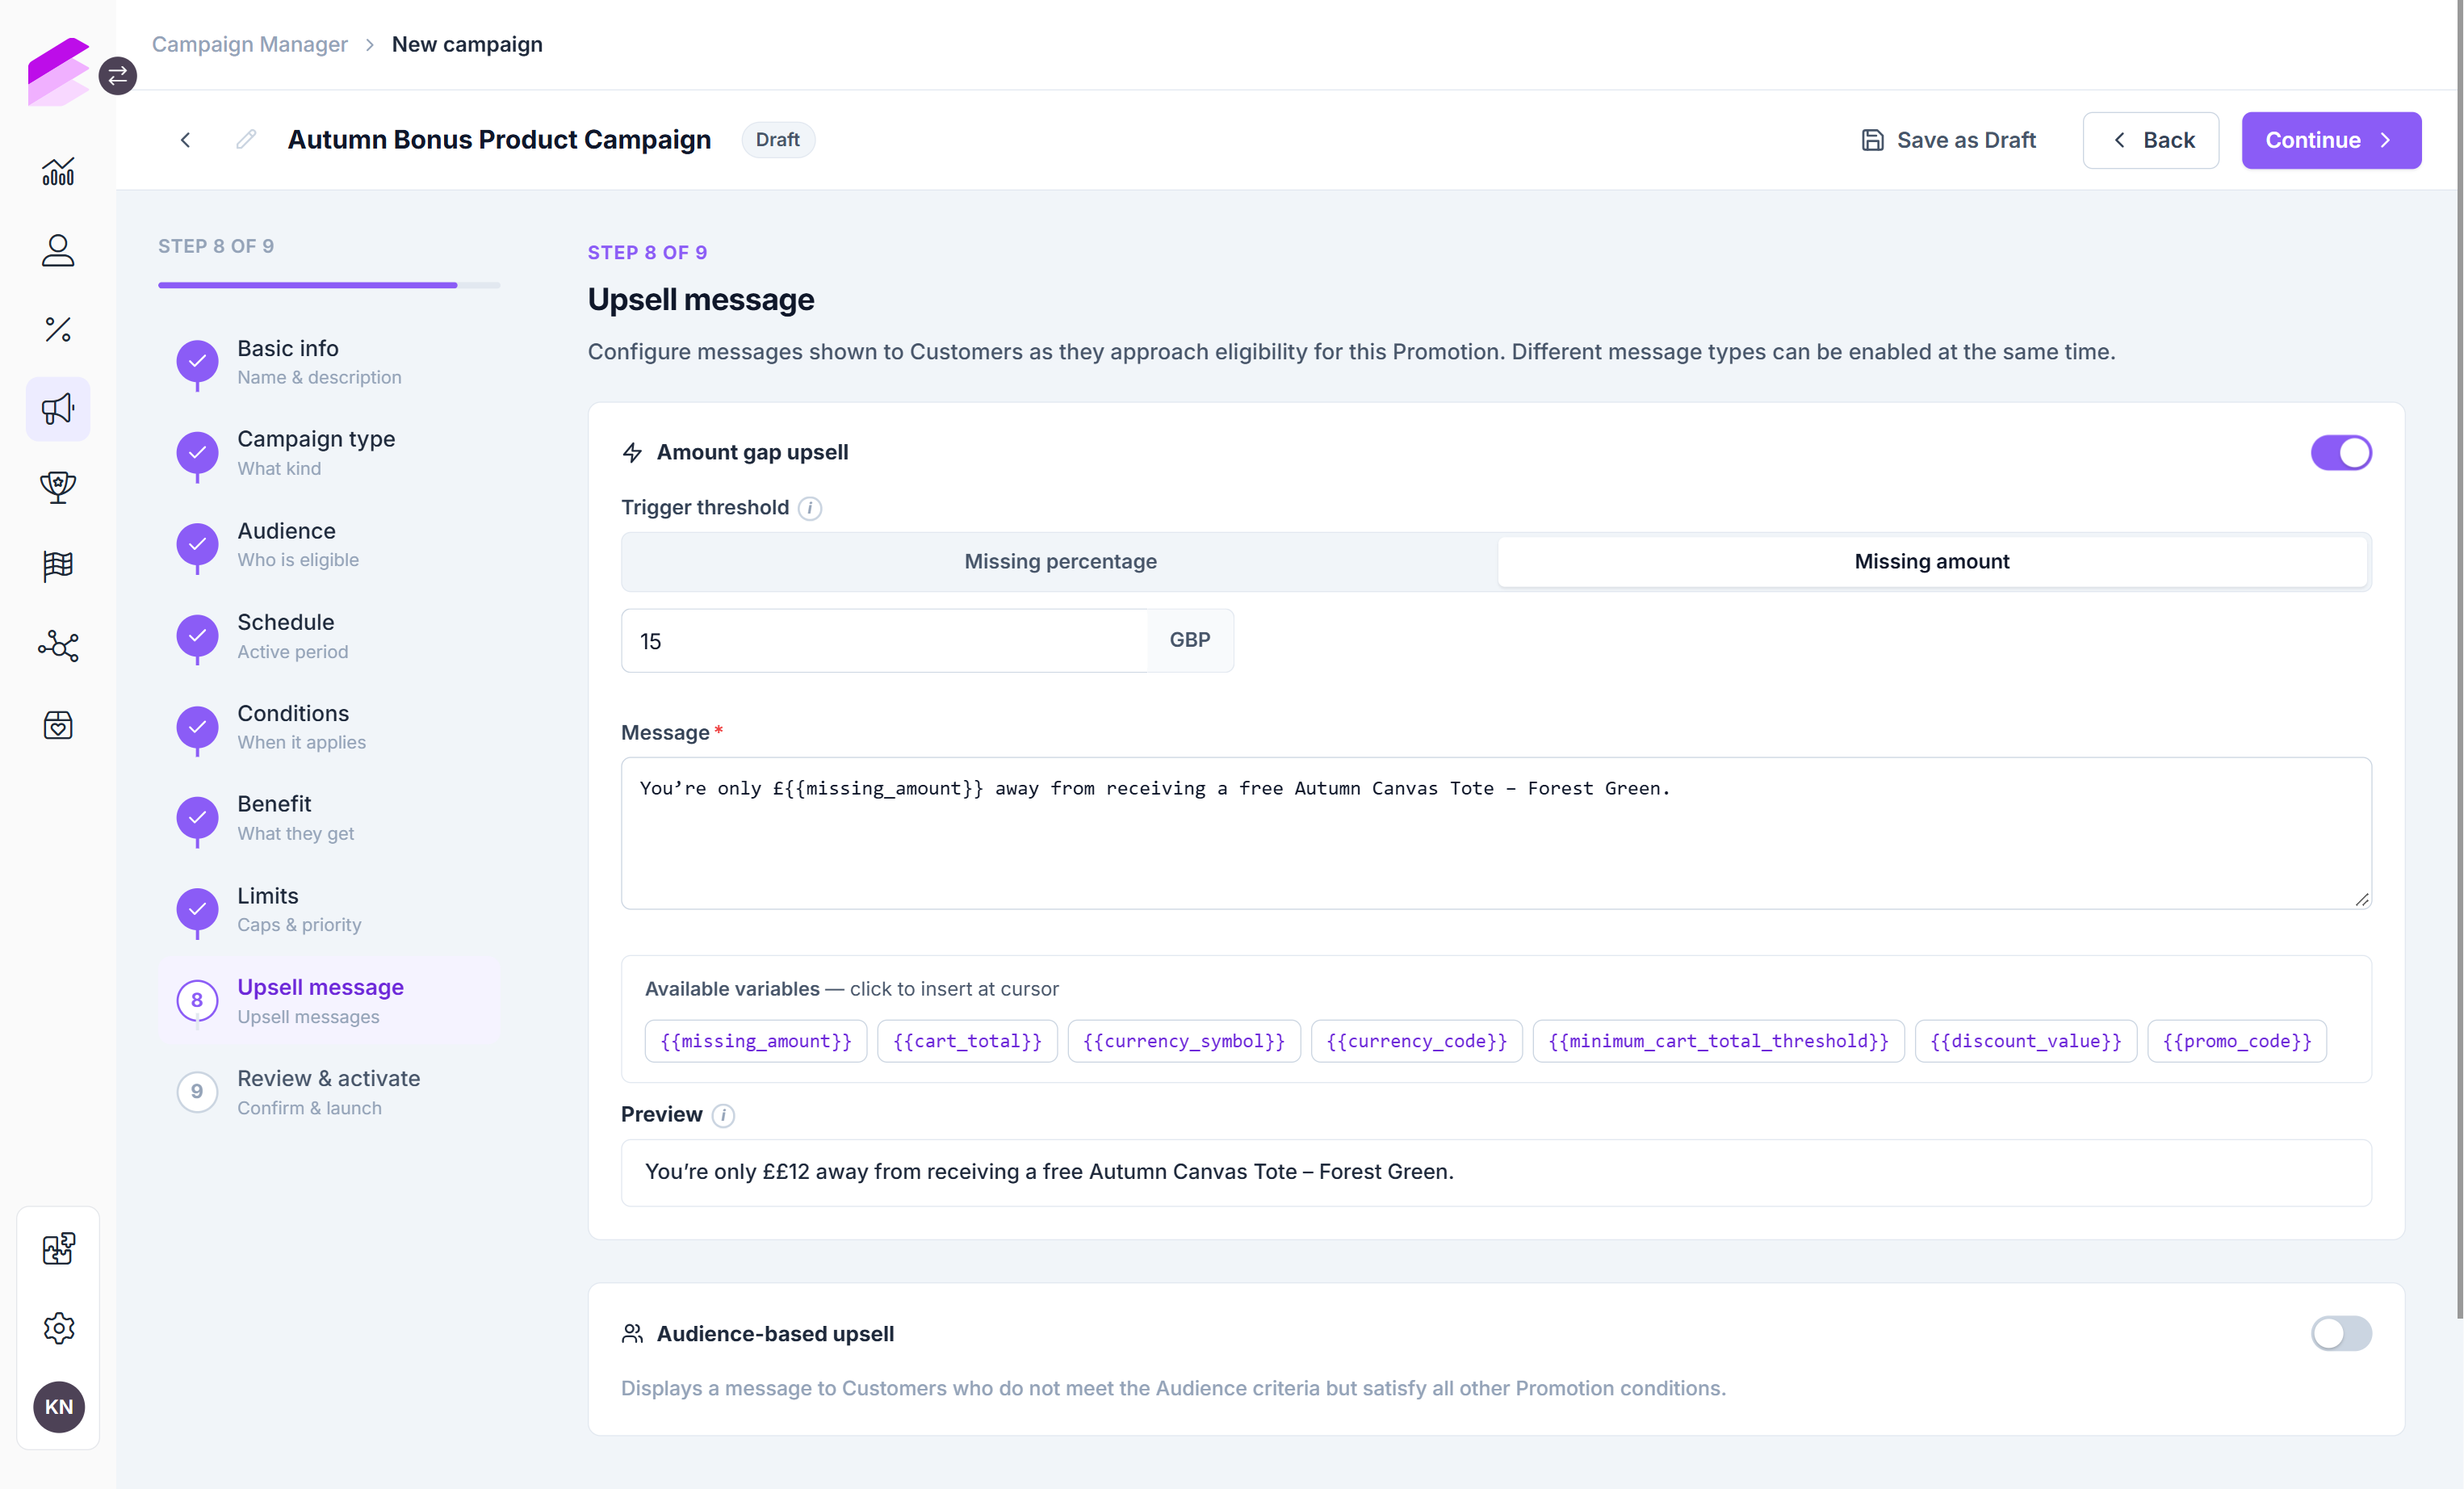
The Upsell message settings are available only for the Promotion campaign type. An amount gap upsell can inform customers that they are close to meeting a cart value condition. The upsell message is optional.
The amount gap upsell is enabled by default. It requires a cart value condition with a minimum value in the Conditions step. If the campaign does not use this condition, disable the amount gap upsell before activation.
Configure the threshold as a missing percentage or missing amount, then enter the message displayed to eligible customers. Click the available variable chips to insert dynamic values into the message. The Preview field shows the message with sample values.
If the amount gap upsell is disabled, no upsell message configuration is created when the campaign is activated.
The Audience-based upsell option is not yet available.
Review & activate
The Review & activate page summarizes the completed configuration. Expand a section to review its values, or click Edit to return to the corresponding wizard step.
Settings that cannot be changed after activation are marked with the Locked after activation label. Activation is blocked until all required fields are completed and all configuration errors are resolved.
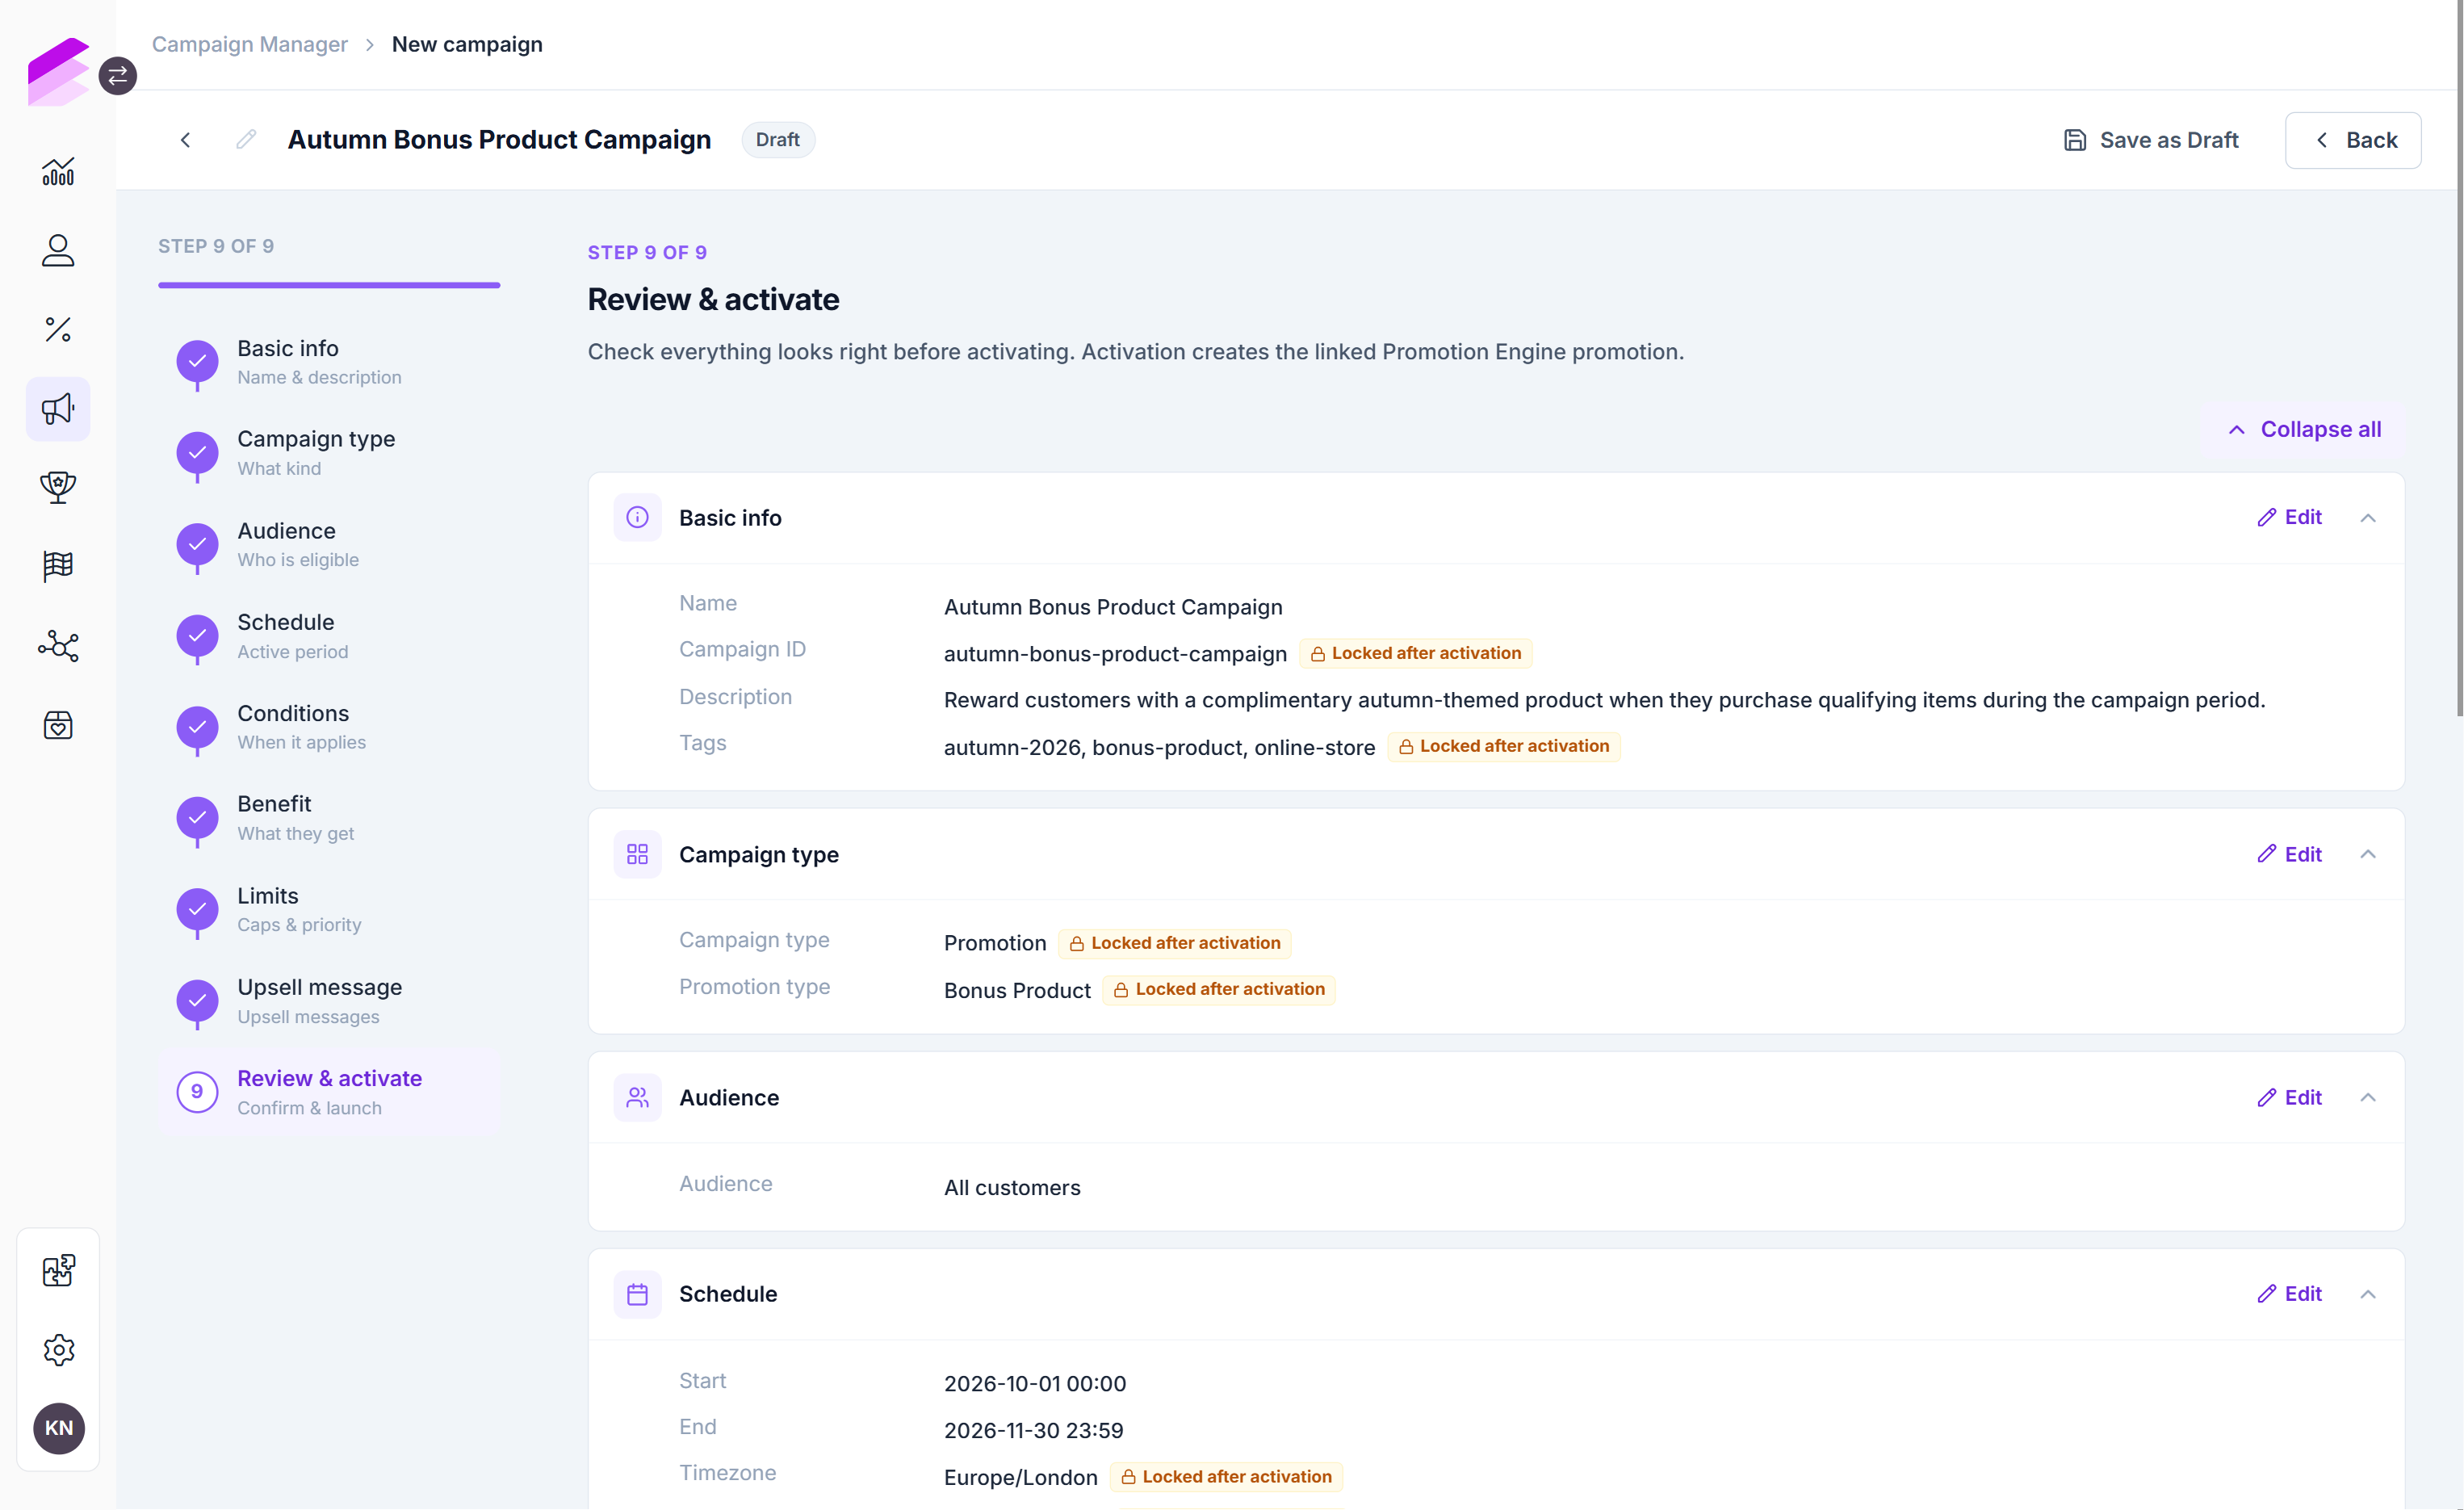
To finish the configuration:
Click Save as Draft to keep the campaign in draft status and continue configuring it later.
Click Activate campaign, then confirm the activation to create the underlying engine configuration.
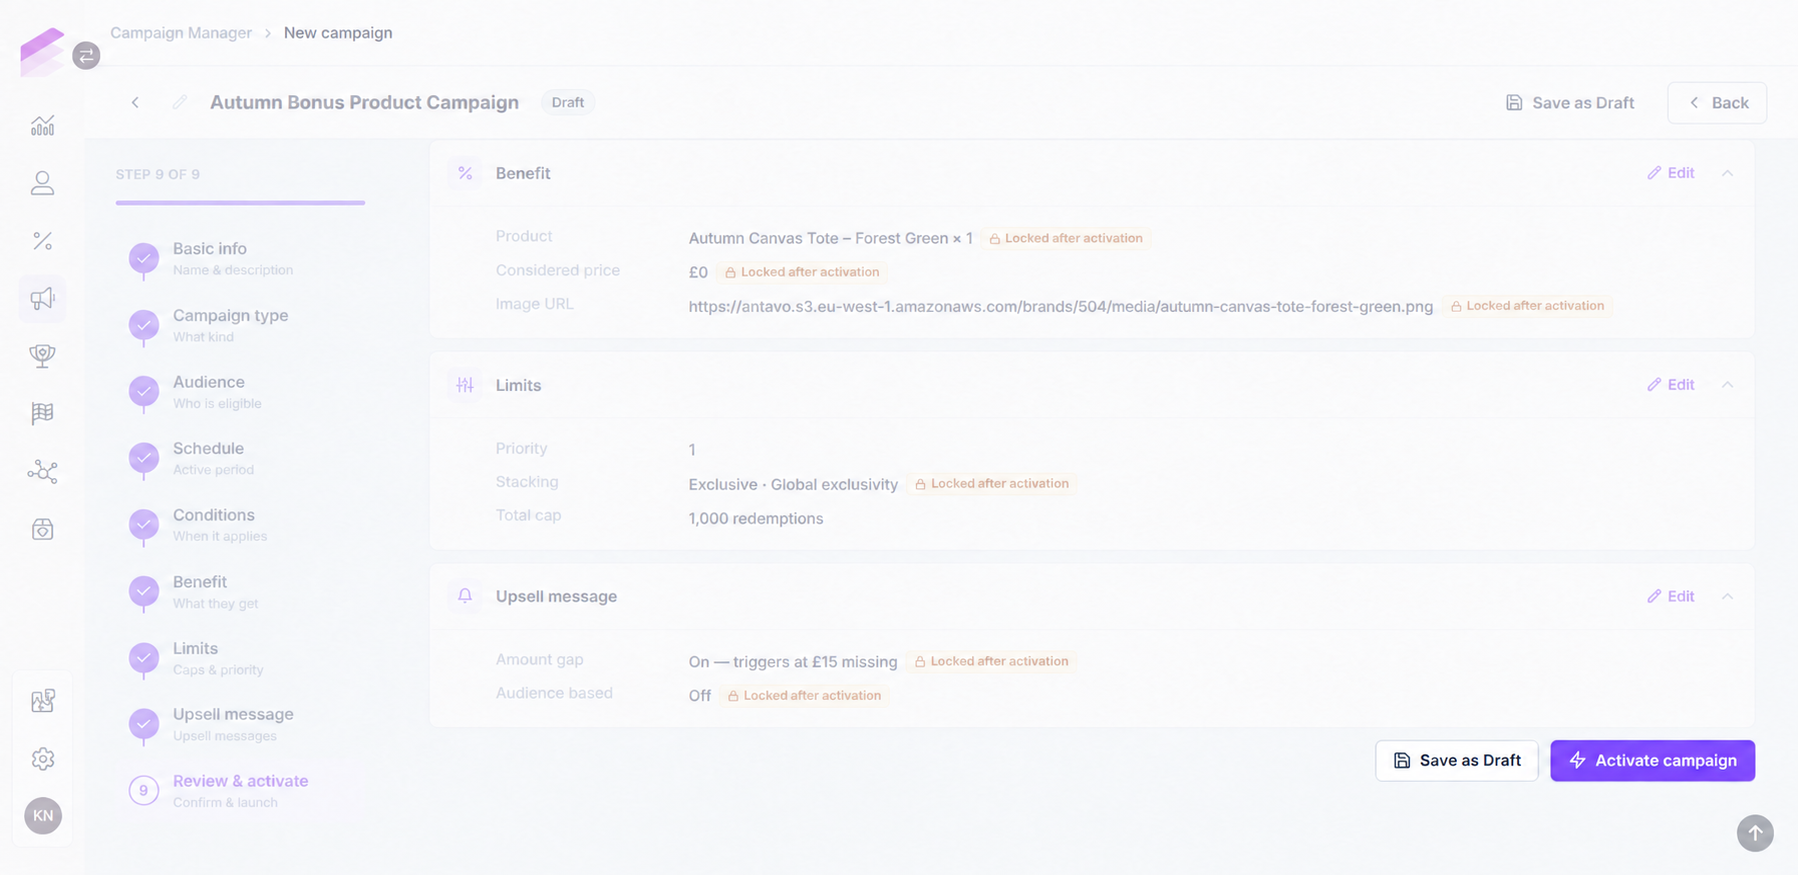
If an amount gap upsell is enabled, its configuration is also created during activation. The campaign is assigned the Scheduled status if its start date and time are in the future. Otherwise, it becomes Active.
The status changes only after the required underlying configuration has been created successfully. If activation fails, the campaign remains in Draft status so that the issue can be corrected and activation retried.
Managing campaigns
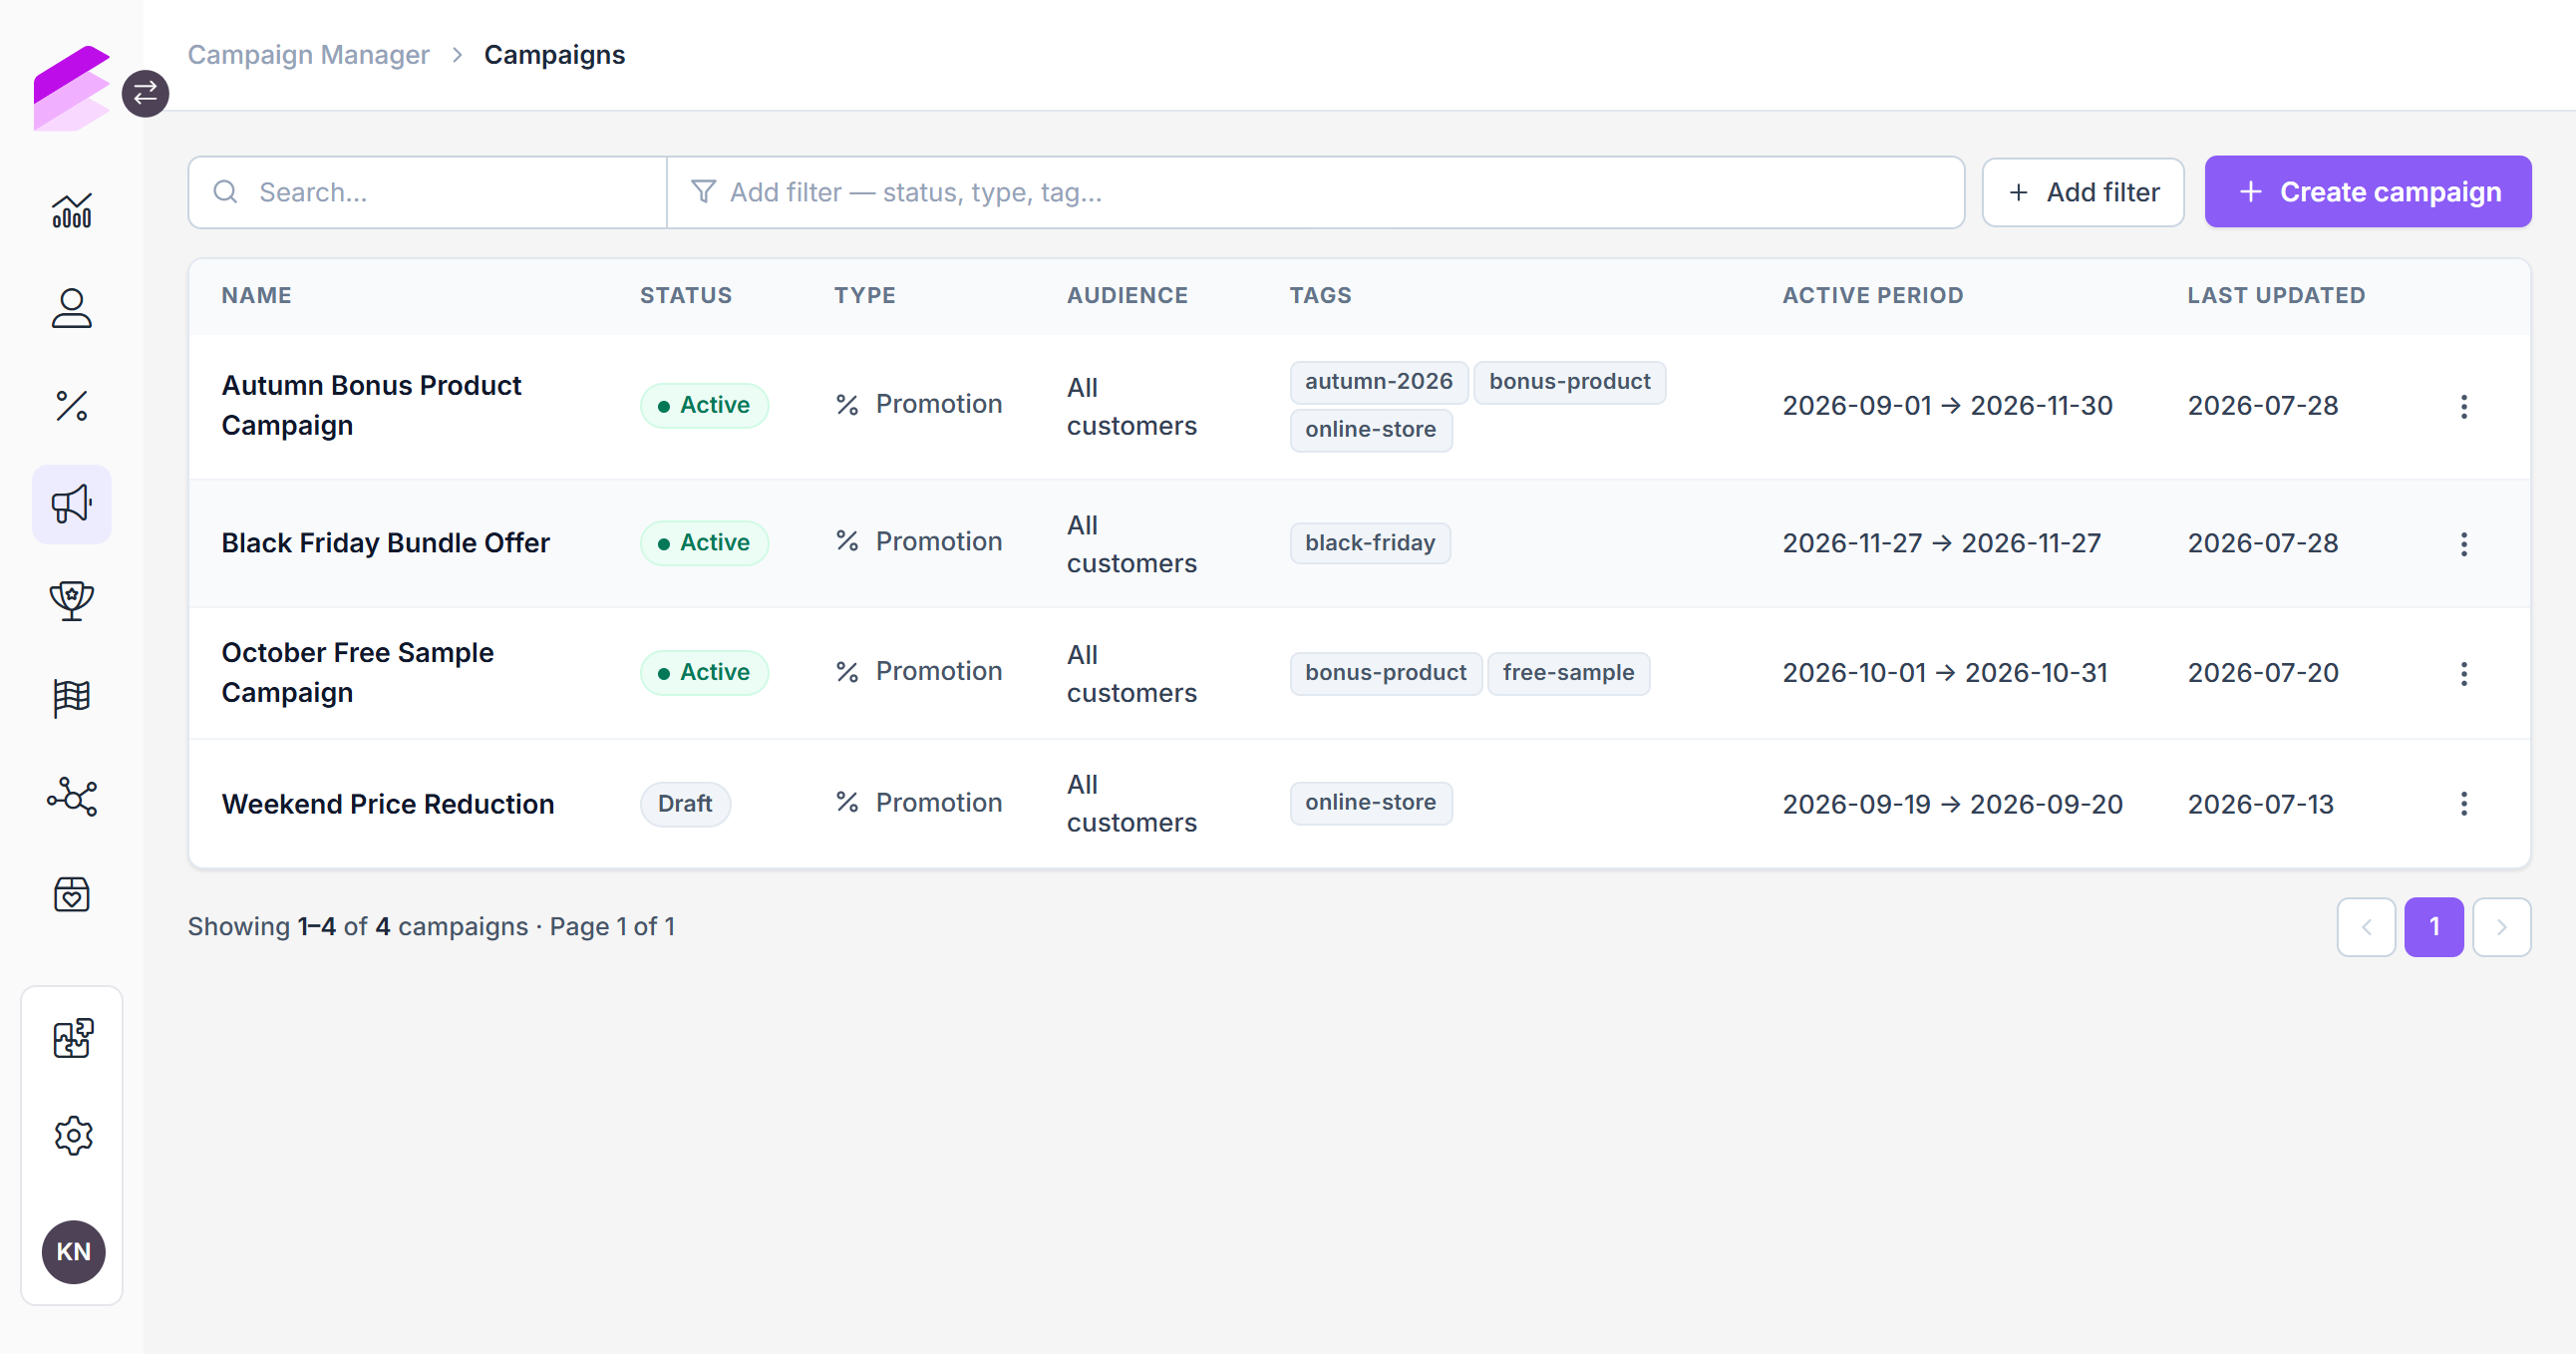
The Campaign Manager list contains campaigns created and managed through the Campaign Manager. The following information is displayed:
Name: Name of the campaign.
Status: Current status of the campaign.
Type: Type of campaign.
Audience (coming soon): Customer audience targeted by the campaign.
Tags: Tags assigned to the campaign.
Active period: Start and end date of the campaign.
Last updated: Date when the campaign was last changed.
Use the search field to find a campaign by name. Click Add filter to filter campaigns by status, type, or tag.
Editing a campaign
Open the action menu of a campaign and click Edit. Draft campaigns can be completed and adjusted before activation.
For a Scheduled or Active campaign, settings marked as locked cannot be changed. Other available settings can be updated through the wizard. Click Save changes to update both the campaign and its linked engine configuration. The corresponding engine uses the updated settings in subsequent evaluations.
For Promotion campaigns, the linked promotion cannot be edited directly in the Promotion Engine. Its configuration and lifecycle are owned by the Campaign Manager.
Duplicating a campaign
To reuse a campaign configuration:
Open the campaign's action menu or configuration page
Click Duplicate
A separate draft is created with the source campaign's configuration. The new campaign receives its own identifiers and has no underlying engine configuration until it is activated. Review the schedule and all other settings before activation.
Duplication can also be used to rerun an inactive campaign, as inactive campaigns cannot be reactivated.
Deactivating a campaign
Click Deactivate on a Scheduled or Active campaign and confirm the action. The linked engine configuration is deactivated, and the campaign becomes Inactive.
Deactivation is irreversible. An inactive campaign is read-only and cannot be reactivated. Duplicate the campaign to create a new draft based on its configuration.
Deleting a draft
To remove an unused draft, open its action menu in the campaign list and click Delete.
Campaigns that have already been activated cannot be deleted.