Historical Transaction Import is a dedicated import model designed for importing complete historical transaction records into Antavo. While it is accessed through the Imports module, its behavior and purpose differ from the standard import process.
Unlike Events imports that process individual events, this import handles entire transactions as a single logical unit, including all related events and data. A transaction can include checkout information, purchased items, and any associated partial or full refunds, ensuring that historical purchase behavior is represented accurately.
Each imported record represents a full transaction with its related events. Transactions are created exactly as defined in the input files and are stored as immutable historical records.
If a transaction already exists in the workspace, it cannot be updated, modified, or extended. Existing transactions and their related events cannot be re-imported, nor can new events be added to them. This behavior ensures data integrity and prevents inconsistencies in historical purchase data.
Creating a new import
To create a new import:
Navigate to the Imports module
Click Create new import in the left sidebar
Select Historical Transactions (Beta) as the data model
Click Next
![]()
Customer Import follows a fixed, multi-step workflow. Each step must be completed successfully before continuing.
![]()
You can cancel the import process at any time before it is started in the final step. Once the import has begun, it cannot be canceled.
1. File upload
After selecting the Historical transaction data model, upload one or more JSON files by clicking Select Files or by dragging and dropping files from your computer into the field.
For the Historical transactions data model, note that only JSON files are supported for import. Therefore, the corresponding template for this data model is available exclusively in JSON format.
![]()
There is a link on this page to download a JSON template, which must be followed when creating your JSON file. You can find detailed instructions on creating a JSON file for importing historical transactions in the JSON file for historical transaction import section.
The Fields collapsible section is also available, which provides the list of transaction attributes that can be imported.
2. Pre-processing
Click Start upload and validation. Before the historical transaction records can be imported into the database, the uploaded files are pre-processed and validated for syntax or data errors to ensure that only valid, error-free historical data is imported.
![]()
During the pre-processing and validation process, only the syntax and data integrity of the import file are validated. Note that the file data is not checked against the database at this stage.
Once the upload has finished, one of the following icons is displayed at the end of the row of each uploaded file:
✅ - Displayed if no errors were found in the file.🚫 - Displayed if the file contains a JSON syntax error.⚠️ - Displayed if the file contains invalid data (e.g., there is nocheckoutevent for a given transaction, or there are two events with the same transaction ID but with a different customer, etc.).
![]()
If any error is detected, click Show errors at the bottom of the page for detailed information about the flagged errors. The Historical transaction import errors page lists each row with an error, the related transaction ID, the event ID, and an error message that allows you to quickly identify the location and type of the error.
If critical information about a transaction is ambiguous or missing, all actions related to that transaction are invalidated, and all elements of the transaction are removed from the import.
![]()
Click Back to return to the list or pre-processed files. Before continuing with the import, you can remove a file that contains errors using the delete (×) icon. After fixing the errors, you can upload and validate it again by clicking Re-upload and validate.
Please note that uploaded files are kept for 7 days. After this period, the uploaded files are deleted from the database, and attempting to proceed with the import will be unsuccessful.
3. Start import
Click Start import to import all uploaded and validated files.
A pop-up confirmation message appears with a warning that invalid transactions will be excluded from the import.Click Start to proceed with the import.
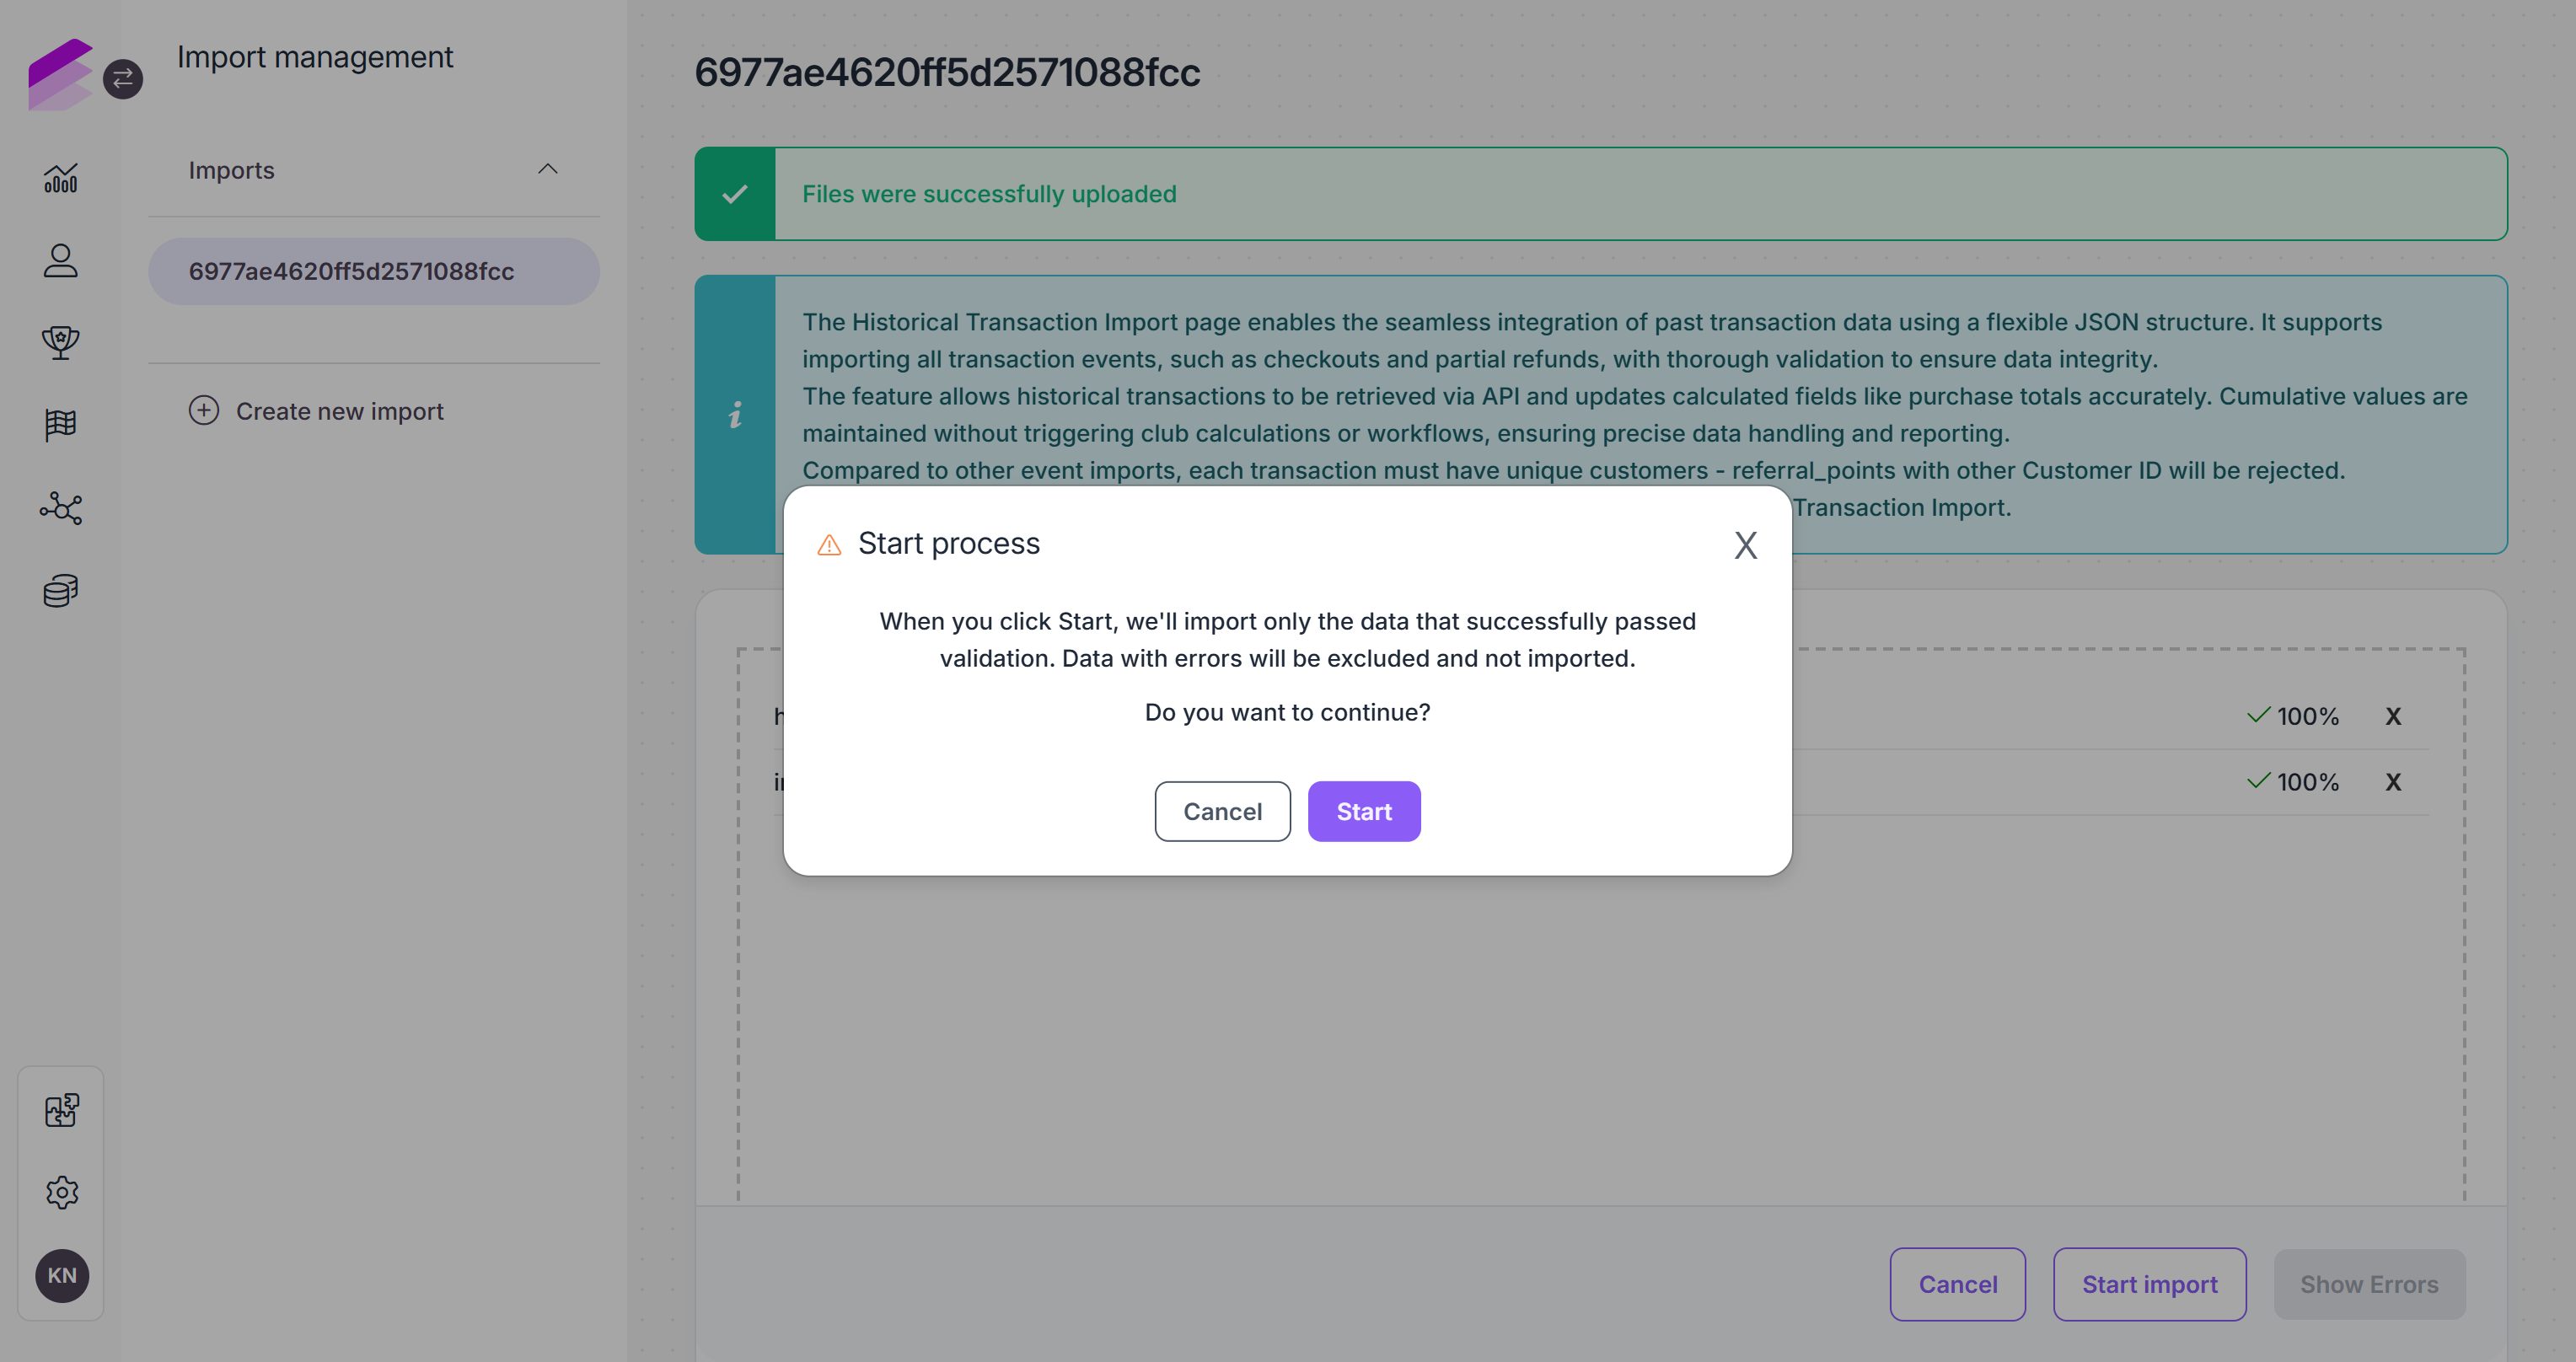
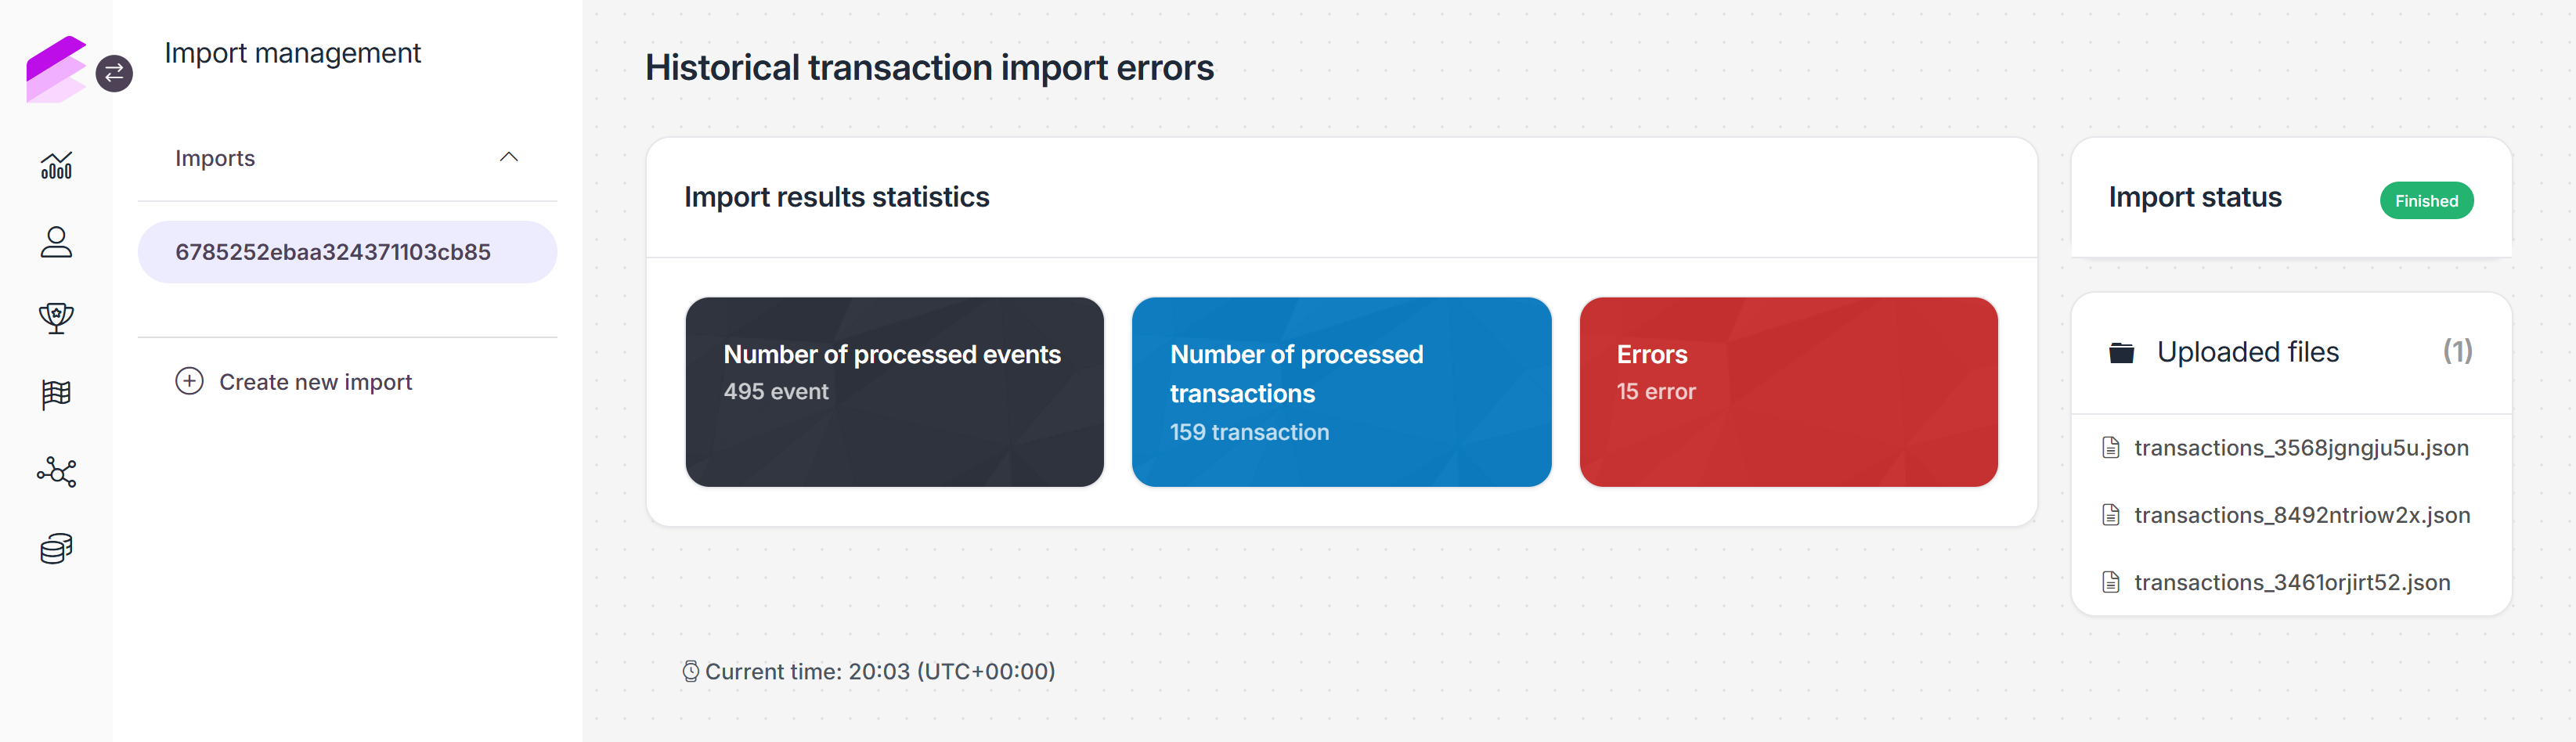
Once the import process has started, you are redirected to the import details page, where you can see:
The status of the import, which updates to Finished when the import completes
The number of processed events
The number of processed transactions
The number of encountered errors
Links to download the import source files
You can access the Import details page anytime from the Imports list by clicking the Details button next to the import.
Import errors
During the import process, the file data is checked against the database. If any errors are encountered during this process (e.g., if a transaction ID found in the uploaded file already exists in the database), an error is logged, and all events related to the transaction ID are invalidated and removed from the import.
To view the import errors, click the Errors button.
![]()
The Historical Transaction Import Logs page displays the list of encountered errors and the transaction ID related to each error. You can expand each error to display additional information, such as the name of the file and the row where the error is encountered.
![]()
You can use the filter at the top of the page to filter the list by transaction ID and Error message.
Import results
Imported transactions appear on each customer's Transactions page with accepted status. Partially or fully refunded transactions appear with a refunded status.
![]()
On the customer's Events page, events imported with the Historical transaction import are listed with a Historical Transaction Import source.
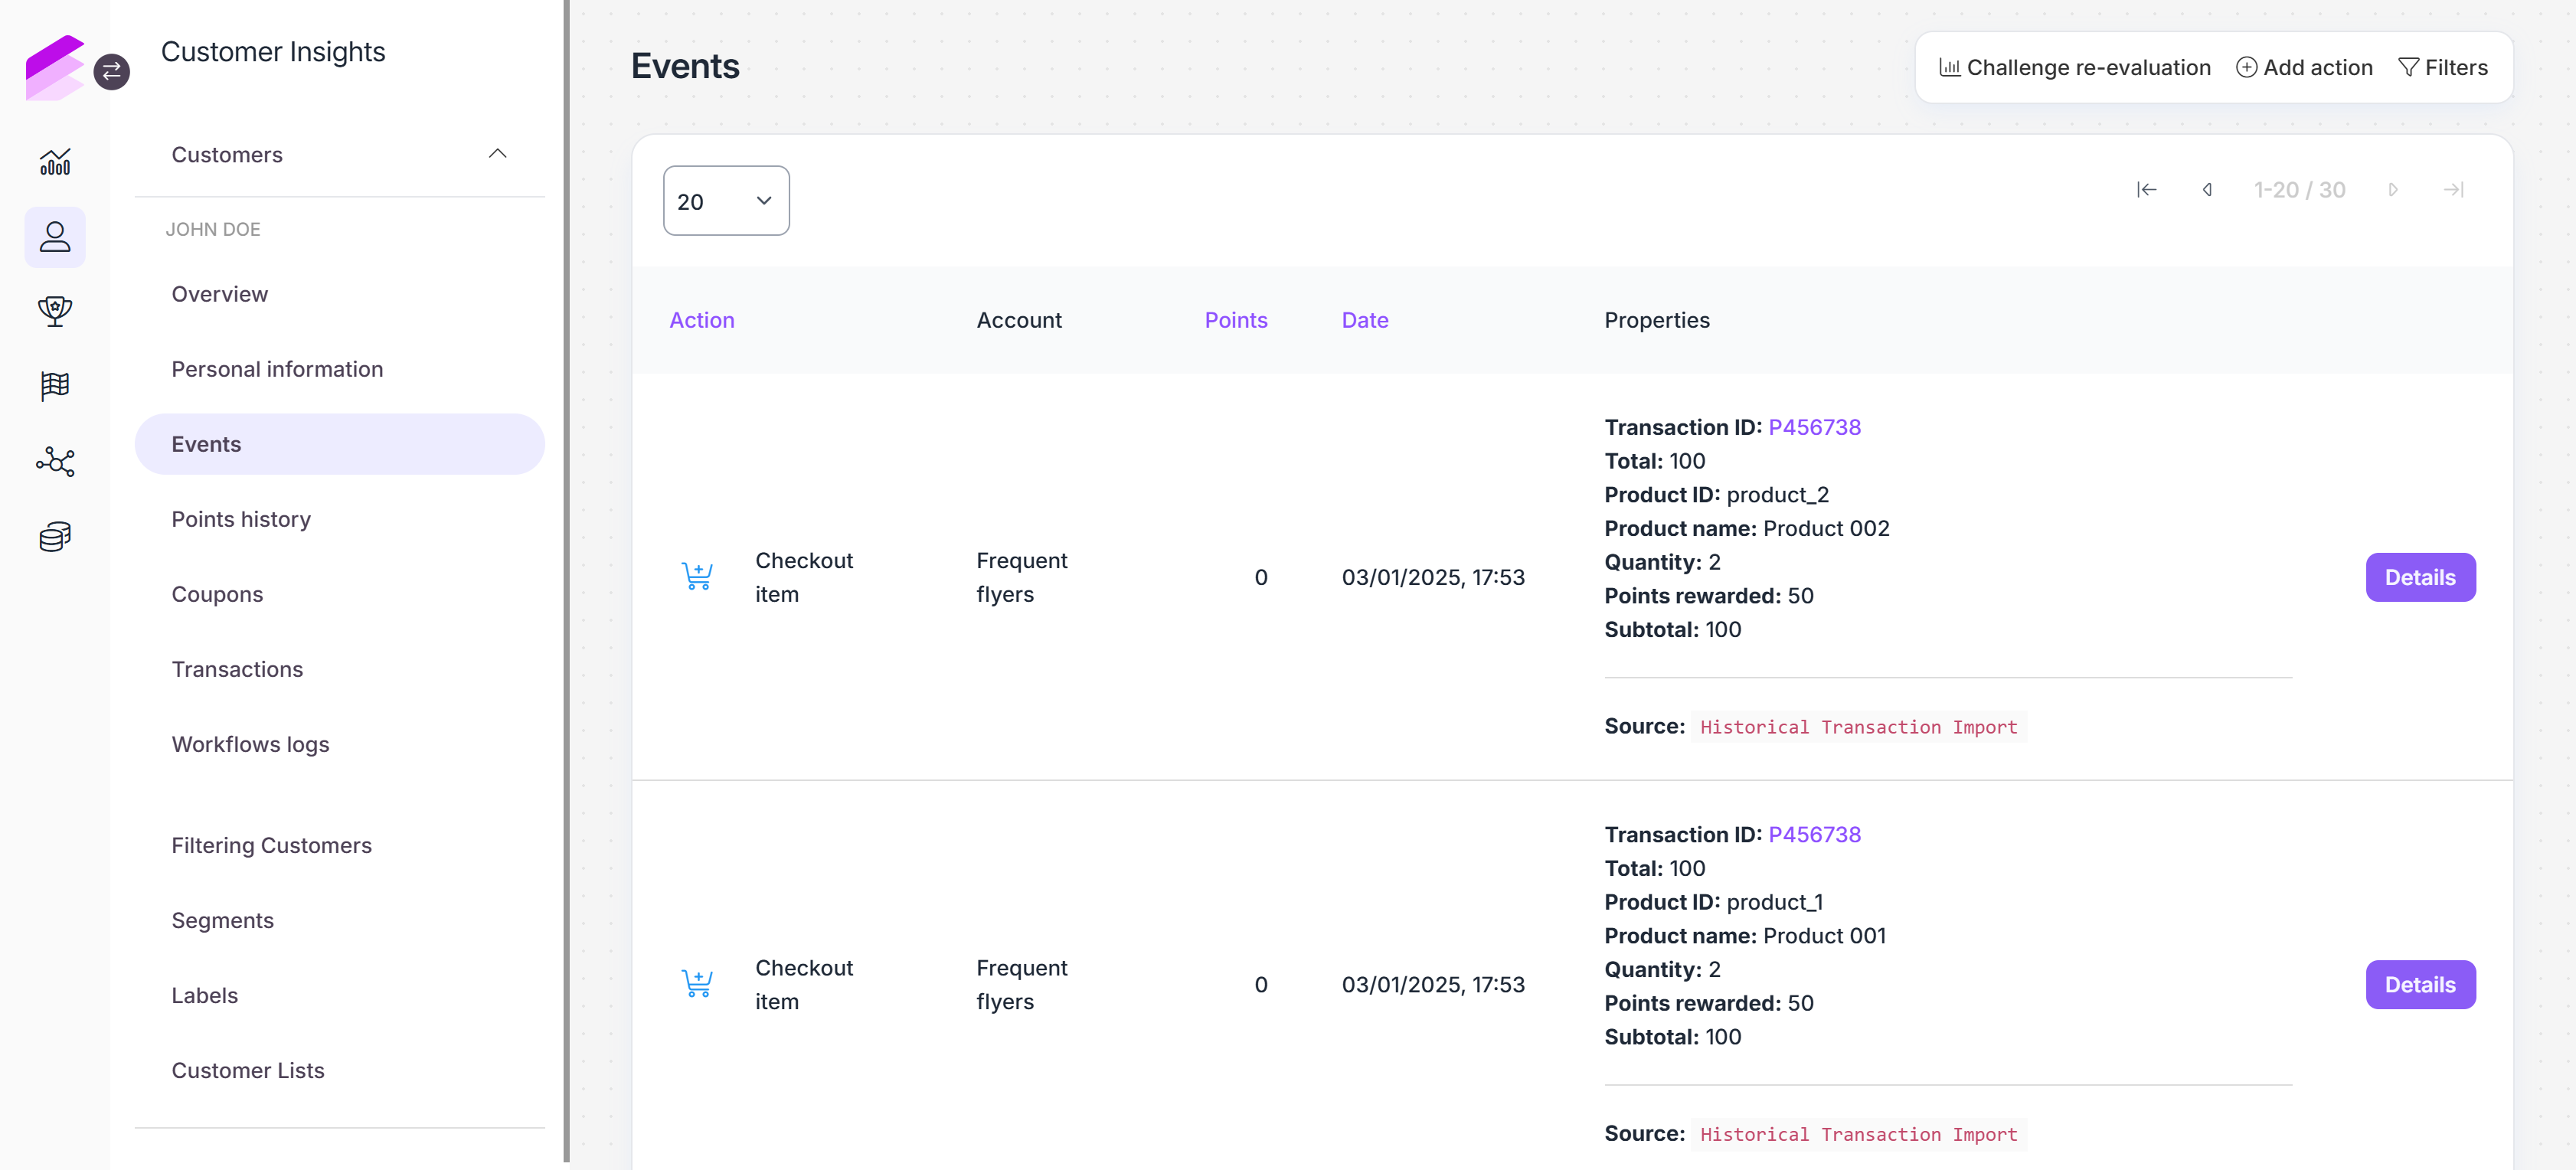
Each historical transaction import triggers the recalculation of transaction-related customer attributes such as the average basket value and the total purchase amount to ensure comprehensive, accurate customer profiles.
Please note that currently points cannot be awarded or removed when importing and processing historical transactions, so imported transactions do not modify customers' calculated points. Adjustments to the customers’ points must be made manually.
Checkout events imported with the Historical transaction import can be refunded later by registering a refund or refund_item event with the same transaction ID.
JSON file for historical transaction imports
When creating a JSON file for Historical transaction imports, it's important to note that the formatting differs from that required for other data models. You must avoid formatting (no indents, extra spaces, or newlines within a single JSON object), and each line should represent a single JSON object, with no additional array or enclosing structure.
The JSON file containing the historical transaction data must follow the syntax and formatting provided in the JSON file template, and must fulfill the following requirements:
The file must not be formatted.
The file must contain one JSON object per transaction action (nested items are supported).
Each JSON object must be on a separate row. The objects must not be separated by commas, and must not be arranged in an array.
The customer ID must be the same for all actions related to the same transaction ID. Transactions containing actions with different customer IDs are invalidated.
Each imported transaction must be complete: all actions related to a specific transaction (e.g.,
checkout,refund) must be included in the same import file, as it is not possible to use the import to update or overwrite transaction data that has already been imported.
The accepted transaction actions are the following:
checkoutrefundrefund_itempartial_refund
Events related to the Checkout accept module (e.g., checkout_accept and checkout_update) cannot be imported, but transactions with such events can be imported by including a checkout action with a timestamp field value that matches the final value of the transaction's auto-accept attribute.
{"transaction_id":"transaction_1","action":"checkout","total":100,"customer":"example_customer_ID","points_rewarded":100,"timestamp":"2022-06-03T17:39:00+01:00","items":[{"product_id":"product_1","product_name":"Product 001","quantity":2,"subtotal":100,"points_rewarded":100}]} {"transaction_id":"transaction_1","action":"partial_refund","amount":50,"customer":"example_customer_ID","timestamp":"2022-06-02T17:39:00+01:00"} {"transaction_id":"transaction_1","action":"refund_item","customer":"example_customer_ID","timestamp":"2022-06-02T17:39:00+01:00","product_id":"product_1","quantity":1} {"transaction_id":"transaction_1","action":"refund","customer":"example_customer_ID","timestamp":"2022-06-02T17:39:00+01:00"}If the Multi-accounts module is enabled in your workspace, the template will also include the account field.