The Trusted sites module offers an interface to configure and manage multiple webhook authentication methods on a single page.
After configuring the sites on this interface, you will be able to select them from a dropdown menu when implementing a workflow using the Webhook message action node. This option eliminates the need to type each system detail in all Webhook message nodes where that system is targeted.
The Trusted sites module is used exclusively for configuring authentication for outgoing webhook messages. It does not apply to the Incoming webhooks module, which is managed separately.
To access the configuration page, navigate to the Modules menu and search for the Trusted sites module. The page will open to the list of sites that are already added, displaying the following information:
Name
Authentication method
URL
Content type
Adding a new site
To add a new authentication, click Add new site in the left sidebar.
Name (required)
Enter the name of the trusted site. This name will appear and be selectable in the dropdown of the Webhook message workflow node.URL (required)
Add the URL address of the trusted website.Content type
Specify the media type of the resource, e.g., application/json
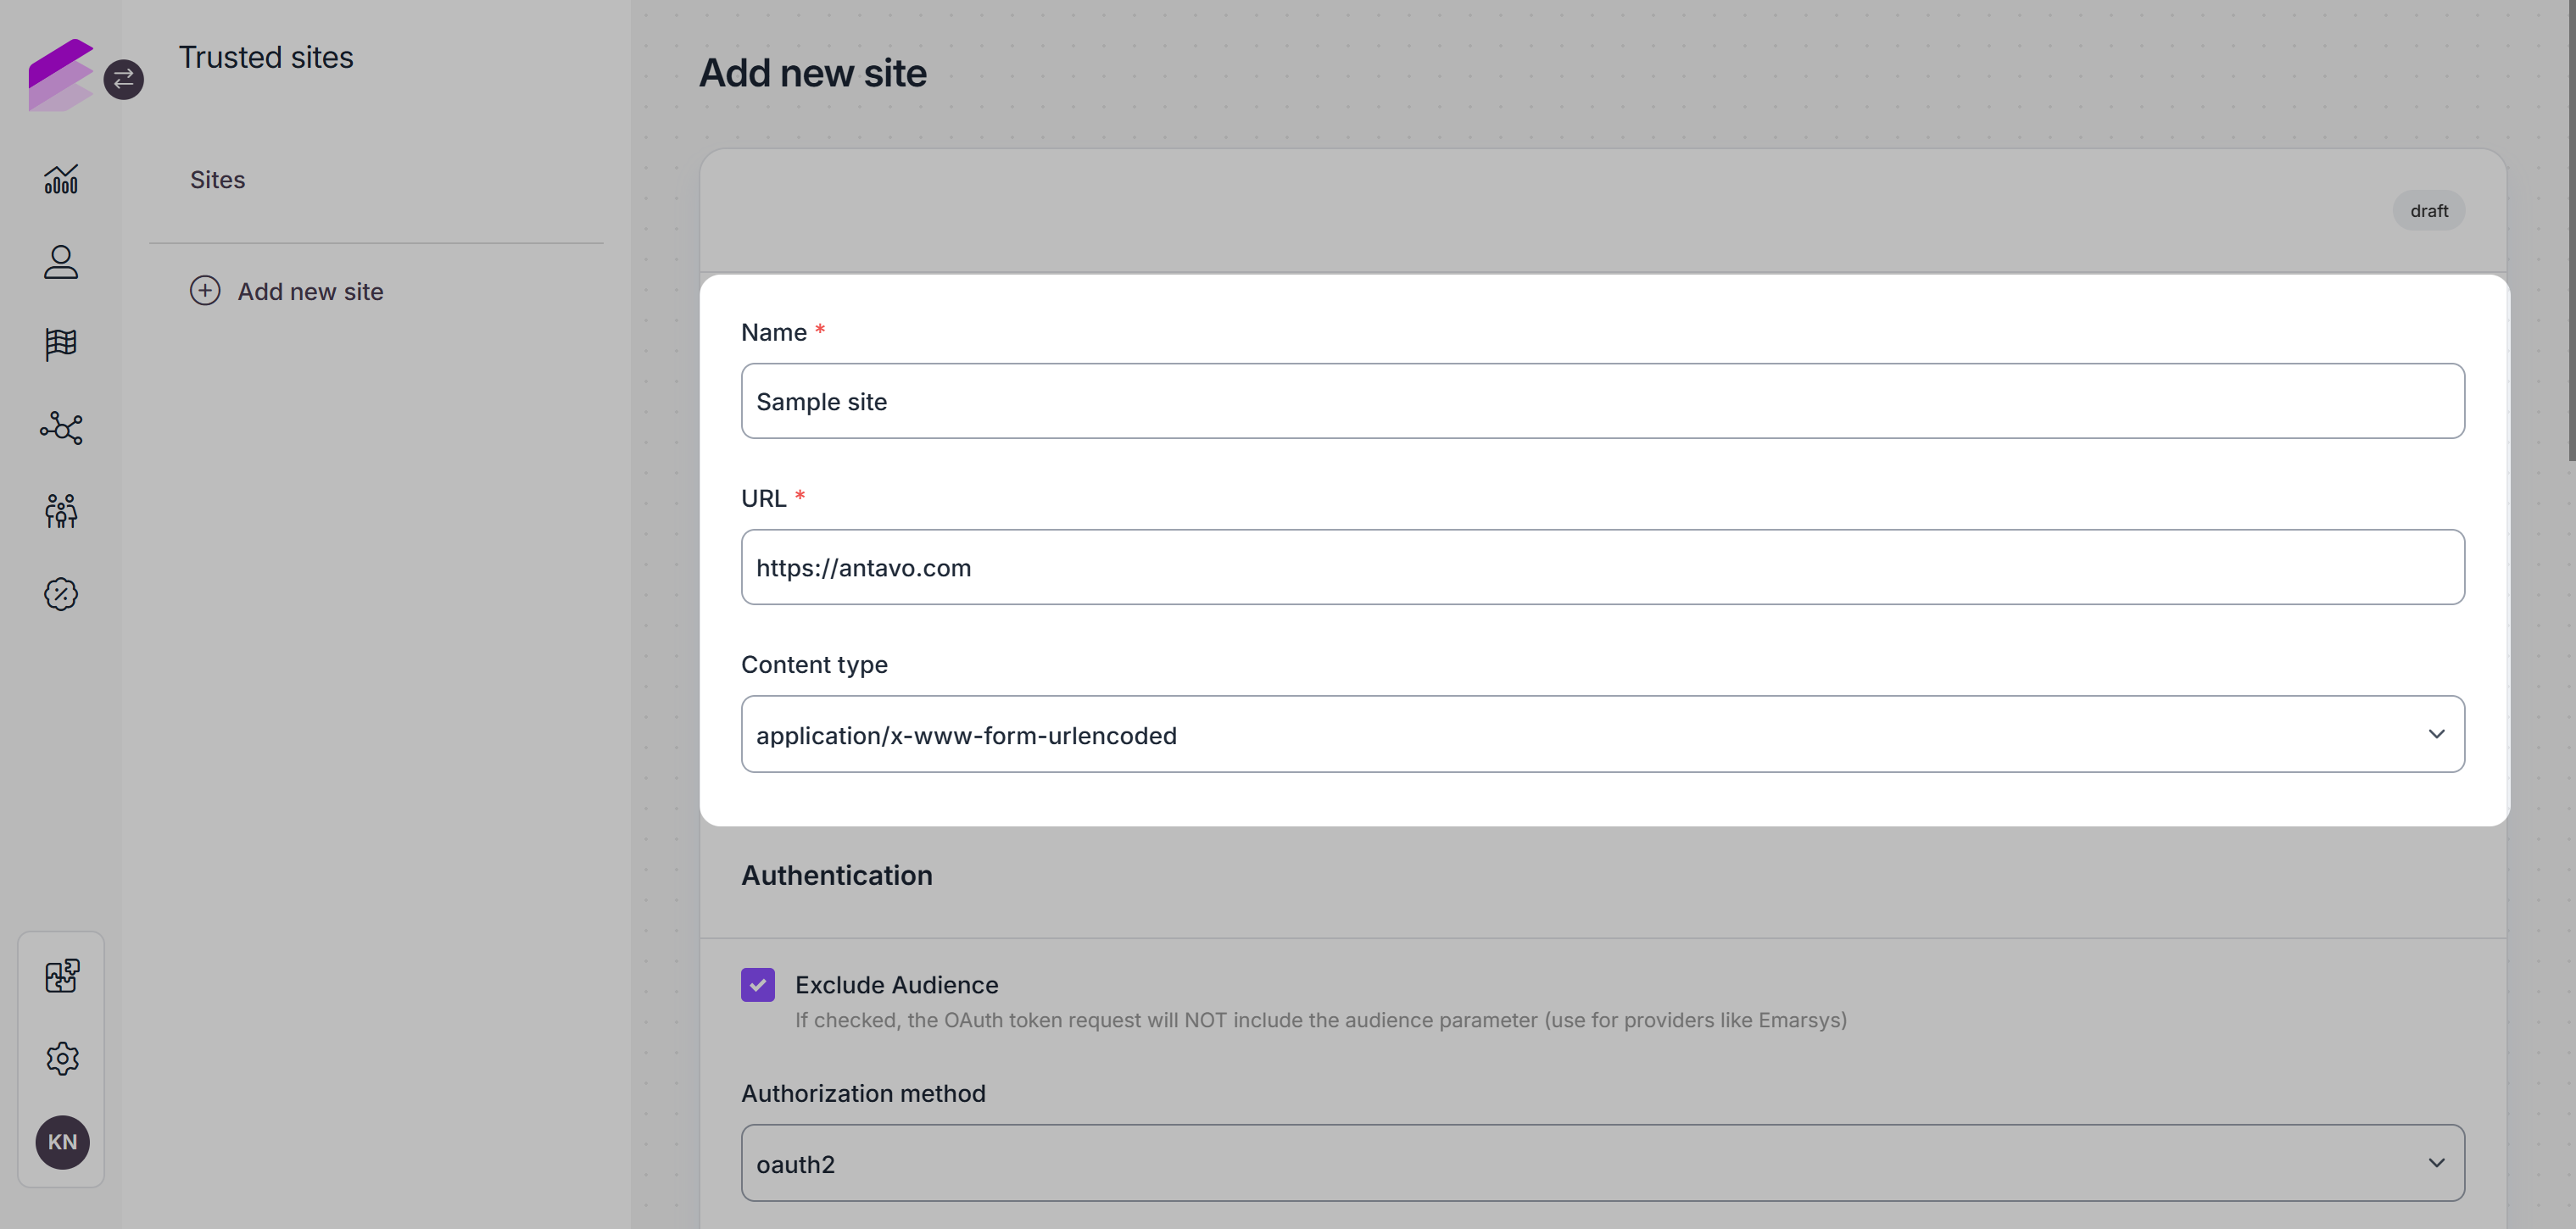
Exclude Audience
Checking this option prevents the OAuth token request from sending theaudienceparameter, which is needed for providers like Emarsys.Authentication method
Choose from five authentication method types, each with specific configuration fields:Basic: Adds a webhook header with basic authentication fields encoded in Base64.
Username
Password
AWS: Adds a complete AWS signature.
Region
Service
Access key ID
Access key secret
Algorithm prefix (optional)
Vendor key (optional)
AWS-S3: Adds a complete AWS signature compatible with Amazon Web Services S3 Bucket communications.
Service
Access key ID
Access key secret
Filename format
JWT: Transmits information as a JSON object.
Algorithm
Select the encryption method: RSA Signature with SHA-256 (RS256) or HMAC with SHA256 (HS256)Secret
The token is signed using this key. Click the eye button to show it or hide it.Payload
Add key-value pairs, the key is always a string, and the value can be any JSON value.Time-to-live
Expiration time in ({number} minute(s)|hour(s)|day(s)|month(s)|year(s)) format
OAuth2: Validates an access token by communicating with the OAuth server.
Consumer key
Consumer secret
Authorization URL
Scope (optional)
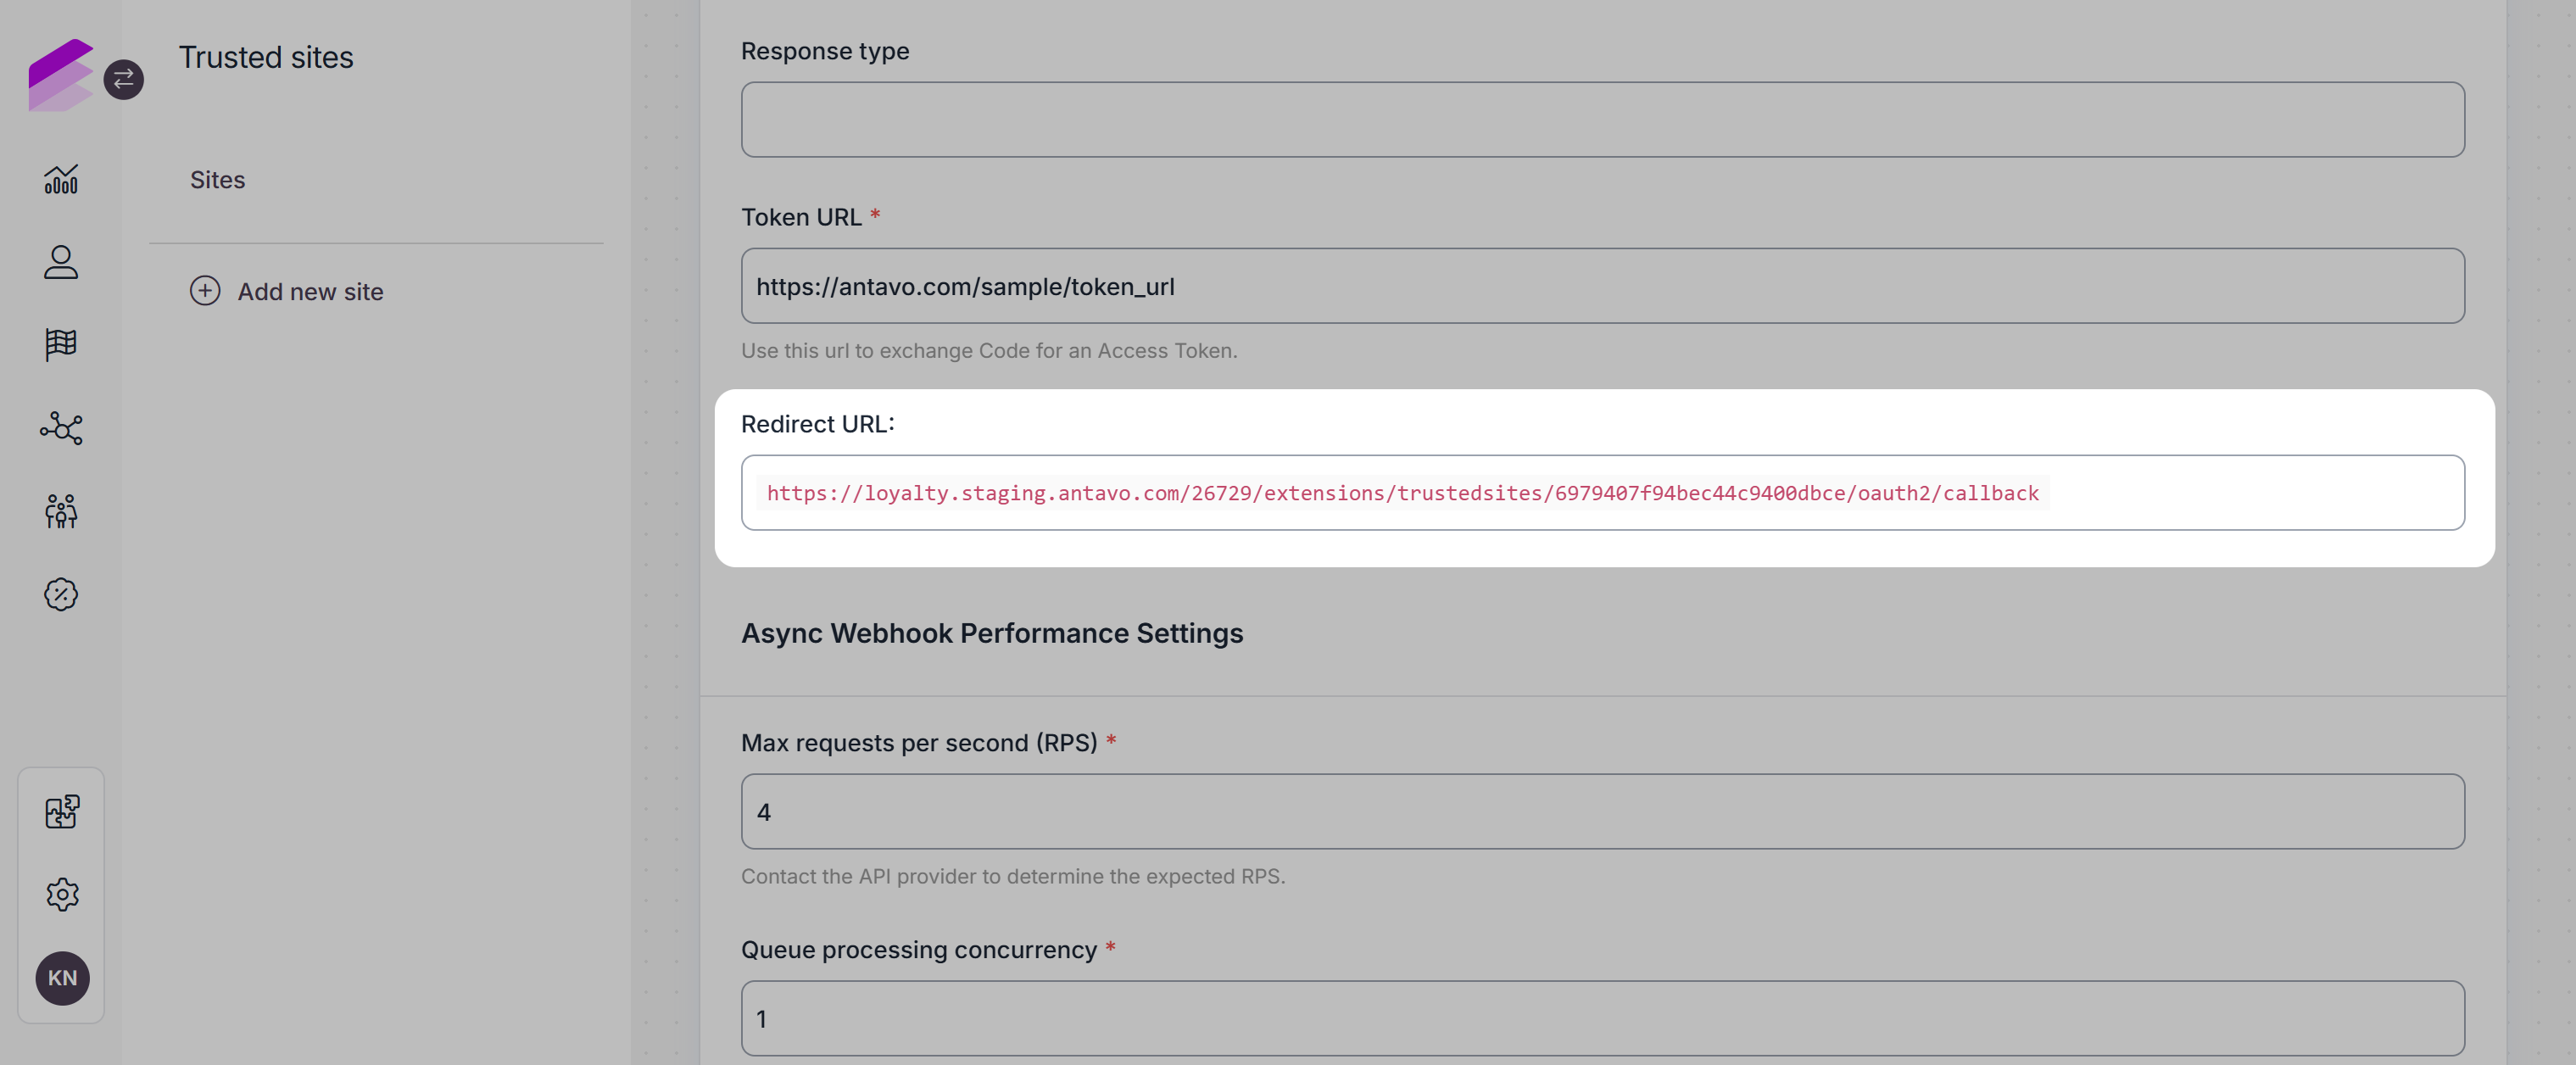
Response type (optional)
Token URL
OAuth 2.0 Client-Secret (RFC 6749): This method allows machine-to-machine authentication using a client ID and client secret. The client requests an access token from the token endpoint and uses it to authenticate calls.
Token URL
Enter the endpoint provided by your OAuth 2.0 provider, which is responsible for issuing access tokens. This URL is typically specified in the provider’s documentation. This is the endpoint the integration will use to request an access token before making authenticated calls.Content type
Define the content type used when requesting the access token. Most providers accept application/x-www-form-urlencoded or application/json, depending on their implementation. Refer to your provider’s requirements.Token expiration
Specify the lifespan of the issued access token in minutes. After this time, the token will expire a new one must be requested. The maximum allowed value is 1440 minutes (24 hours). Choosing a shorter expiration improves security but may require more frequent token refreshes.Client ID
Enter the client identifier issued by your OAuth provider. This is a unique string that identifies your application when requesting the token.Client secret
Provide the secret associated with your client ID. This value must be kept secure, as it proves your application’s identity to the authorization server. Never expose it publicly.Scope (optional)
Specify the scopes your application needs when requesting the access token. Scopes define the permissions granted. Multiple scopes are typically space- or comma-separated (e.g., read:orders write:orders). Leave the field empty if the provider does not require specific scopes.
OAuth 2.0 JWT Private Key (RFC 7519): This method uses a signed JWT instead of a static secret to request an access token. Unlike traditional authentication methods that rely on a username-password pair or a client secret, this approach uses a digital signature created with a private key stored in a PEM file. After authentication, your system receives a standard JWT access token to authorize subsequent calls.
Token URL
Enter the endpoint where your signed JWT will be sent to exchange it for an OAuth 2.0 access token. This URL is usually provided by your OAuth provider.Content Type
Define the content type to use when sending the JWT. This tells the server how to interpret the request payload. Options include application/x-www-form-urlencoded or application/json.Token expiration
Set how long the resulting access token remains valid after issuance. The value must be given in minutes and cannot exceed 120 minutes (2 hours). When the token expires, your system must generate a new JWT and request a new token.Client ID
Enter the unique identifier assigned to your application by the authorization server. This client ID is used to associate the JWT request with your registered app.Private key
Provide the PEM-encoded private key used to sign the JWT. This key proves your system’s identity and must remain confidential. Do not expose it in logs or public repositories.Key ID (optional)
If your key is part of a key set, the key ID (kid) helps the authorization server identify which key was used to sign the JWT. This value is optional and only needed in setups where multiple keys exist.Sign Algorithm
Choose the algorithm used to sign the JWT. Supported values include RS256 and ES256. Make sure your chosen algorithm matches the capabilities of your OAuth provider.Scope (optional)
Define the scopes required by your application. These control what permissions are granted via the access token. Scopes should be listed according to the provider’s format (e.g., space-separated). Leave empty if no specific scope is needed.
.png)
Async Webhook Performance Settings
This section allows you to configure how outbound webhook requests are processed to avoid overloading the receiving system.Maximum number of requests per second (RPS)
Defines the total number of webhook requests that can be sent per second across all threads.
This value is global and not per thread. Before increasing this value, check with the receiving system to ensure it can handle the load. A misconfigured RPS can lead to unintended denial-of-service (DoS) behavior.Number of asynchronous threads handled simultaneously
This controls how many webhook requests are processed in parallel. Increasing the number of threads can improve delivery speed, but it also adds load to the receiving system.
The number of parallel threads does not directly control the RPS value. Do not increase this without understanding the receiving system’s capabilities — otherwise, you risk overloading it.
.png)
After saving the new site, the Redirect URL will be displayed on the page, constructed by the website ID and the callback endpoint.
If no access token has been acquired automatically, a Connect button will appear in the upper right corner. Clicking this button will redirect you to the configured Authorization URL.
If the acquired access token expires, the Connect button will reappear, allowing you to start the process again and acquire a new token. If Antavo has received a Refresh token after exchange, it will also be saved at trusted_sites.auth_params.refresh_token.
If there’s a Refresh token and the Access token expires, the action button Refresh access token will be displayed. Clicking the refresh button will send a POST request to the Token URL to exchange the Refresh token for a new Access token and a new Refresh token.
Activating a trusted site
After saving for the first time, the status of the added authentication is set to draft. This means it appears only in the list of trusted sites on the module configuration page and won’t appear among the options in the Webhook message workflow node’s dropdown.
You can activate it right away using the Set active button on the upper right-hand side of the setup page and confirm the activation in the subsequent dialog. Also, you can deactivate it anytime by clicking Set inactive.