The Data Transfer area is used to load and extract catalog data in bulk. Import and export definitions store reusable processing settings, while Data Tracker provides execution details and error information.
Product Hub can also notify a receiving system when a product is created.
Imports
Imports can create, update, or delete products and product categories from a source file.
Before creating an import
Create the required catalog structure before importing products.
Make sure attributes, families, categories, locales, currencies, and channels referenced by the source already exist.
Use stable codes and SKUs as identifiers.
When uploading a file from a computer, download the sample file offered on the import form and use its headers and value format.
Start with a small, representative file and review the result in Data Tracker.
If the source references images, make sure the files are available under the configured image path.
Creating an import
Navigate to Data Transfer > Imports
Click Create Import
Enter a unique Code
Select the entity Type:
Products - API: Imports product data provided as JSON.
Products: Imports product records from a CSV, XLS, or XLSX file.
Categories: Imports category records from a supported source file.
Select the import source.
Local: Upload a CSV, XLS, or XLSX file.
URL: Enter the URL from which Product Hub can retrieve the source.
SFTP: Configure the connection and identify the source file to retrieve.
Configure the processing settings:
Action: Select whether matching records should be created or updated, or whether records should be deleted.
Validation strategy: Determine how validation errors affect processing.
Allowed errors: Enter the maximum number of invalid rows that can be encountered before the import is stopped.
Field separator: For CSV files, select the character used to separate values.
Select a schedule if the import should run automatically:
On date: Select the date and time when the import should run. Enable Schedule active to activate the scheduled execution.
Repeated: Select the frequency and the time in UTC at which Product Hub should retrieve and process the source. This option is intended for sources, such as URL or SFTP, where an updated file can be retrieved repeatedly.
Click Save Import
Click Import Now to start the import
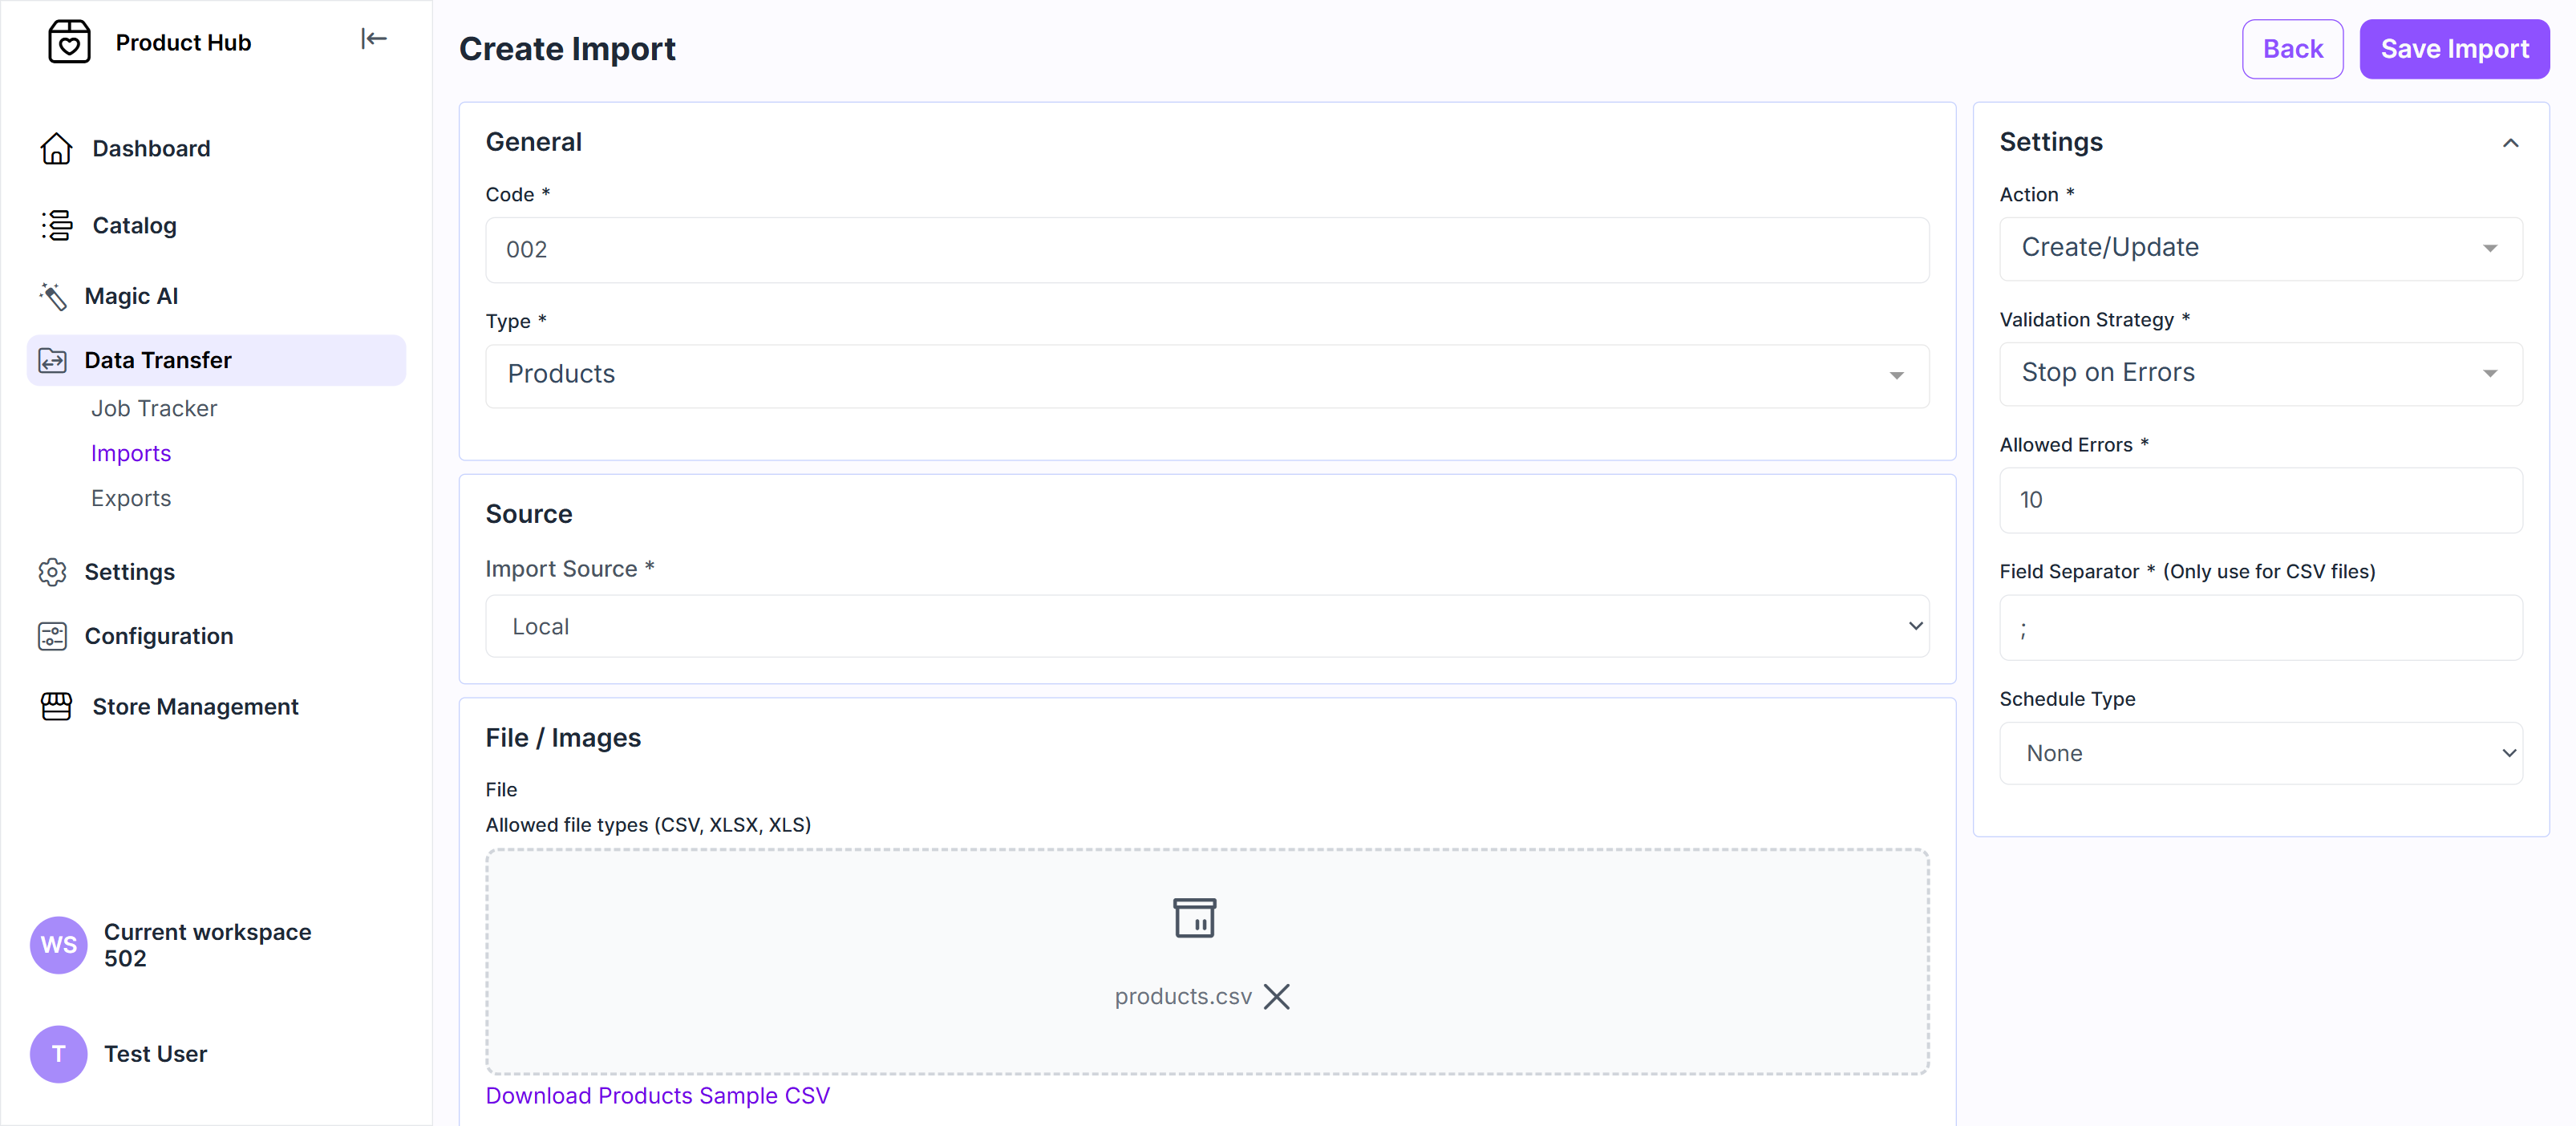
The Code and entity Type cannot be changed after an import or export definition is created. For imports, the selected Source type is also fixed. The History tab on an item’s edit page displays its recorded changes.
Validation behavior
The validation strategy and allowed-error threshold determine whether processing can continue when invalid rows are found.
For example, an allowed-error threshold can let validation continue through a small number of invalid rows instead of stopping at the first issue. This makes it possible to identify more problems in a single run. When the configured limit is exceeded, the job is stopped according to the selected validation strategy.
These settings do not correct invalid source data. Review the errors in Data Tracker, update the source, and run the import again.
Exports
Exports generate files containing selected Product Hub data. Use a saved export when the same field selection, filter, format, or destination will be reused.
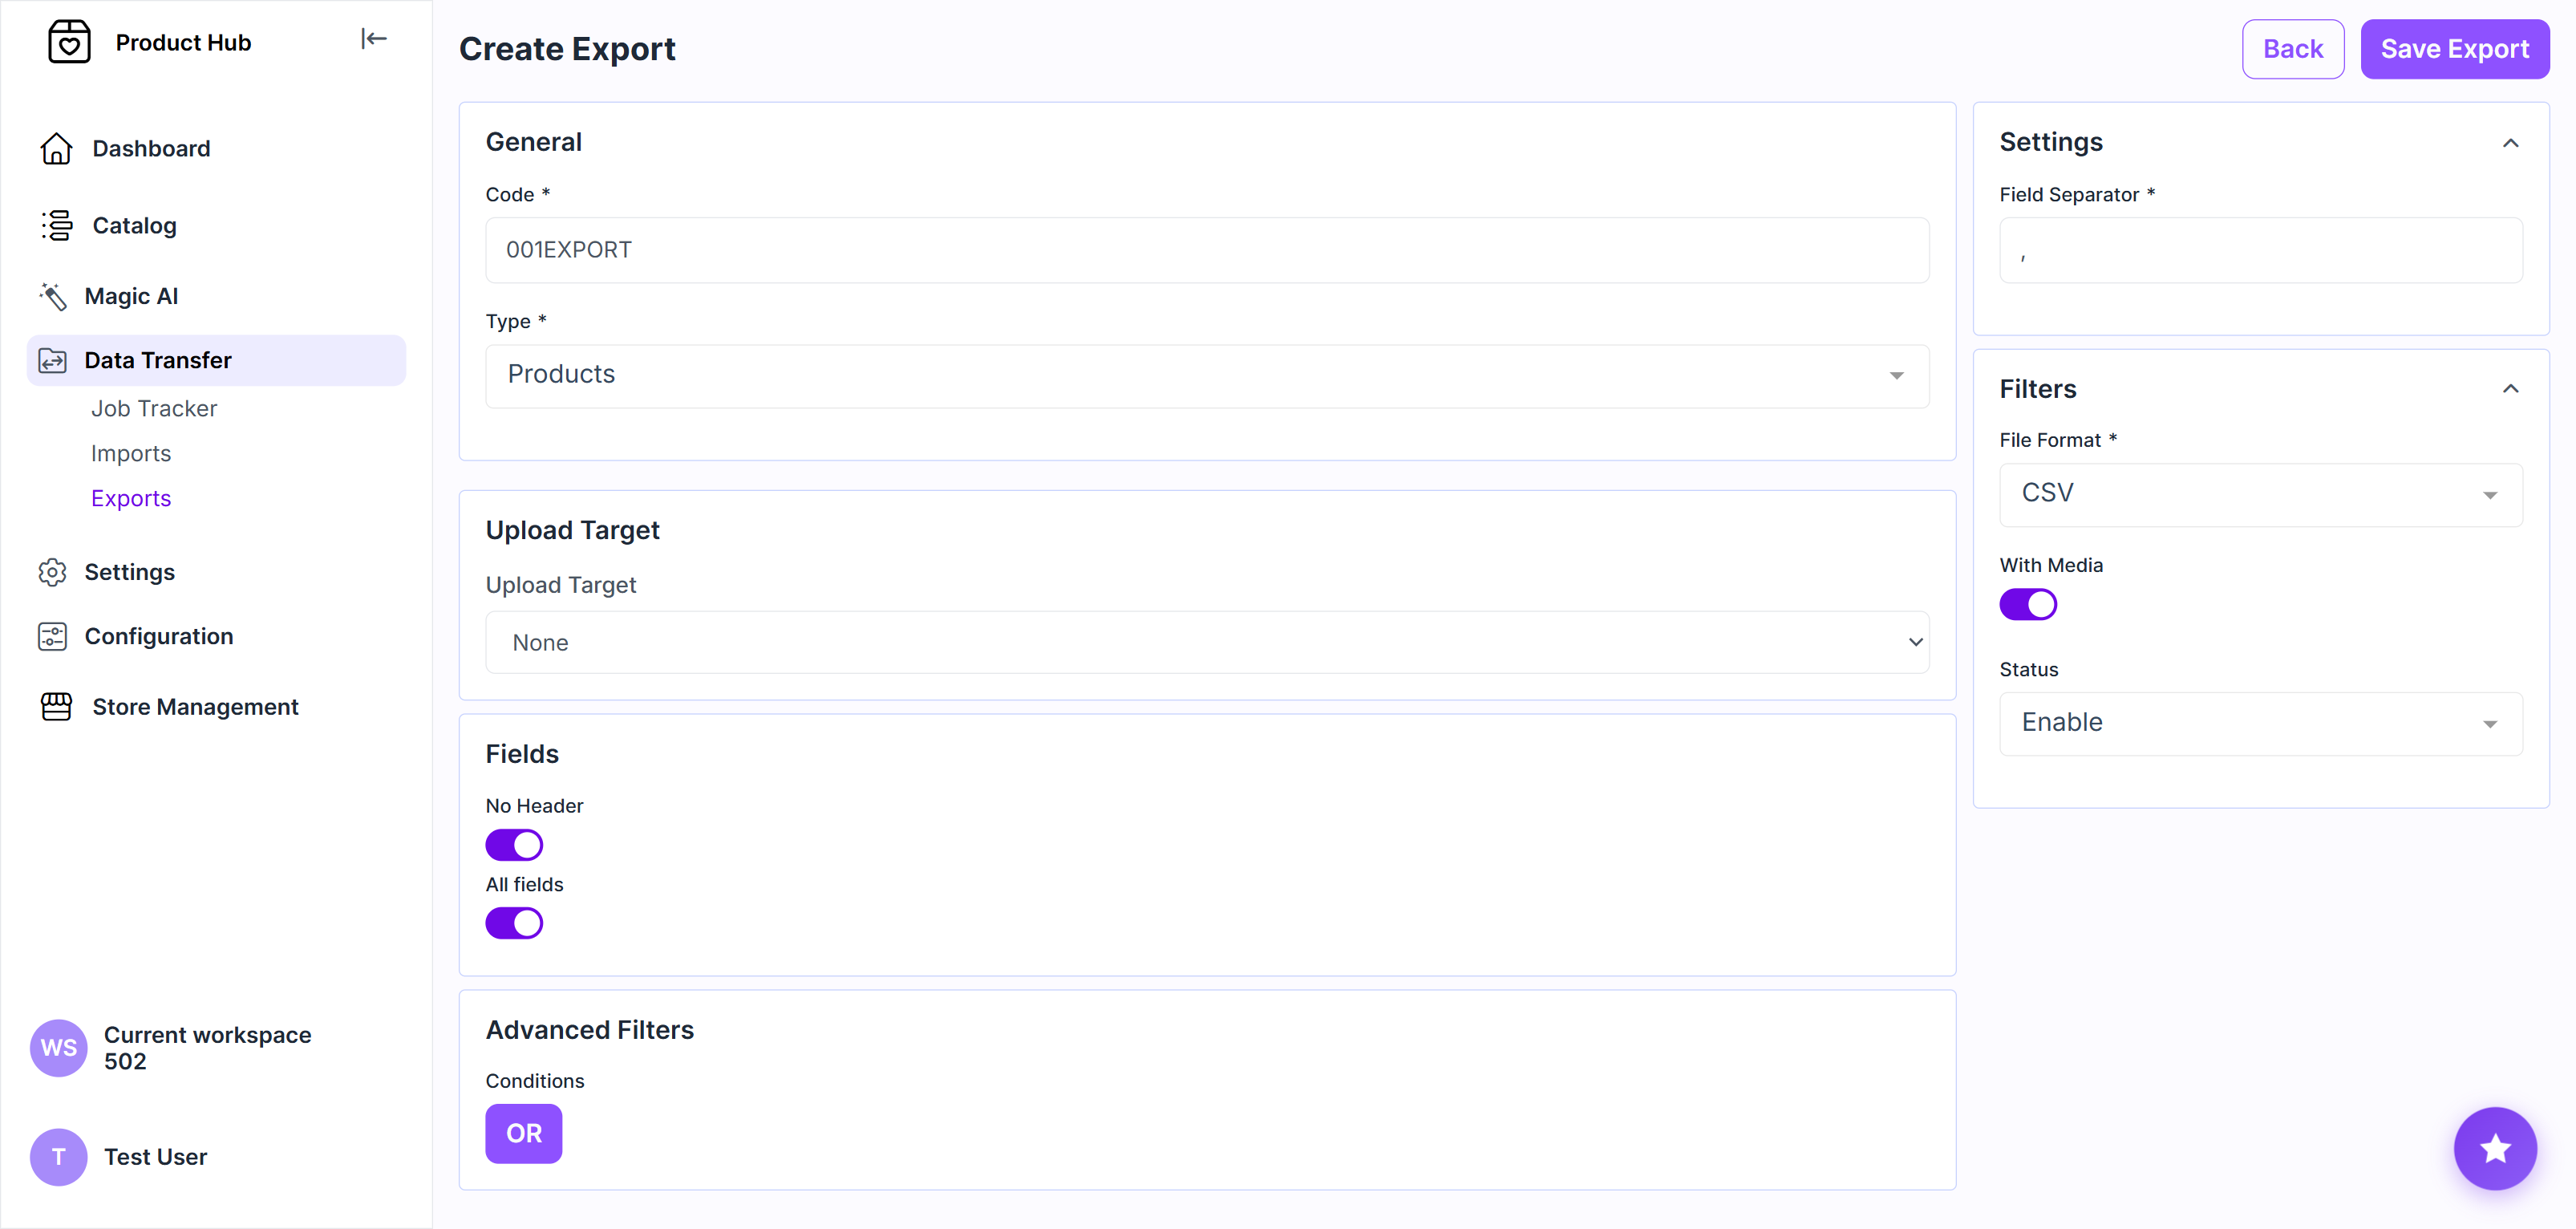
Creating an export
Navigate to Data Transfer > Exports
Click Create Export
Enter a unique code
Select the entity Type to export:
Products
Categories
Select the upload target:
None: if the generated file should be downloaded directly
Select a configured FTP, FTP over SSL, or SFTP target if the file should be delivered to a remote destination.
For a Products export, configure the product-specific content settings:
Enable Headers to include column names in the generated file
Enable All fields to include every available product field
If only specific fields are required, click Add Field and select each field to include. The exported column header can also be renamed.
Apply Filters to restrict which products are included based on attribute value
Use Status to enable or disable the export definition
Select the File format
If CSV is selected, configure the applicable field separator
Enable With Media if the referenced media files should be included in the export
Click Save Export
Click Export to start the export
Job Tracker
Use Data Transfer > Job Tracker to monitor import and export processes. It is the first place to check when expected changes are not visible, or an output file is not generated.
For each job, review:
Current processing status
Start and completion time
Total and processed row counts
Created, updated, skipped, or invalid records, where available
Validation and processing errors
Generated output, error, or log files
Sending product notifications
A webhook can notify a receiving system when a product is created in Product Hub. This avoids requiring the receiving system to check repeatedly for new records.
An export transfers a selected set of product records. The webhook instead sends an event-driven message to the configured URL when the supported product event occurs.
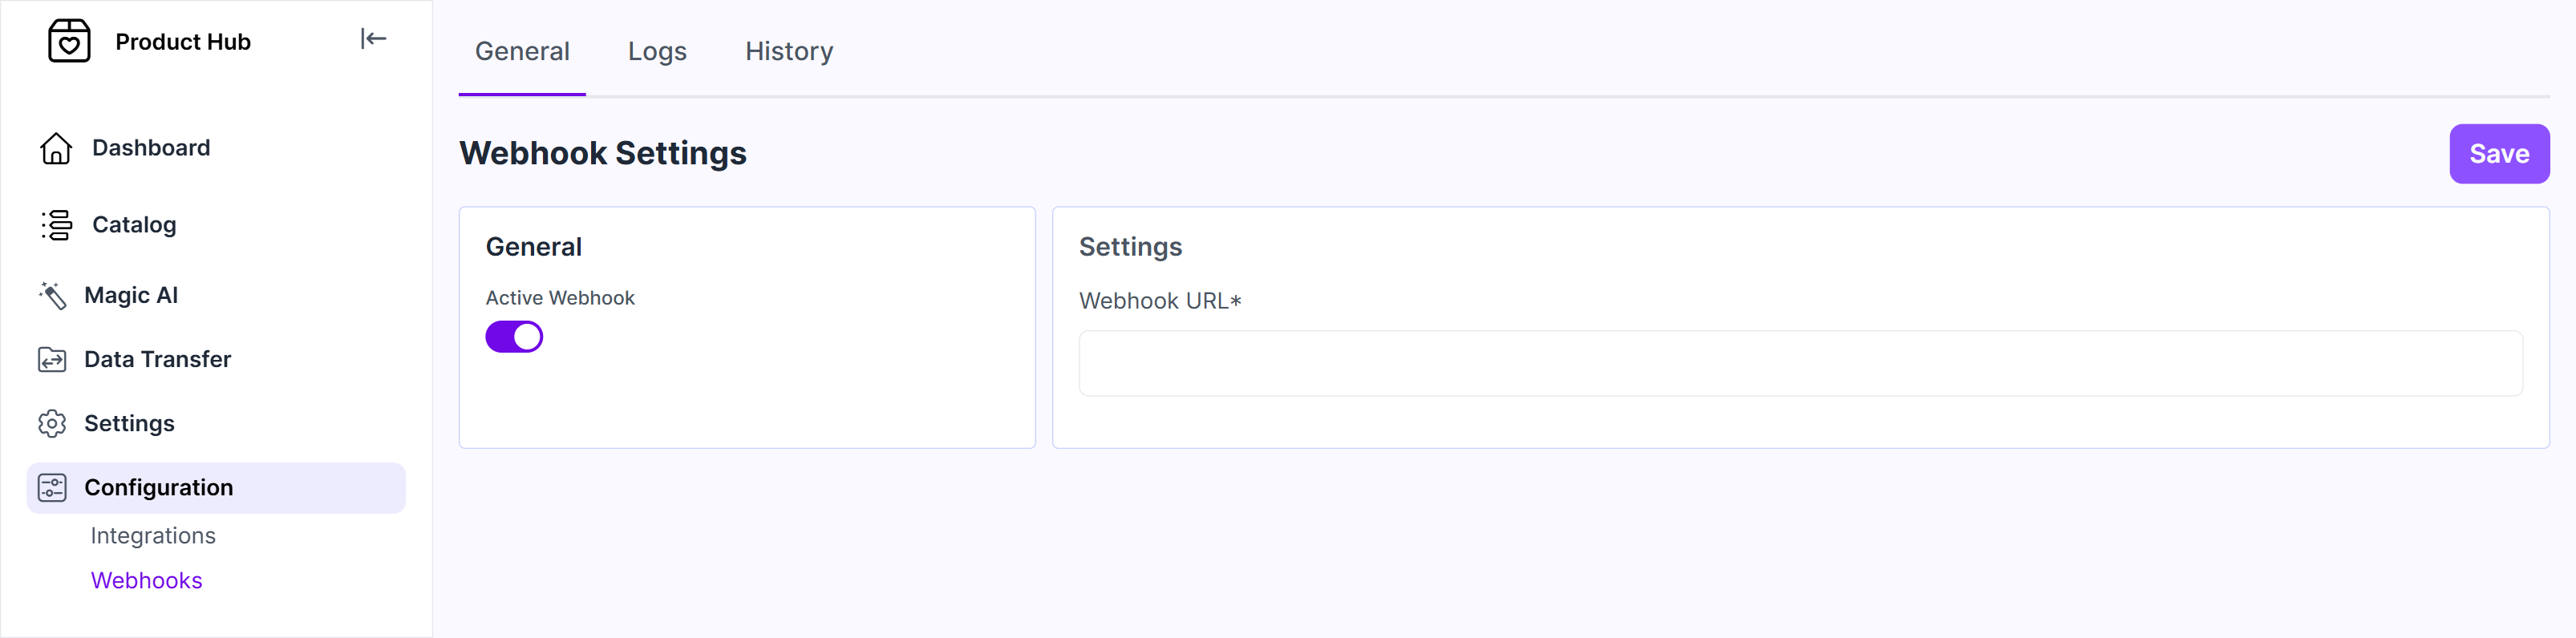
Configuring the webhook
Navigate to Configuration > Webhooks.
Activate the webhook
Enter the receiving endpoint under Webhook URL.
Click Save.
You can disable the webhook anytime to pause delivery without removing the URL.
Webhook logs and history
Open Logs to review delivery attempts and investigate unsuccessful requests.
The History tab displays recorded changes to the webhook configuration.
API access
External systems can also access Product Hub through its REST API. Credentials and permissions are managed under Configuration > Integrations.
Troubleshooting data transfers
Issue | Check |
Imported products are not visible | Review the job status and invalid-row count in Data Tracker |
Only some rows were processed | Review the validation strategy and allowed-error limit |
Images are missing | Check the image path and filenames in the source |
An export file was not generated | Review the export job and its output or error files |
No webhook notification was received | Check whether the webhook is active, verify the URL, and review Logs |