Product Hub catalogs are built in three connected layers. The product schema defines which information a product can store, the category structure organizes products in a hierarchy, and product records contain the actual catalog data.
Most of the reusable catalog setup is covered in this article: attributes, groups, and families define the product schema, while category fields and categories define the catalog hierarchy. Product records use both layers and are covered separately in the Products article.
Layer | Purpose | Components |
Product schema | Defines the fields available on a product and how they are arranged | Attributes, attribute groups, attribute families |
Category structure | Defines the hierarchy used to organize products | Category fields, categories |
Product records | Store the values for individual products | Products |
Several catalog components support localized labels and values, allowing different text to be maintained for each enabled locale while the stable, machine-readable code remains unchanged. Enable the required locales before entering localized catalog content. To use locale-specific product values within a channel, assign those locales to the applicable channel.
Open the Catalog menu to configure these layers.
Building the product schema
The product schema determines what information can be stored for a type of product. Attributes define the individual fields, attribute groups arrange related fields for editors, and an attribute family combines the relevant groups and attributes into the schema assigned to a product.
(1).svg)
Attributes are fields used to store product information. Each attribute has a stable code, a display label, and a type that determines the accepted value and the input displayed on product forms.
Typical attributes include a product name, description, brand, color, price, release date, status, and image. Product Hub also contains system attributes, such as the SKU and name used by the default product family.
Creating an attribute
Navigate to Catalog > Attributes
Click Create Attribute
Enter a unique Code
Use a stable, machine-readable value because the code identifies the field in imports, exports, and integrations.Select the attribute Type
The selected type determines which additional validation and configuration options are available.Complete any settings required for the selected type:
For a Textarea attribute, enable the WYSIWYG editor if formatting tools should be available when entering values.
For a Select or Multiselect attribute, select the required swatch type: text, color, or image. The swatch type cannot be changed later.
Enter the Label displayed to product editors
For text-based attributes, configure Input validation only when the product value must follow a specific format. Text values can be restricted to an email address, decimal number, URL, or regular-expression pattern.
Enable Required only if every product using the attribute must contain a value
For text-based attributes, enable Is unique if the same value must not be used by more than one product.
Enable the applicable scope and behavior settings:
Click Save Attribute
.png)
The attribute type, Value per locale, Value per channel, and Is unique settings cannot be changed after the attribute is created. Review these settings before saving the attribute.
Attribute options
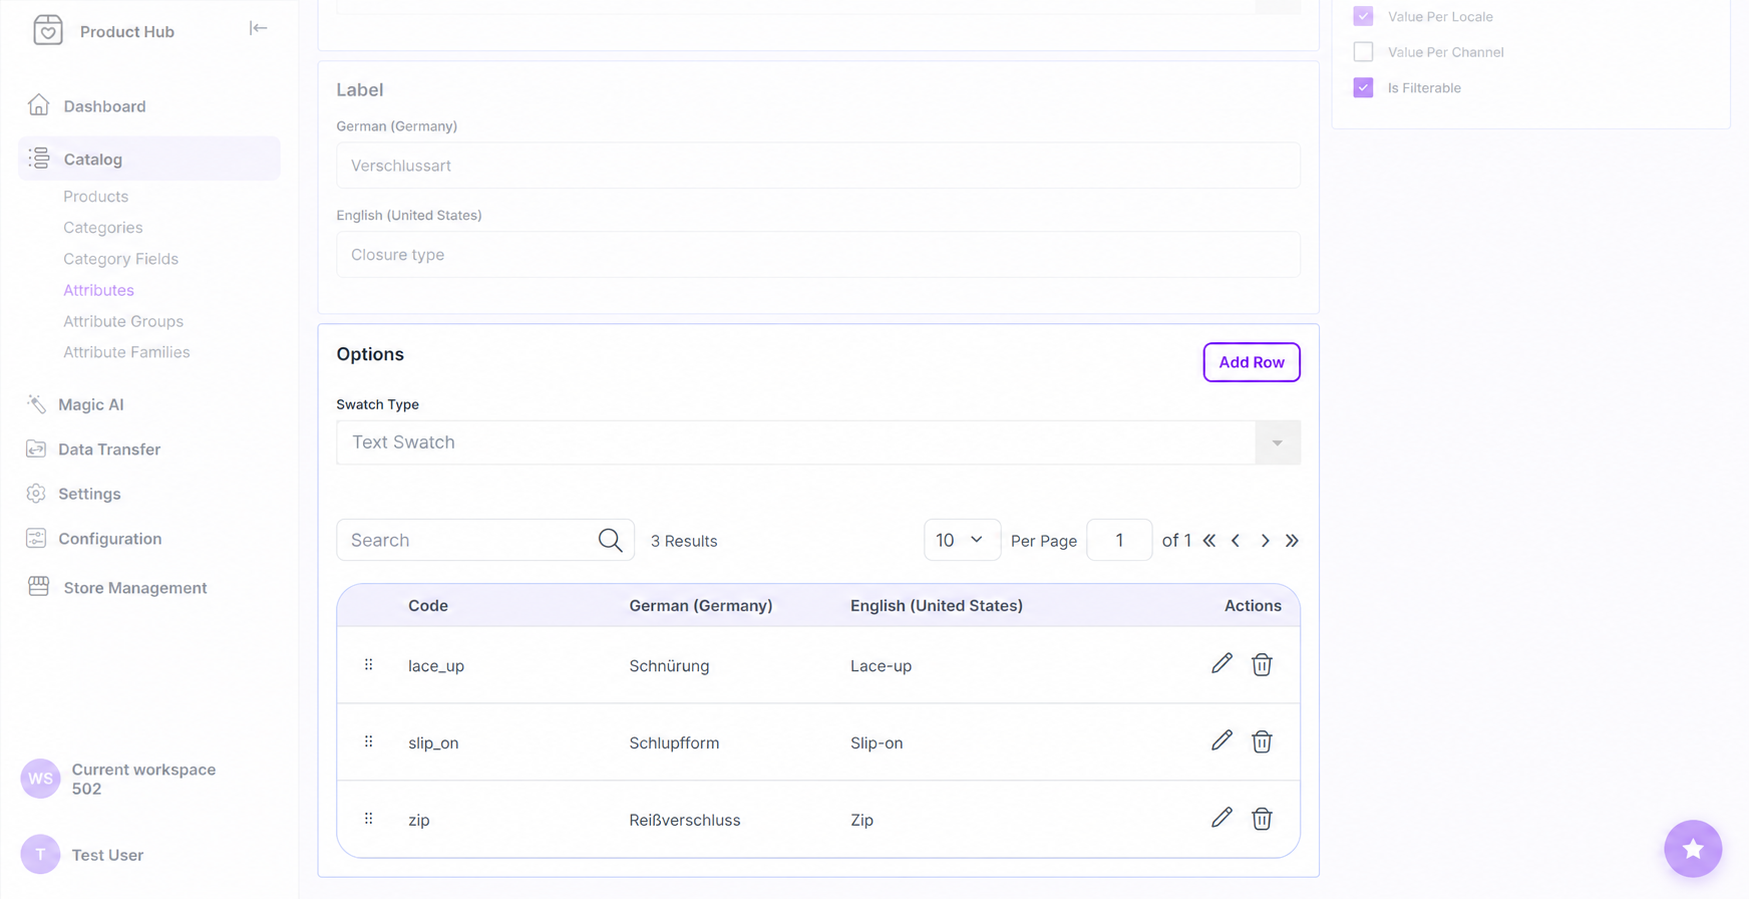
Select, Multiselect and Checkbox attributes require a predefined set of options. Add these options before the attribute is used in product records or imports. The option editor is based on the swatch type selected when the attribute was created. The swatch type cannot be changed later.
Click Add Row to add an option and provide the values required by the selected swatch type:
Text: Enter the option code and its label.
Color: Enter the option code, label, and applicable color.
Image: Enter the option code, label, and applicable image.
For Checkbox attributes, use Add Row in the option editor to define the available values.
Organizing attributes into a product schema
Instead of displaying every field in one long list, related attributes can be placed in groups that appear as separate sections on the product form.
For example, product name, brand, and description can be placed in a Product information group, price fields in Pricing, and images in Media.
An attribute family defines a product's schema. It determines which attribute groups and attributes appear when a product assigned to the family is edited. Create separate families when product types require different sets of information.
For example, a Footwear family can include size, color, and material, while a Gift card family can use value and validity attributes.
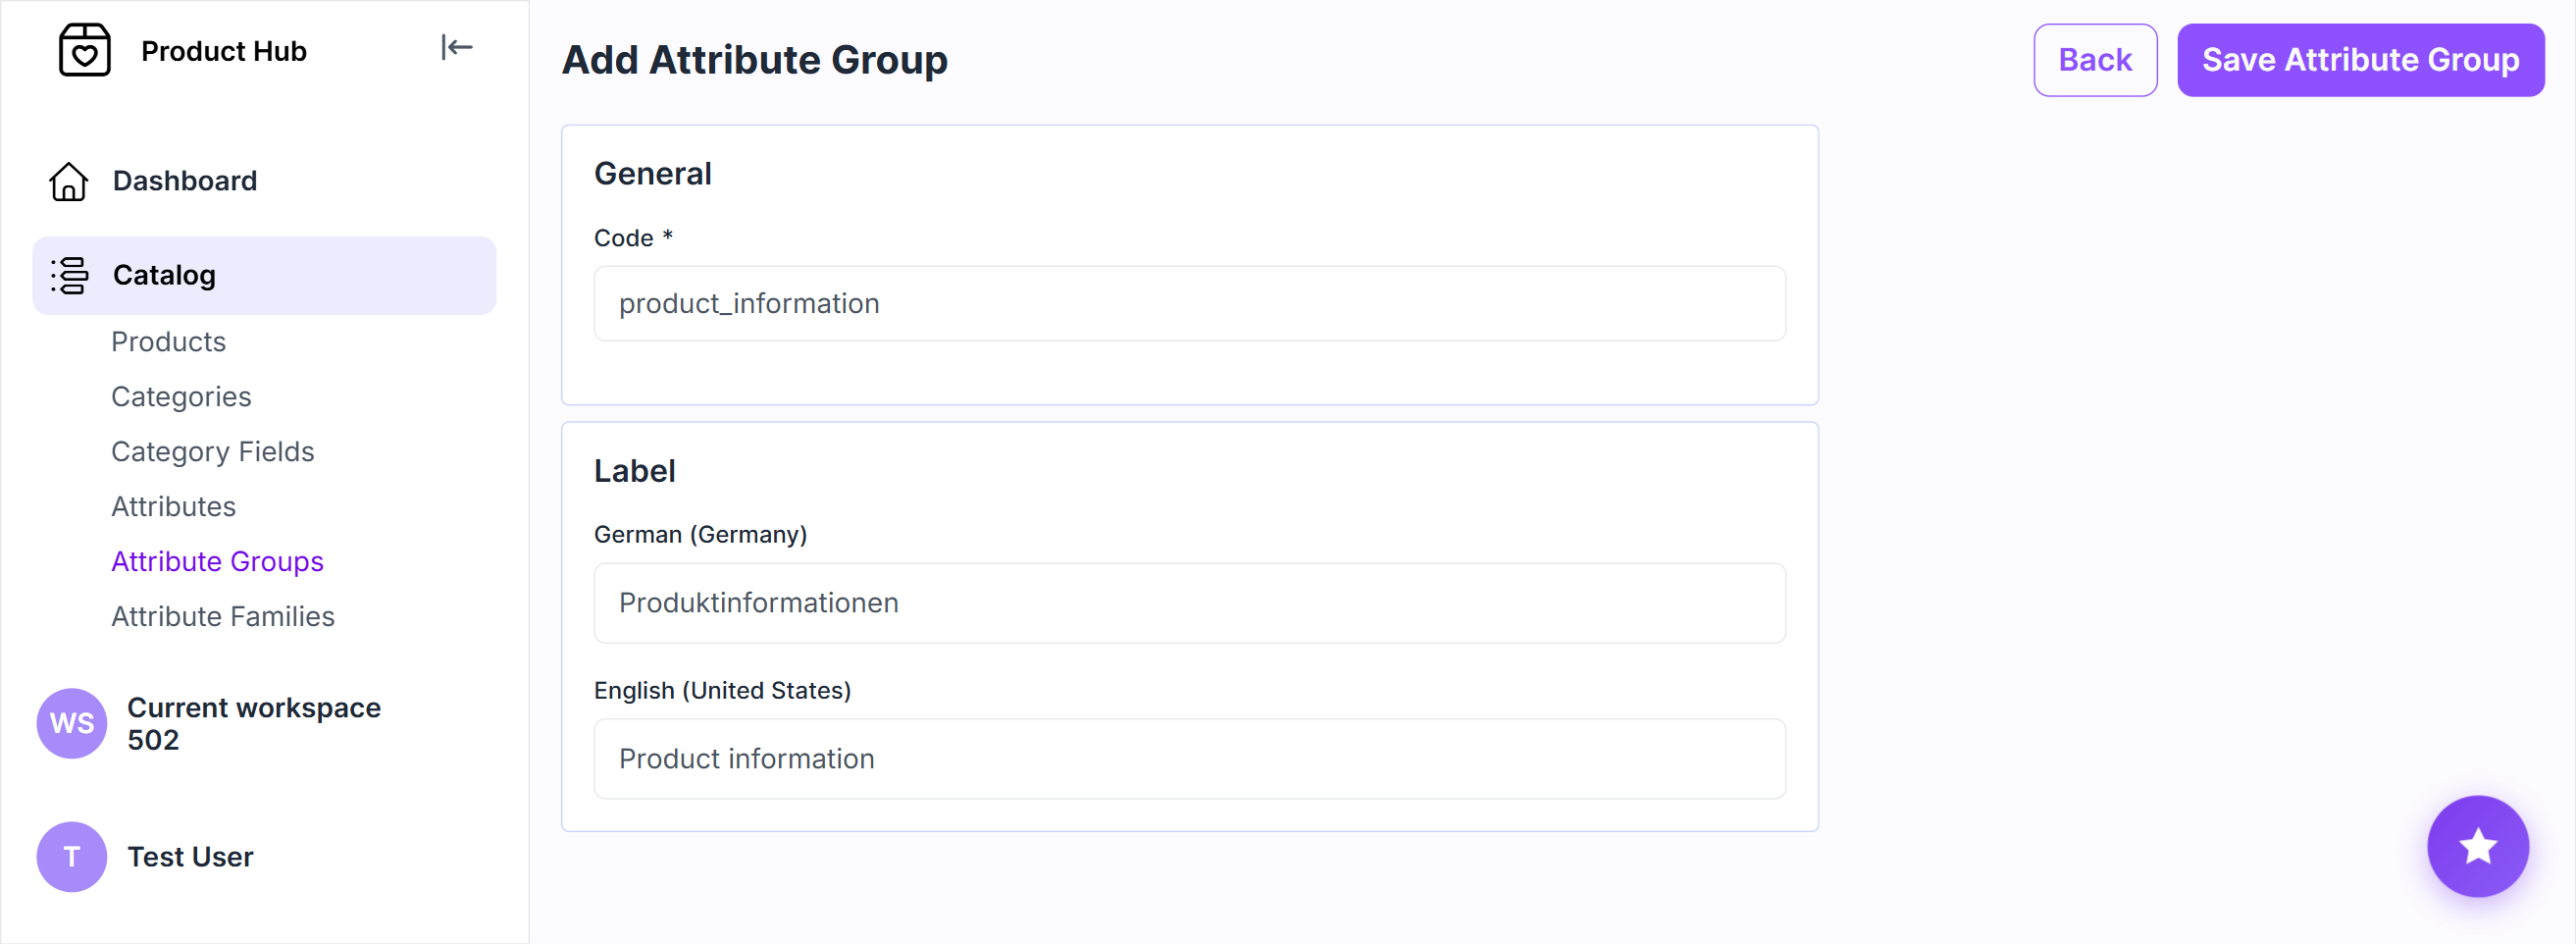
1. Create the attribute groups
Create the groups required to organize the product form before configuring the family.
Navigate to Catalog > Attribute Groups
Click Create Attribute Group
Enter a unique Code and Label
Click Save Attribute Group
A group cannot be deleted while it is assigned to an attribute family.
2. Create the attribute family
An attribute family defines the schema of a product. It controls which attribute groups and attributes appear when a product is edited.
For example, a Footwear family may include size, color, and material attributes, while a gift card family may include value and validity attributes.
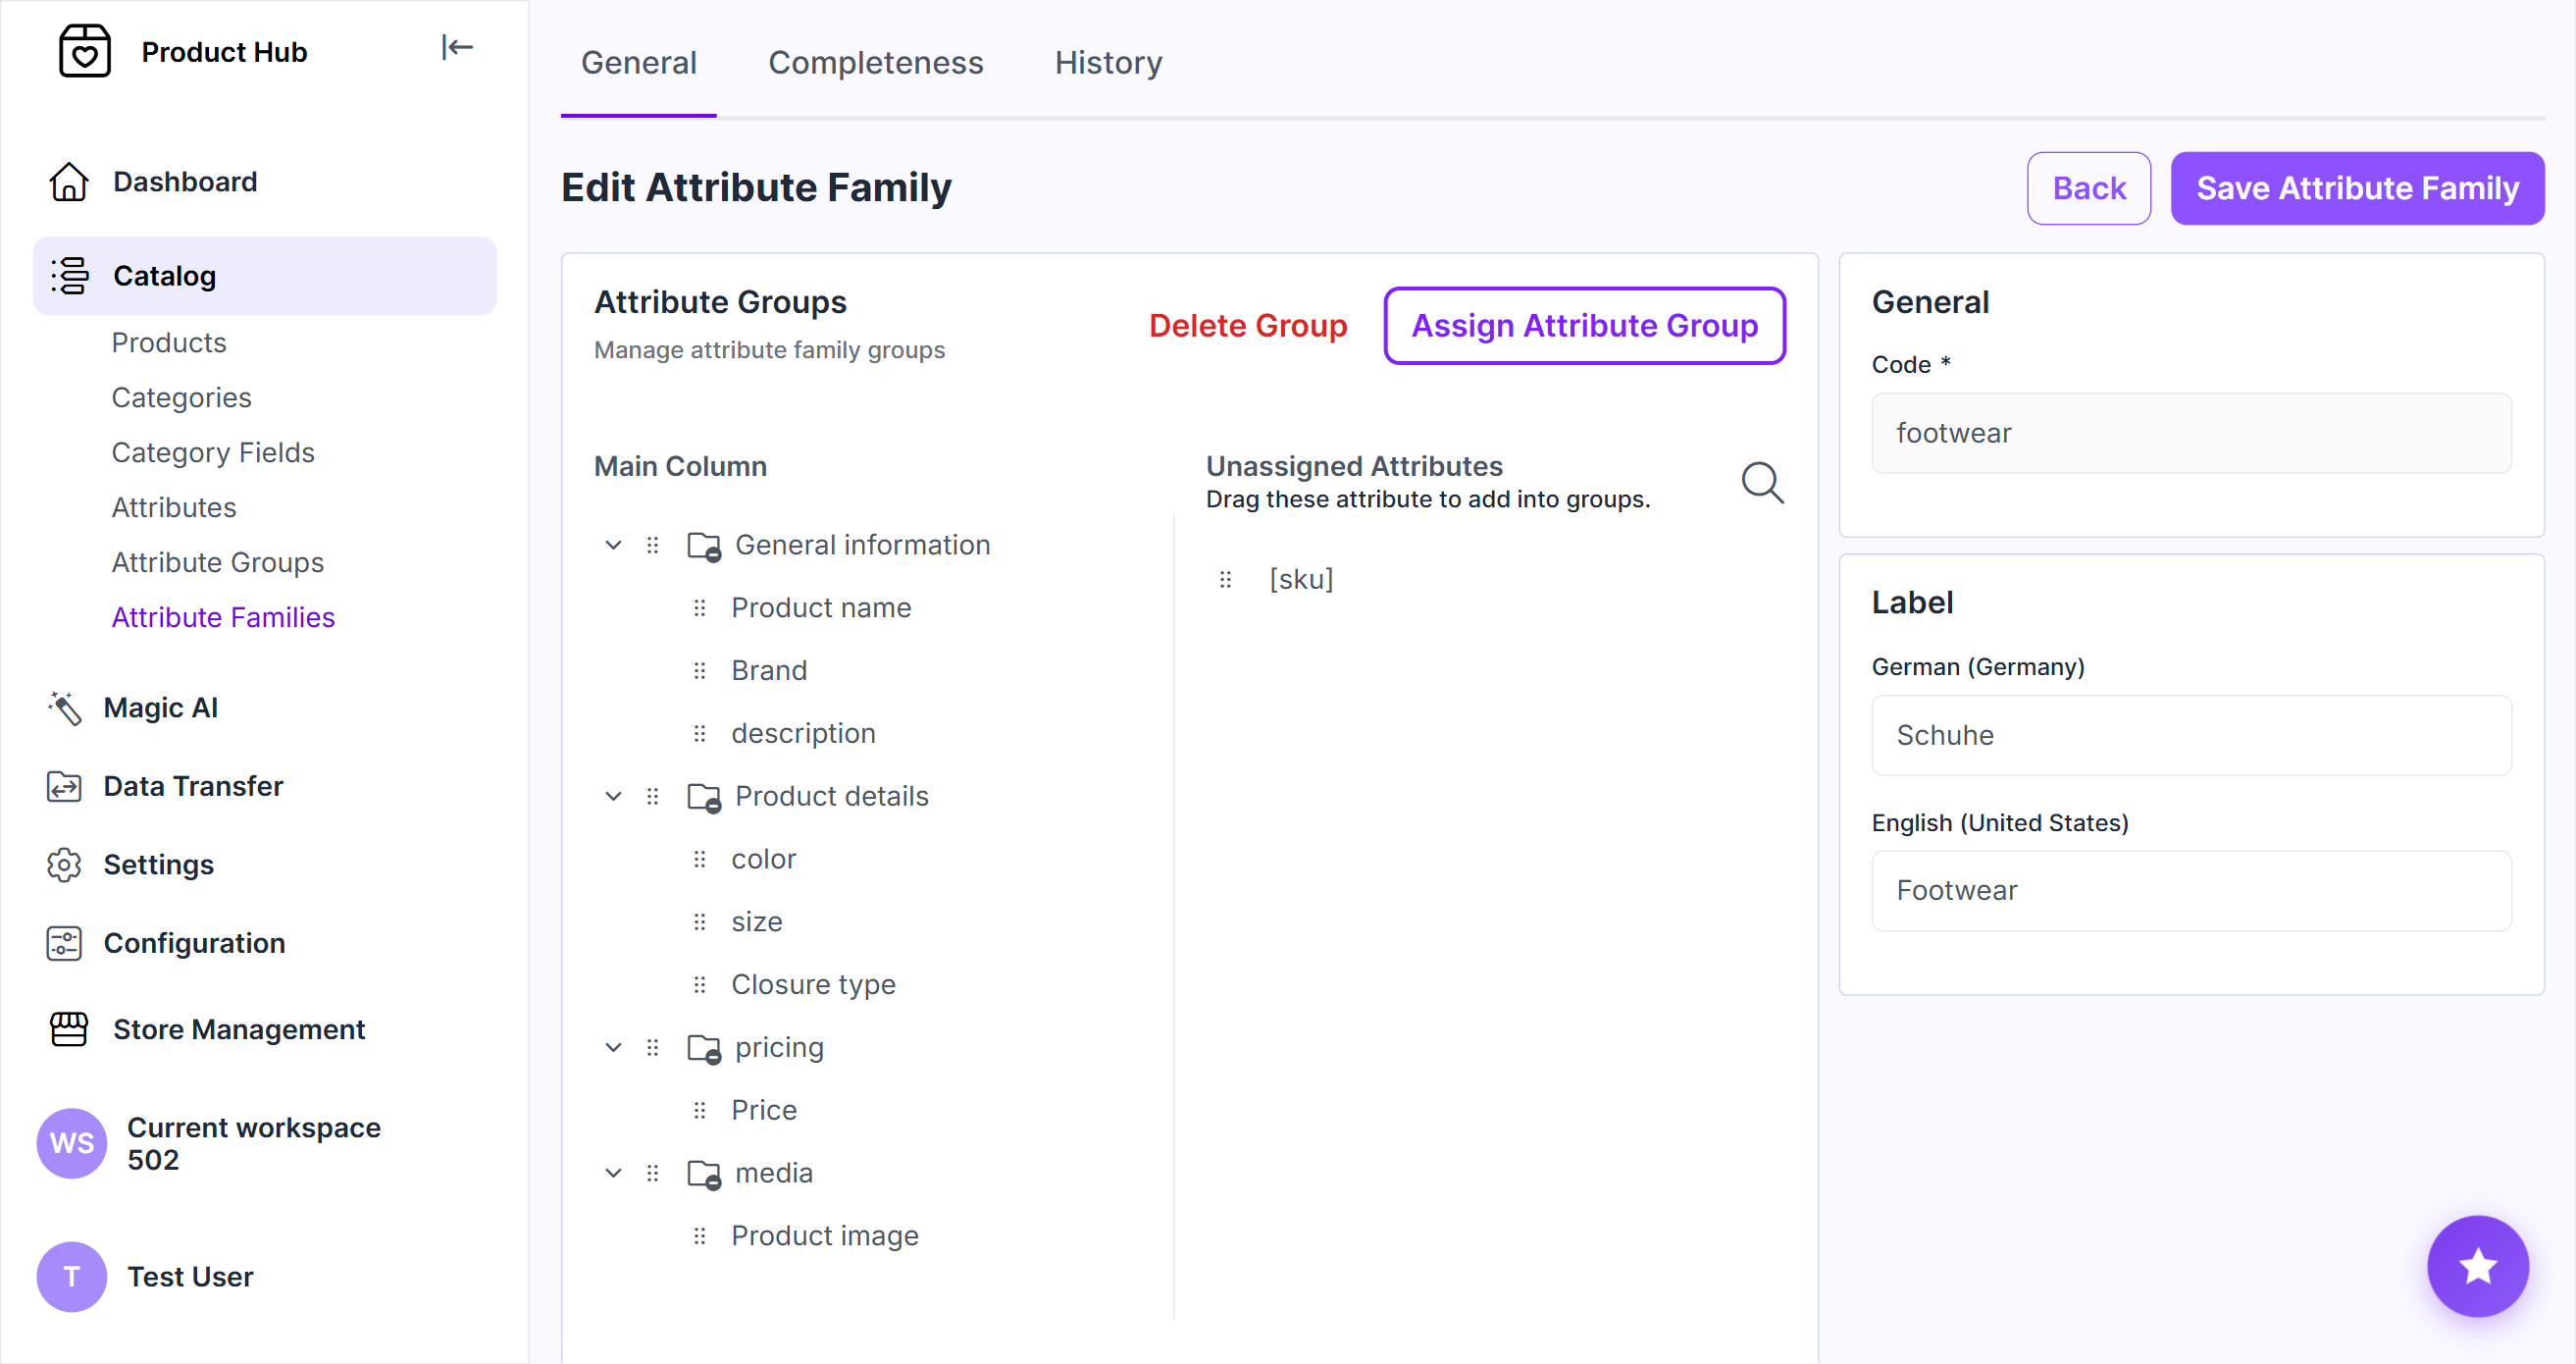
Navigate to Catalog > Attribute Families
Click Create Attribute Family
Enter a unique Code and Label
Click Assign Attribute Group and add the groups required by products in this family
Drag unassigned attributes into the applicable groups
Arrange the groups and attributes in the order in which they should appear on product forms
Click Save Attribute Family
Building the category structure
Categories organize products in a hierarchy but do not determine which fields are available on a product. This remains controlled by the product's attribute family.
Configuring category fields
Category fields define the information stored on categories, just as product attributes define information stored on products. Use them when categories need more than a code and parent relationship, such as a display name or description.
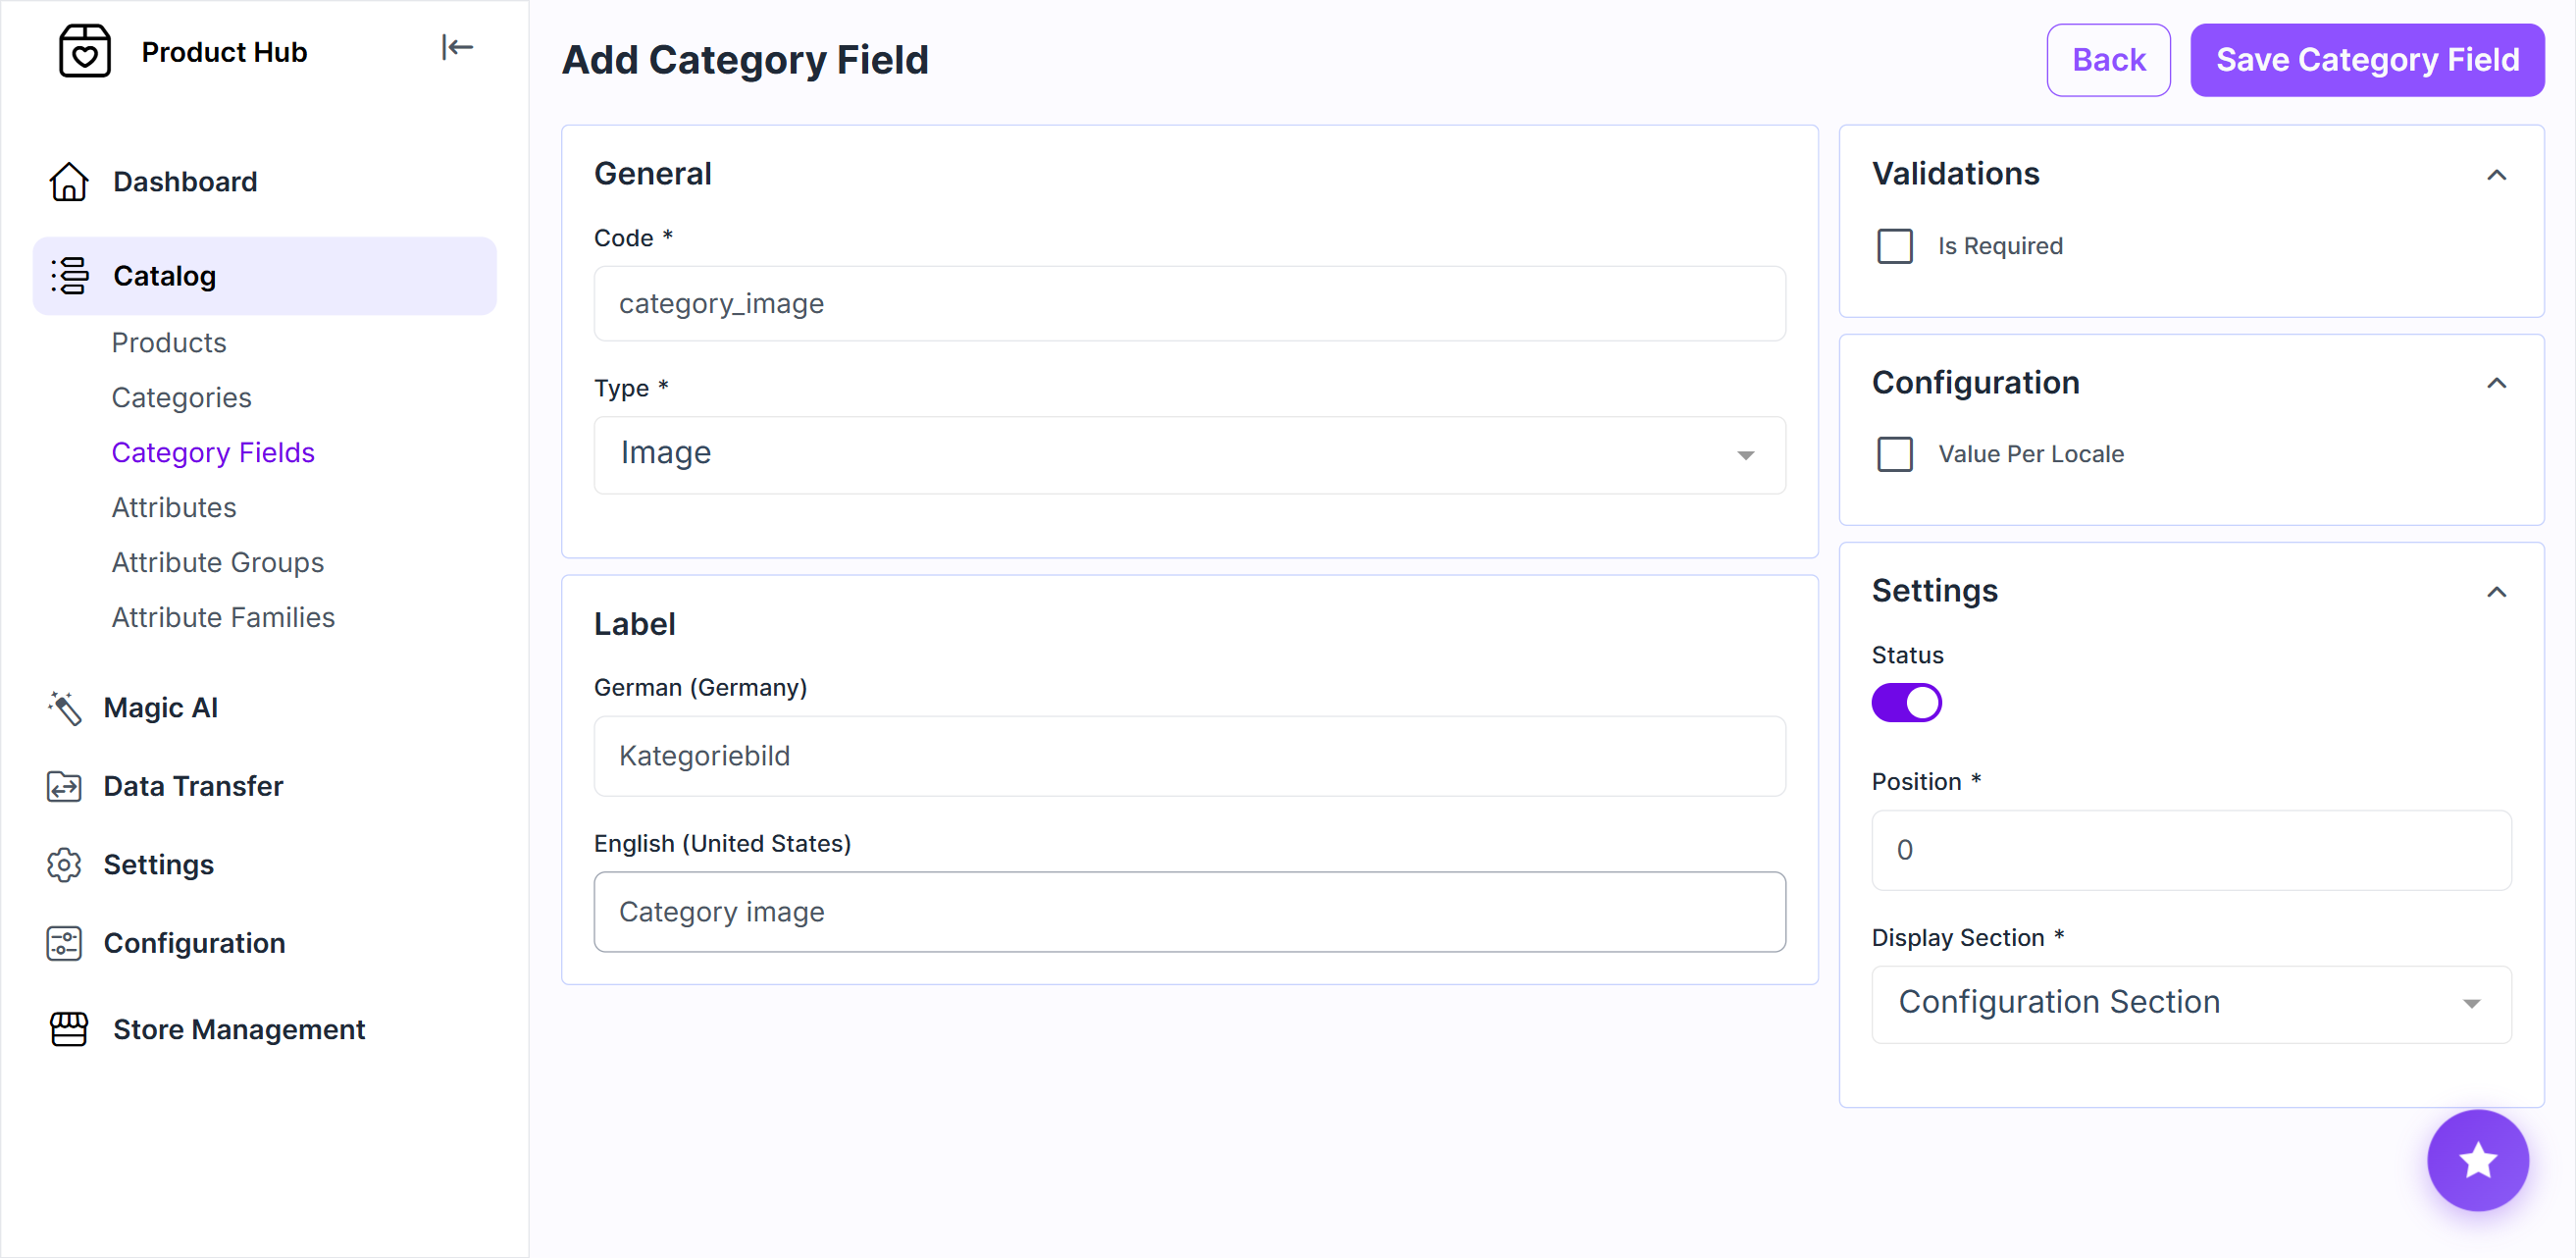
Navigate to Catalog > Category Fields
Click Create Category Field
Enter the unique field Code and select the field Type
The selected type determines which additional validation and configuration options are available.Enter the label
For Select and Multiselect fields, define the available options
Configure the applicable validation and scope
The configuration follows the steps of creating product attributes. Use validation only when needed and enable locale scope only when the value differs between locales.Under Settings, configure how the field appears in the category editor:
Status: Determines whether the field is displayed.
Position: Determines the field’s order in the interface.
Display section: Places the field in either the General or Configuration section of the category editor
Click Save Category Field
Creating the category hierarchy
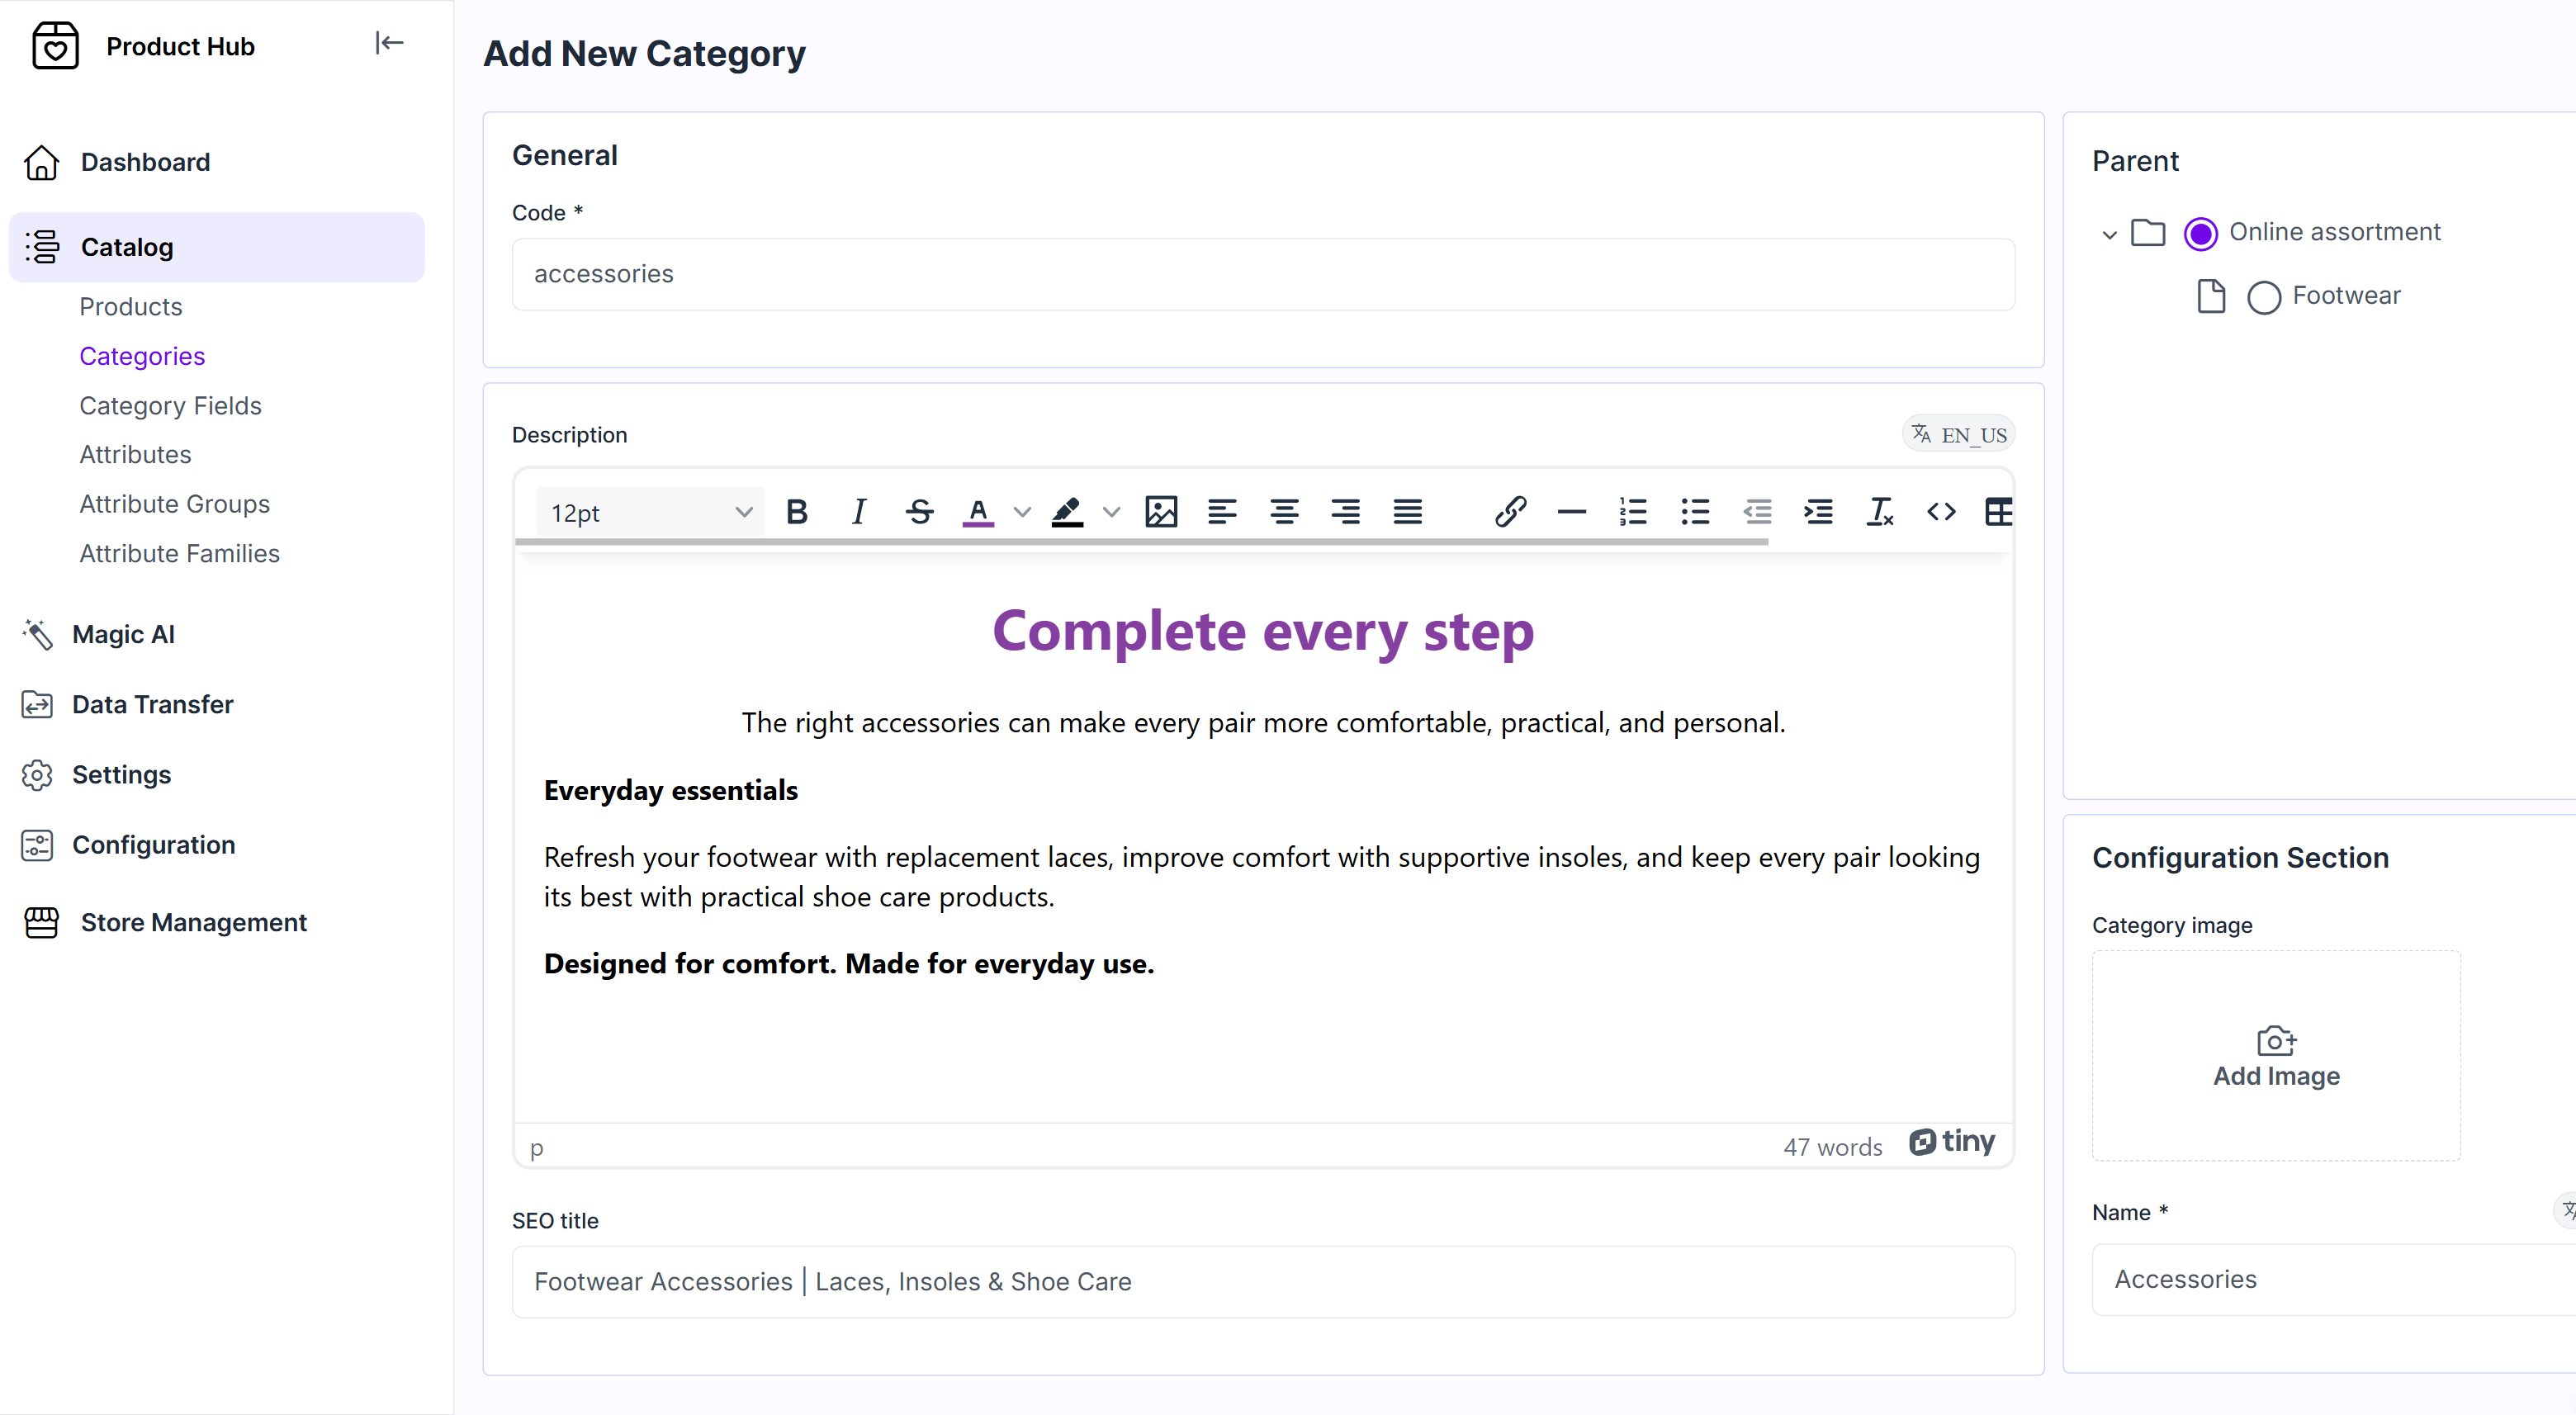
Categories organize products into a hierarchy. A category can be created at the root level or below another category selected as its parent.
Navigate to Catalog > Categories
Click Create Category
Enter a unique Code
Complete the configured category fields, such as display name and description
To create a nested category, select the applicable Parent category
Click Save Category
The Display name column in the Categories list reflects parent–child relationships, making the category hierarchy visible directly in the list.
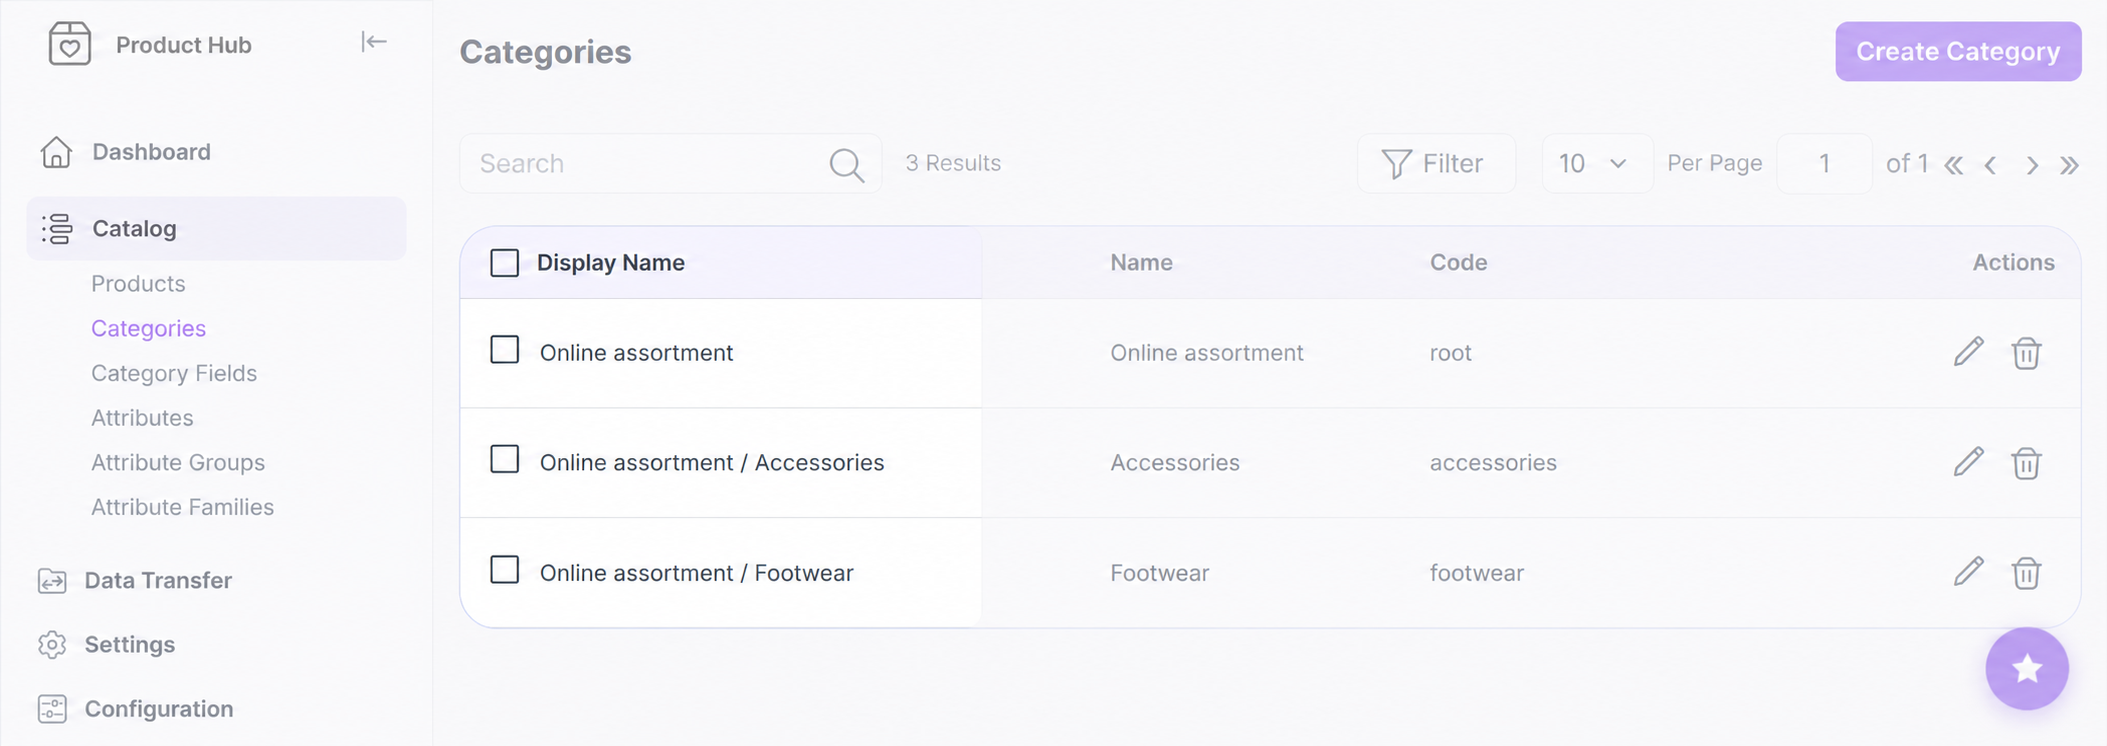
Deleting a parent category also deletes its child categories.
For the actions available across catalog lists, see Working with Product Hub records. After the category hierarchy has been prepared, make sure you complete the required channel configuration, then continue with Products.