You can define action attributes that can be included in requests sent to the Events API as an attribute of any event, including built-in and custom events.
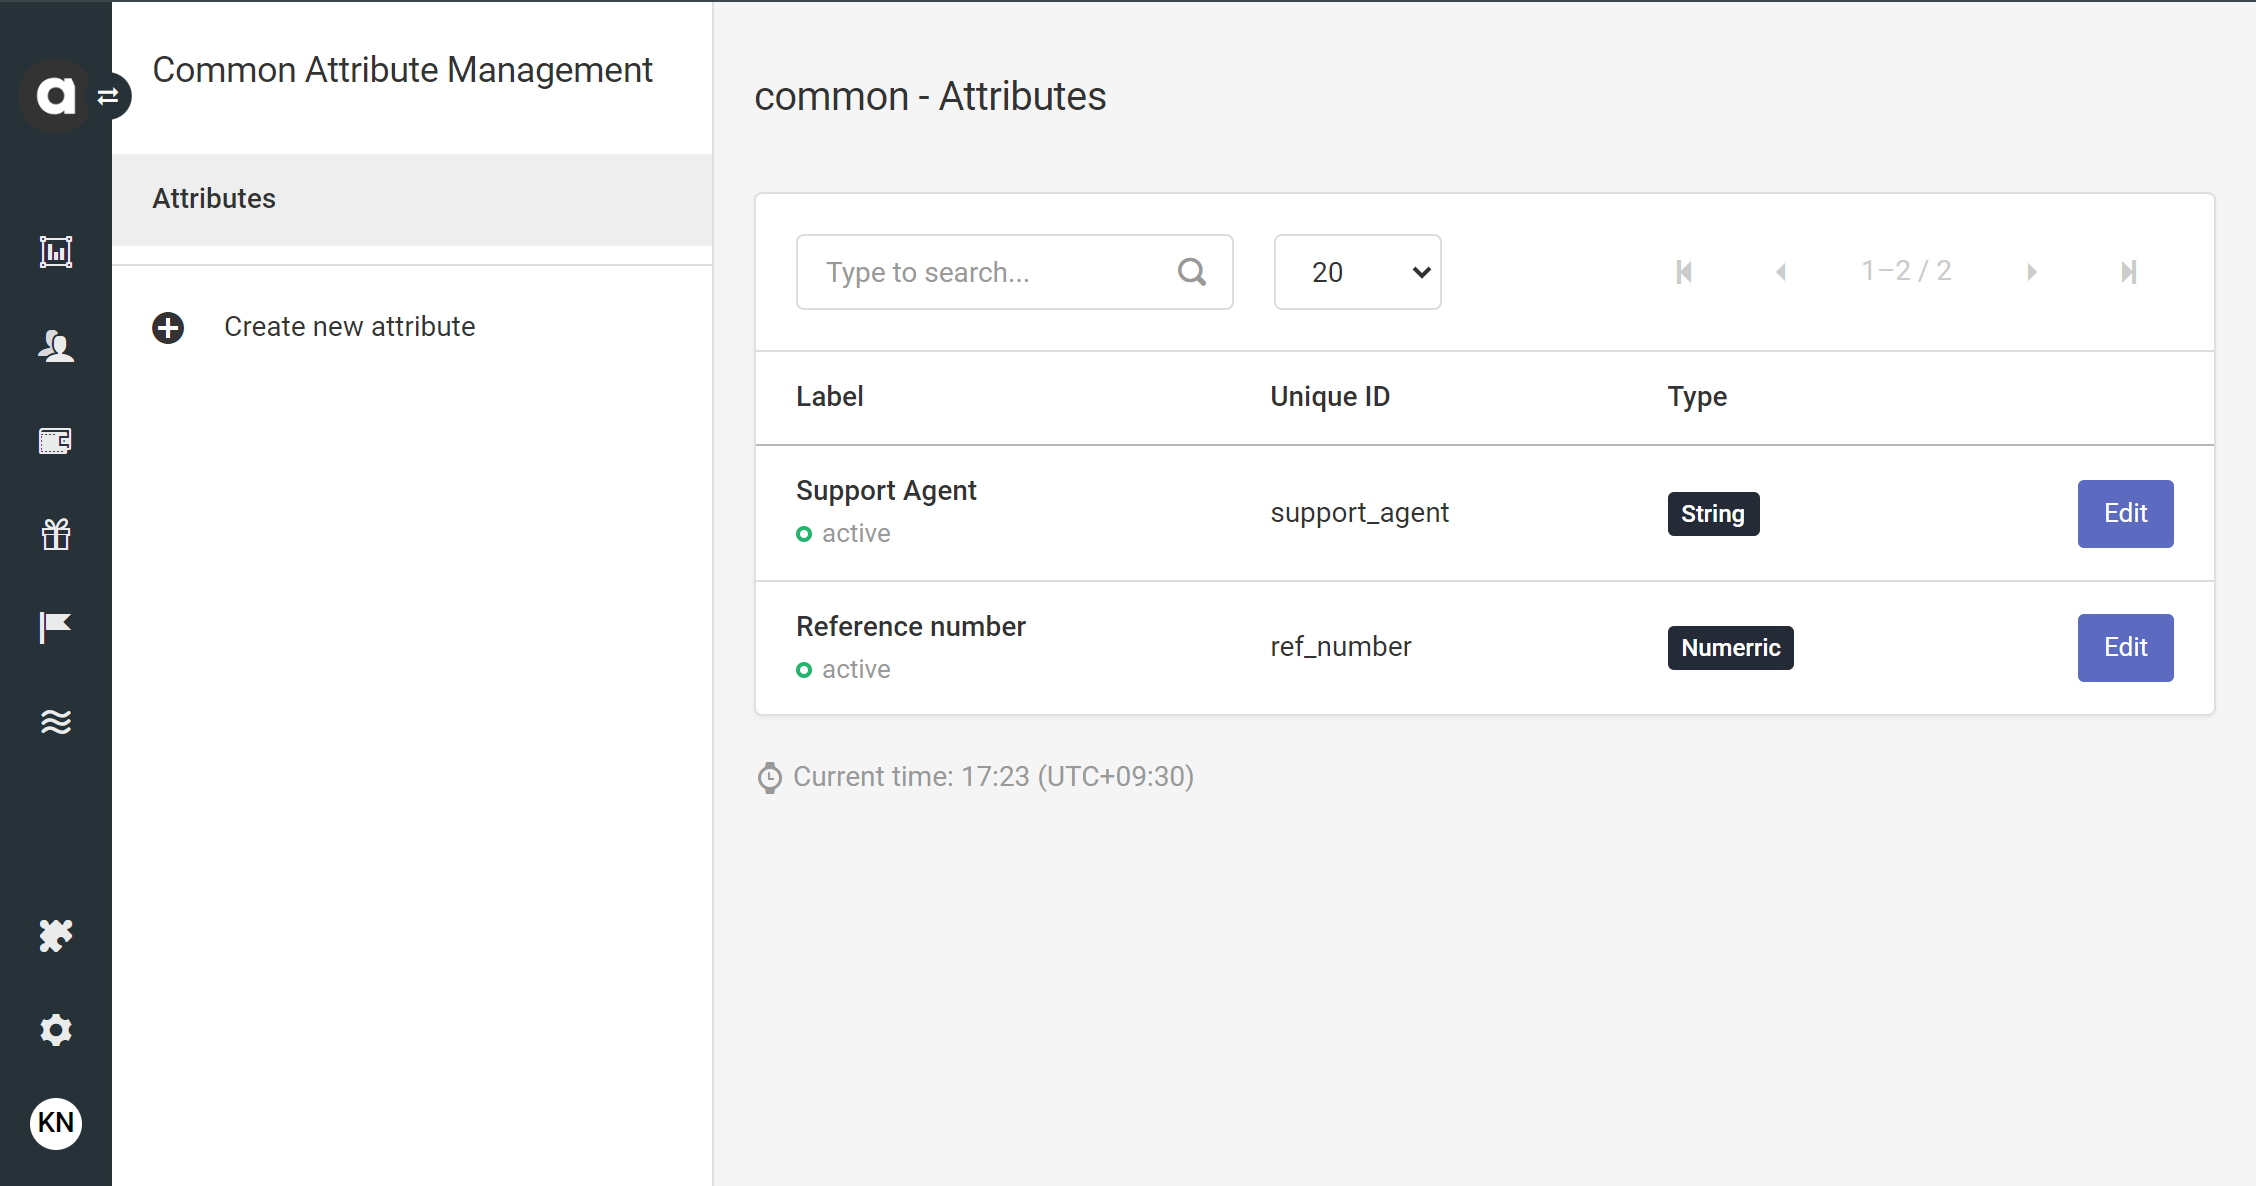
To access the configuration page, open the Modules menu and search for the Common attributes module. The page will open to the list of attributes that have been added with the following information:
Label | Name of the attribute |
Unique ID | Unique ID of the attribute |
Type | Type of the attribute |

Create new attributes
Basic settings
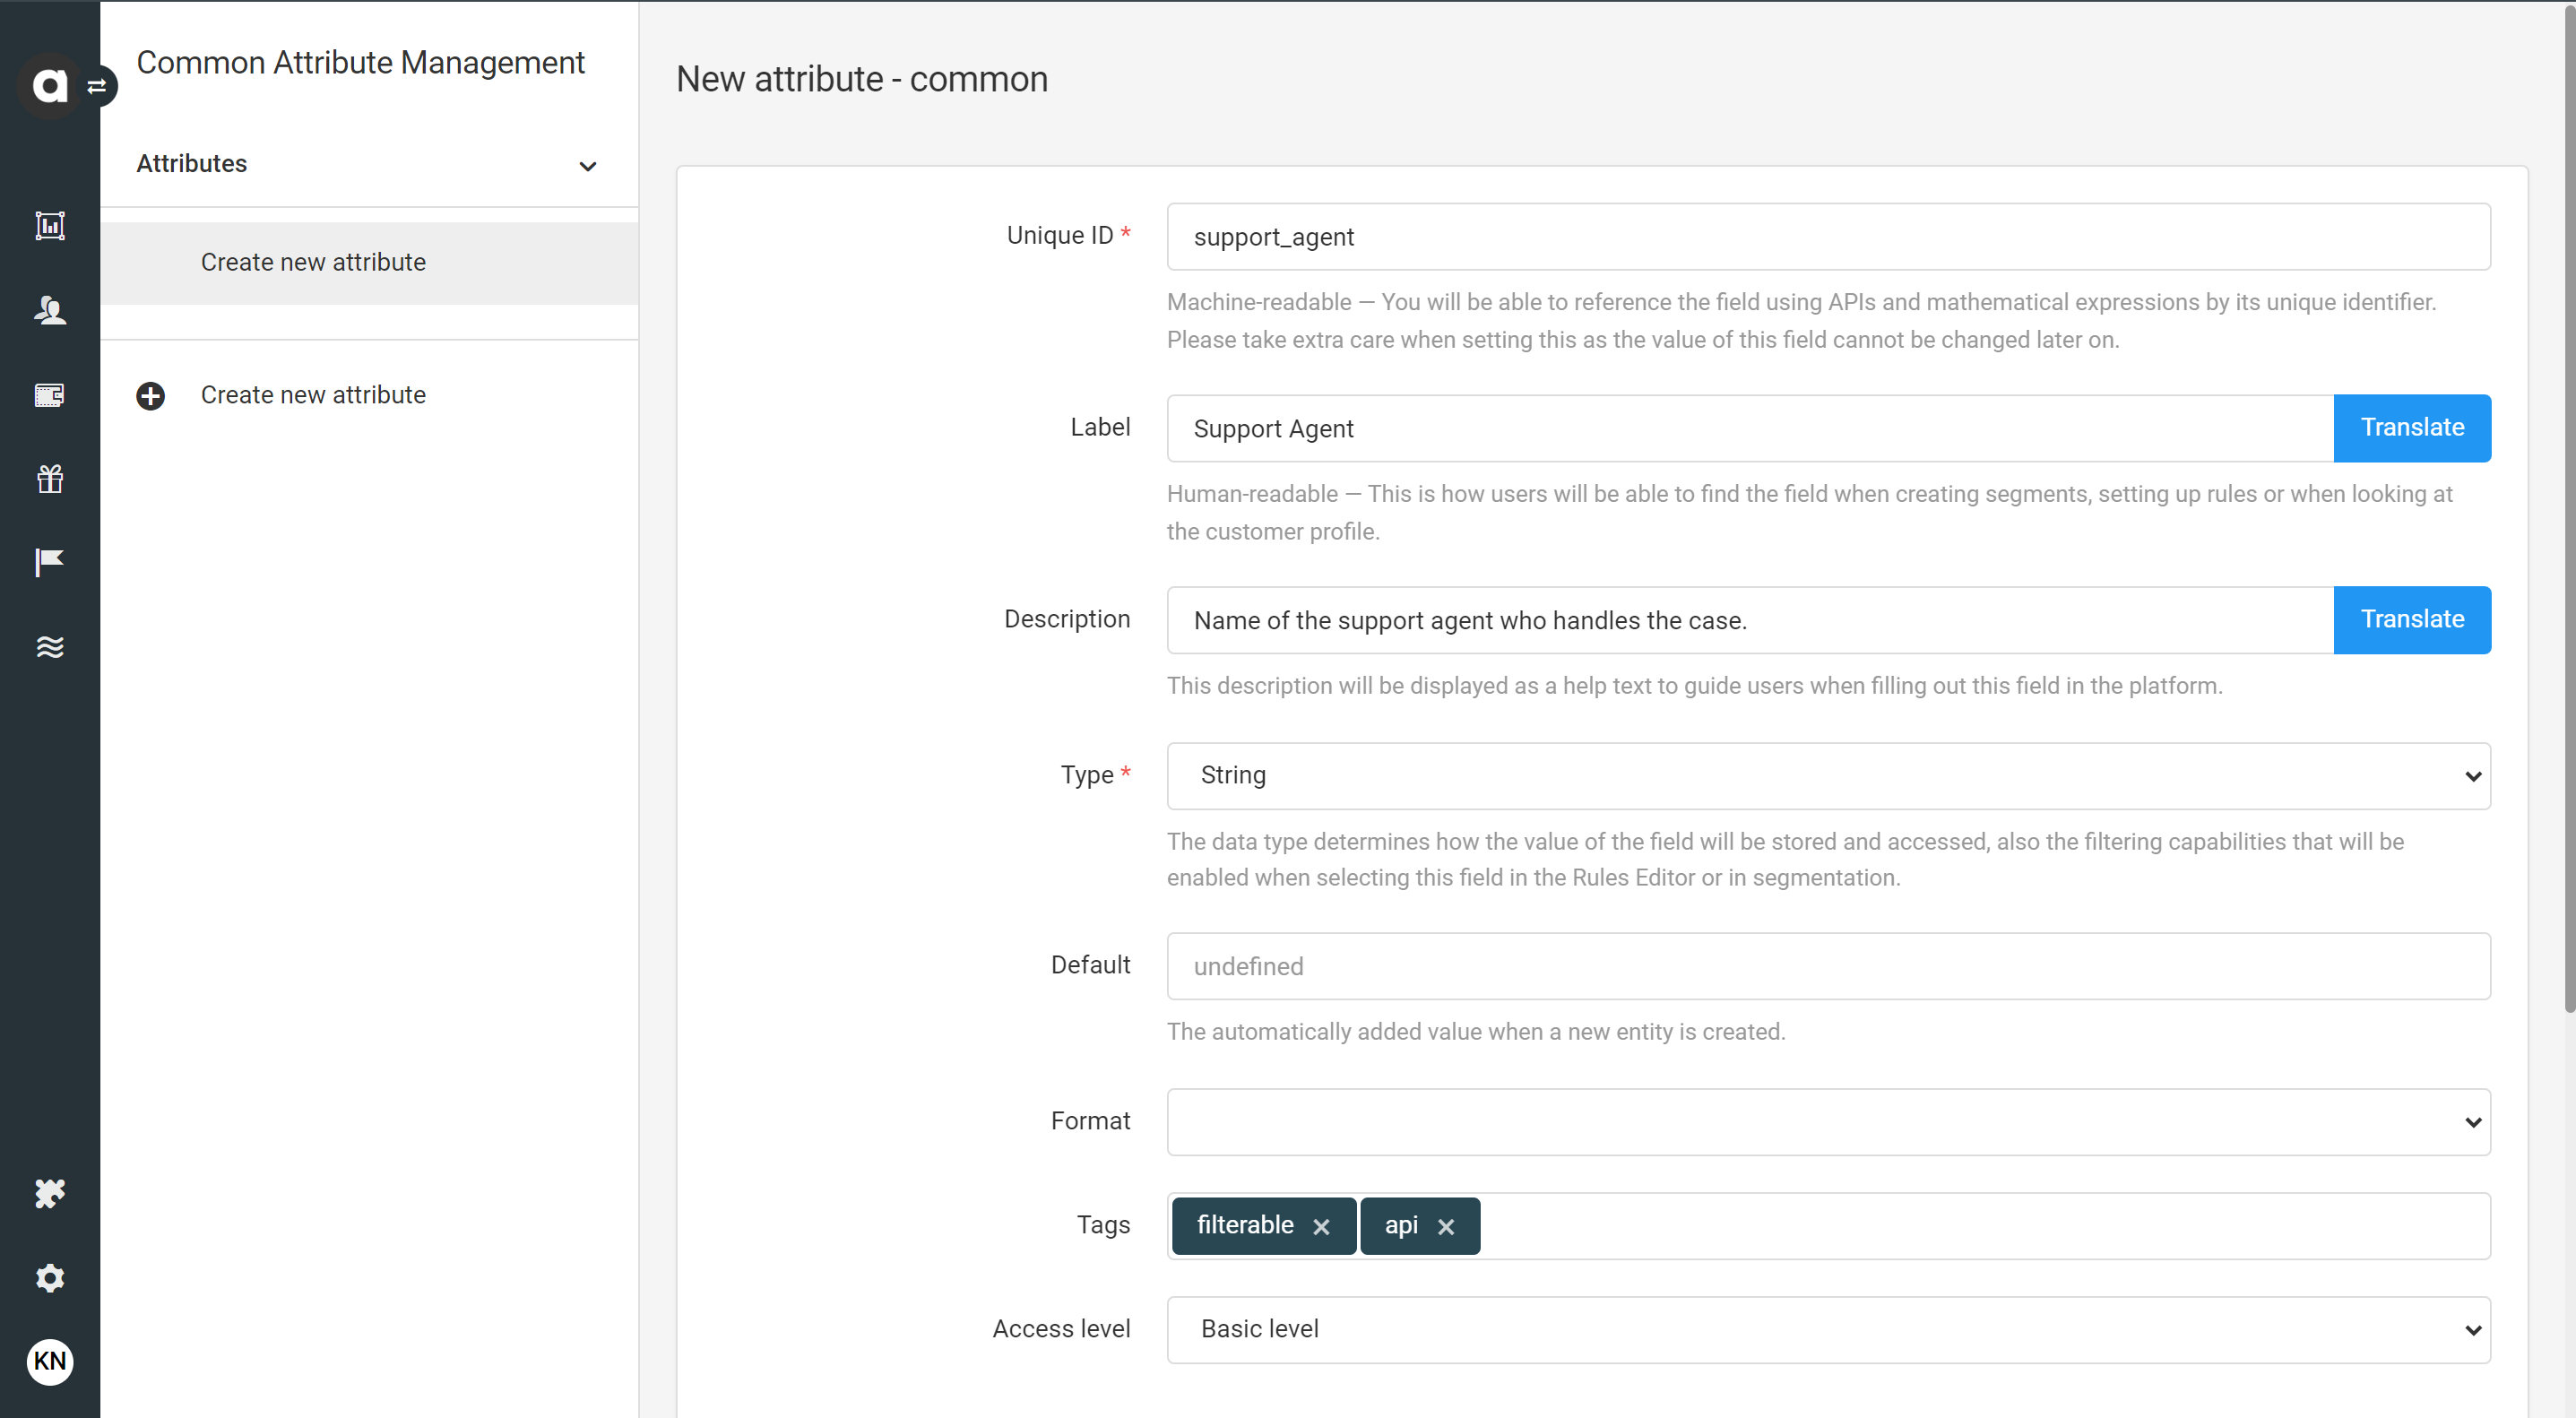
Click the Create a new attribute option in the sidebar
Define the unique ID
This is the machine-readable ID of the attribute that needs to be referenced when sending API calls.
System keywords (e.g.,source,transaction) cannot be used as IDs. If a system keyword is provided as an ID, an error message is displayed, and the attribute cannot be created.Add a label
This is the listing name of the attribute that will be displayed across the interface of the Management UI, including workflows and customers' event streams.Add a description
This serves informative purposes in the Management UI, reminding the user what the attribute is used for.Select the field type
Select the type of data that will be stored in the attribute. When sending the data through the API, ensure it is in the format required by the selected type, to avoid API request failures.String
Numeric
Boolean
Select: Add the selectable options by defining possible values.
URL
Date
Datetime
Multiple choice: Add the selectable options by defining possible values.
List
Image
Add a default value (only applicable for String, Numeric, Boolean, and URL type attributes)
Enter a default value for event fields. After saving the new event attribute, the default value will be automatically populated in all future events if no value is provided in the API request. Note, that once an event is registered, the field values cannot be applied retroactively.Format (only applicable for String and List types of fields)
For String and List type values, you can specify the format further to Date, URL, Email, Phone number formats. The API will validate the values accordingly.Tags
Tags define how attributes can be accessed and managed in the system.API: The field is included in the response returned by the History endpoint of the Display API.searchable: The value of the field can be used as a search condition when requesting customer data through the Display API, by using key-value pairs as query parameters. Additionally, it is available for searching within lists in the Management UI.importable: The value of the field can be populated through the Imports module. Note that as events are WORM (Write Once-Read Many) objects, the field values cannot be modified after the event has been registered.groupable: The data values of the field can be grouped when configuring charts to be displayed on the Dashboard.filterable: The field can be used as a filter condition when requesting customer data through the Display API. Its impact on performance may vary, so it is important to test each filtered operation to ensure efficiency.
The field can also be used for filtering in the Management UI's list filters and search fields.unique: The same field value can only be registered once and cannot be saved to the same field for any other attribute value.
Access Level
Select the access level that should apply to the event field. Users without the defined level of access cannot add and/or view this attribute through the Events tab of Customer insights.

Data and privacy controls
Required
Tick the checkbox to make this attribute required for all events.

Please be careful setting the attribute as required, as it must be included in any event request; otherwise, the request will fail, and the event will not be registered in Antavo’s database.
Don’t forget to click Save at the bottom of the page.
Edit attributes
Navigate to the Common attributes module configuration page
Click the Edit button of the attribute that you’d like to modify
Edit attribute settings
Click Save before leaving the page
Archive attributes
Navigate to the Common attributes module configuration page
Click the Edit button of the attribute that you want to archive
Next, click the Archive button in the upper right-hand corner.
Confirm your decision in the dialog that appears.
Keep in mind that archiving is an irreversible action.