Some of Antavo’s features rely on cron jobs to execute automated tasks in the background at set intervals. These tasks can include updating charts on the Dashboard or initiating date-triggered workflows.
When you access the Jobs page in the Settings menu, you’ll be able to create new jobs, manage existing ones, and review logs of job executions.
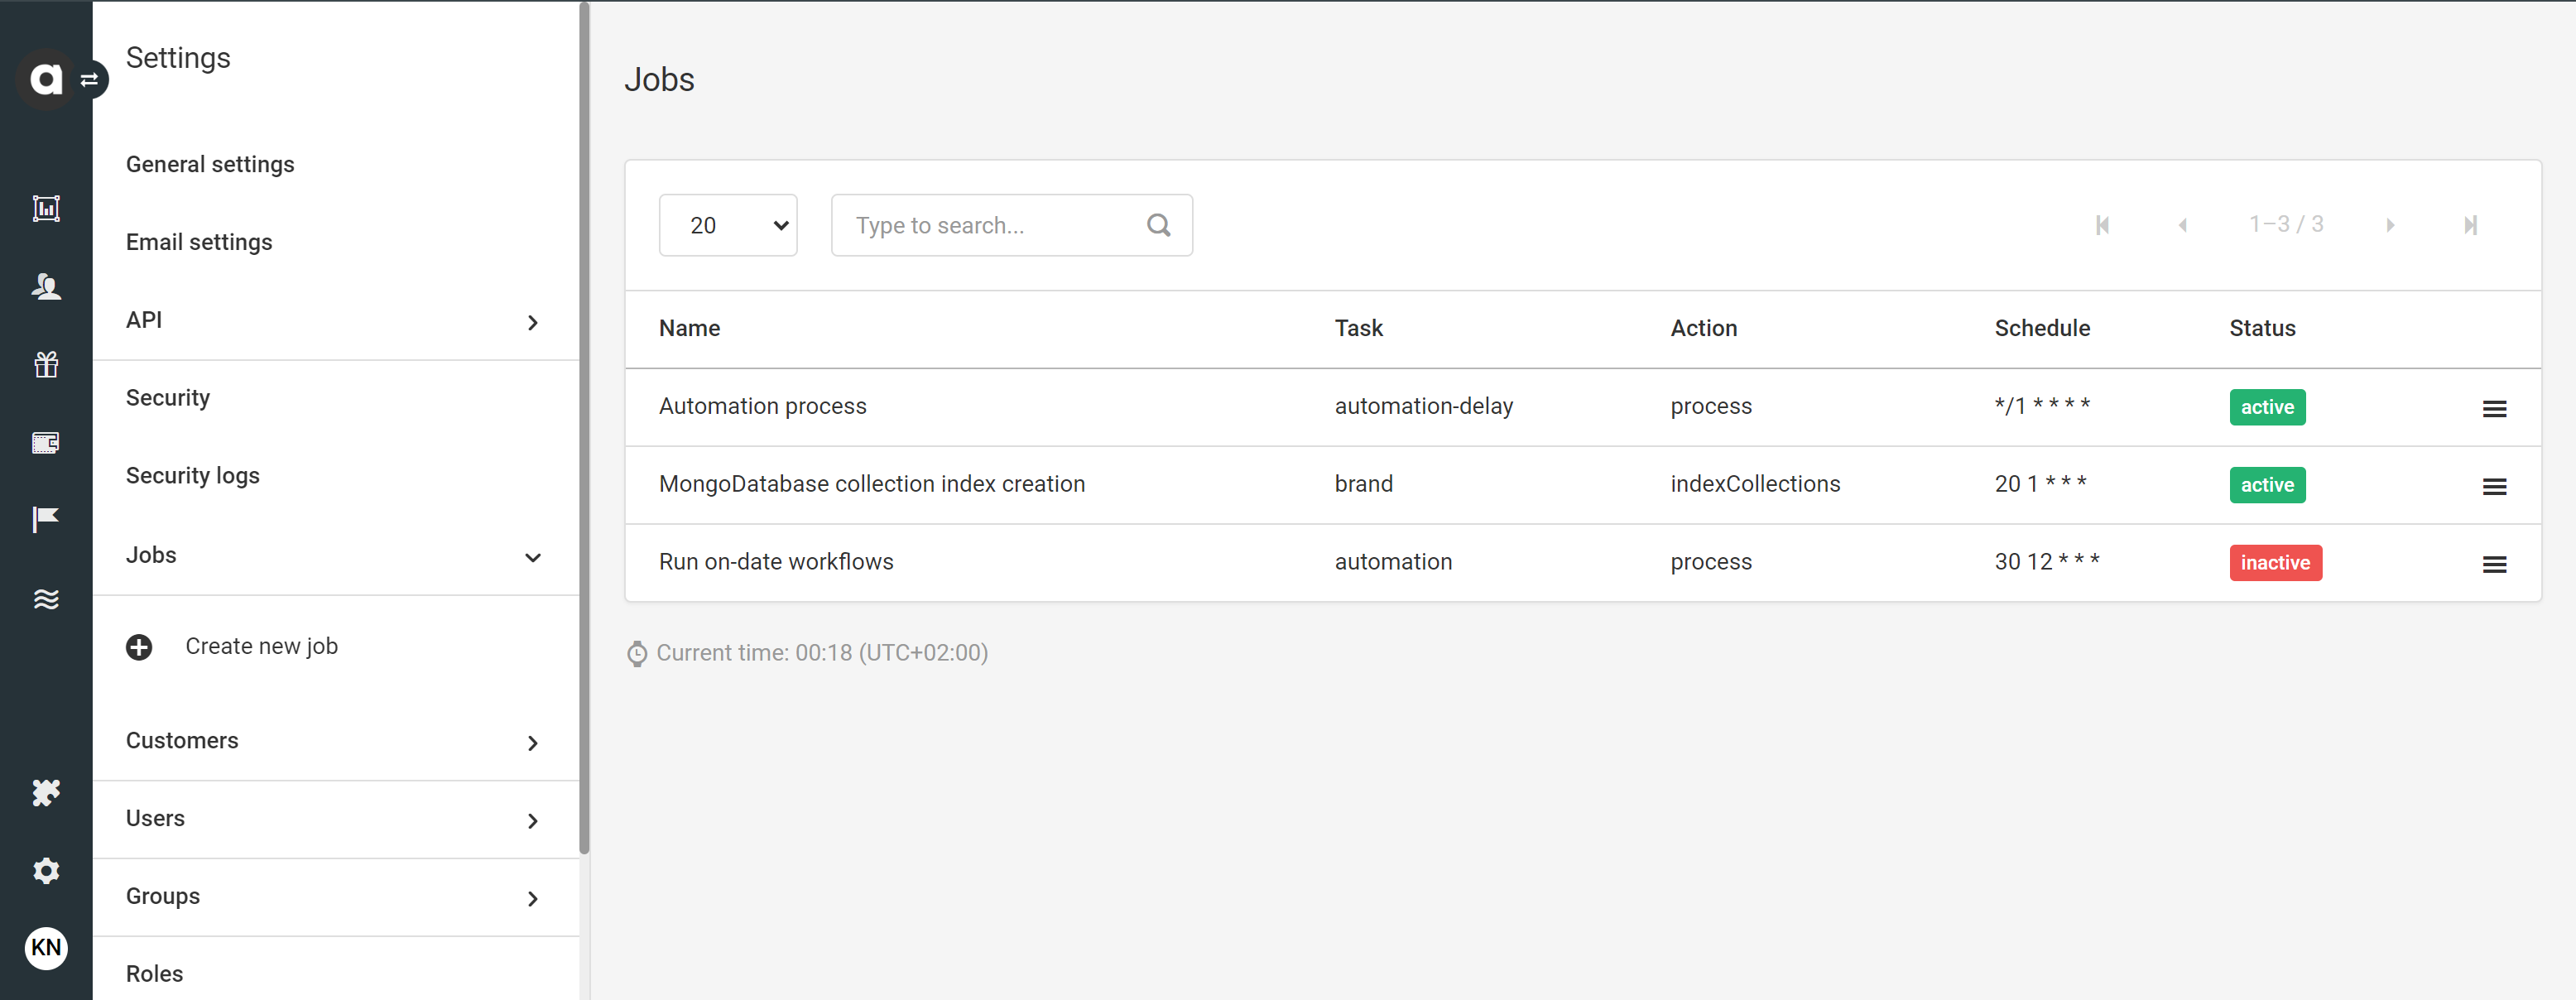
On the Jobs page, you’ll see the list of jobs that have been created with the following information:
Name | Name of the job |
Task and Action | The task and the action that the job executes |
Schedule | Configured schedule of job execution |
Last login at | Status of the job ( active or inactive ) |
Setting up a new job
Click Create new job in the sidebar
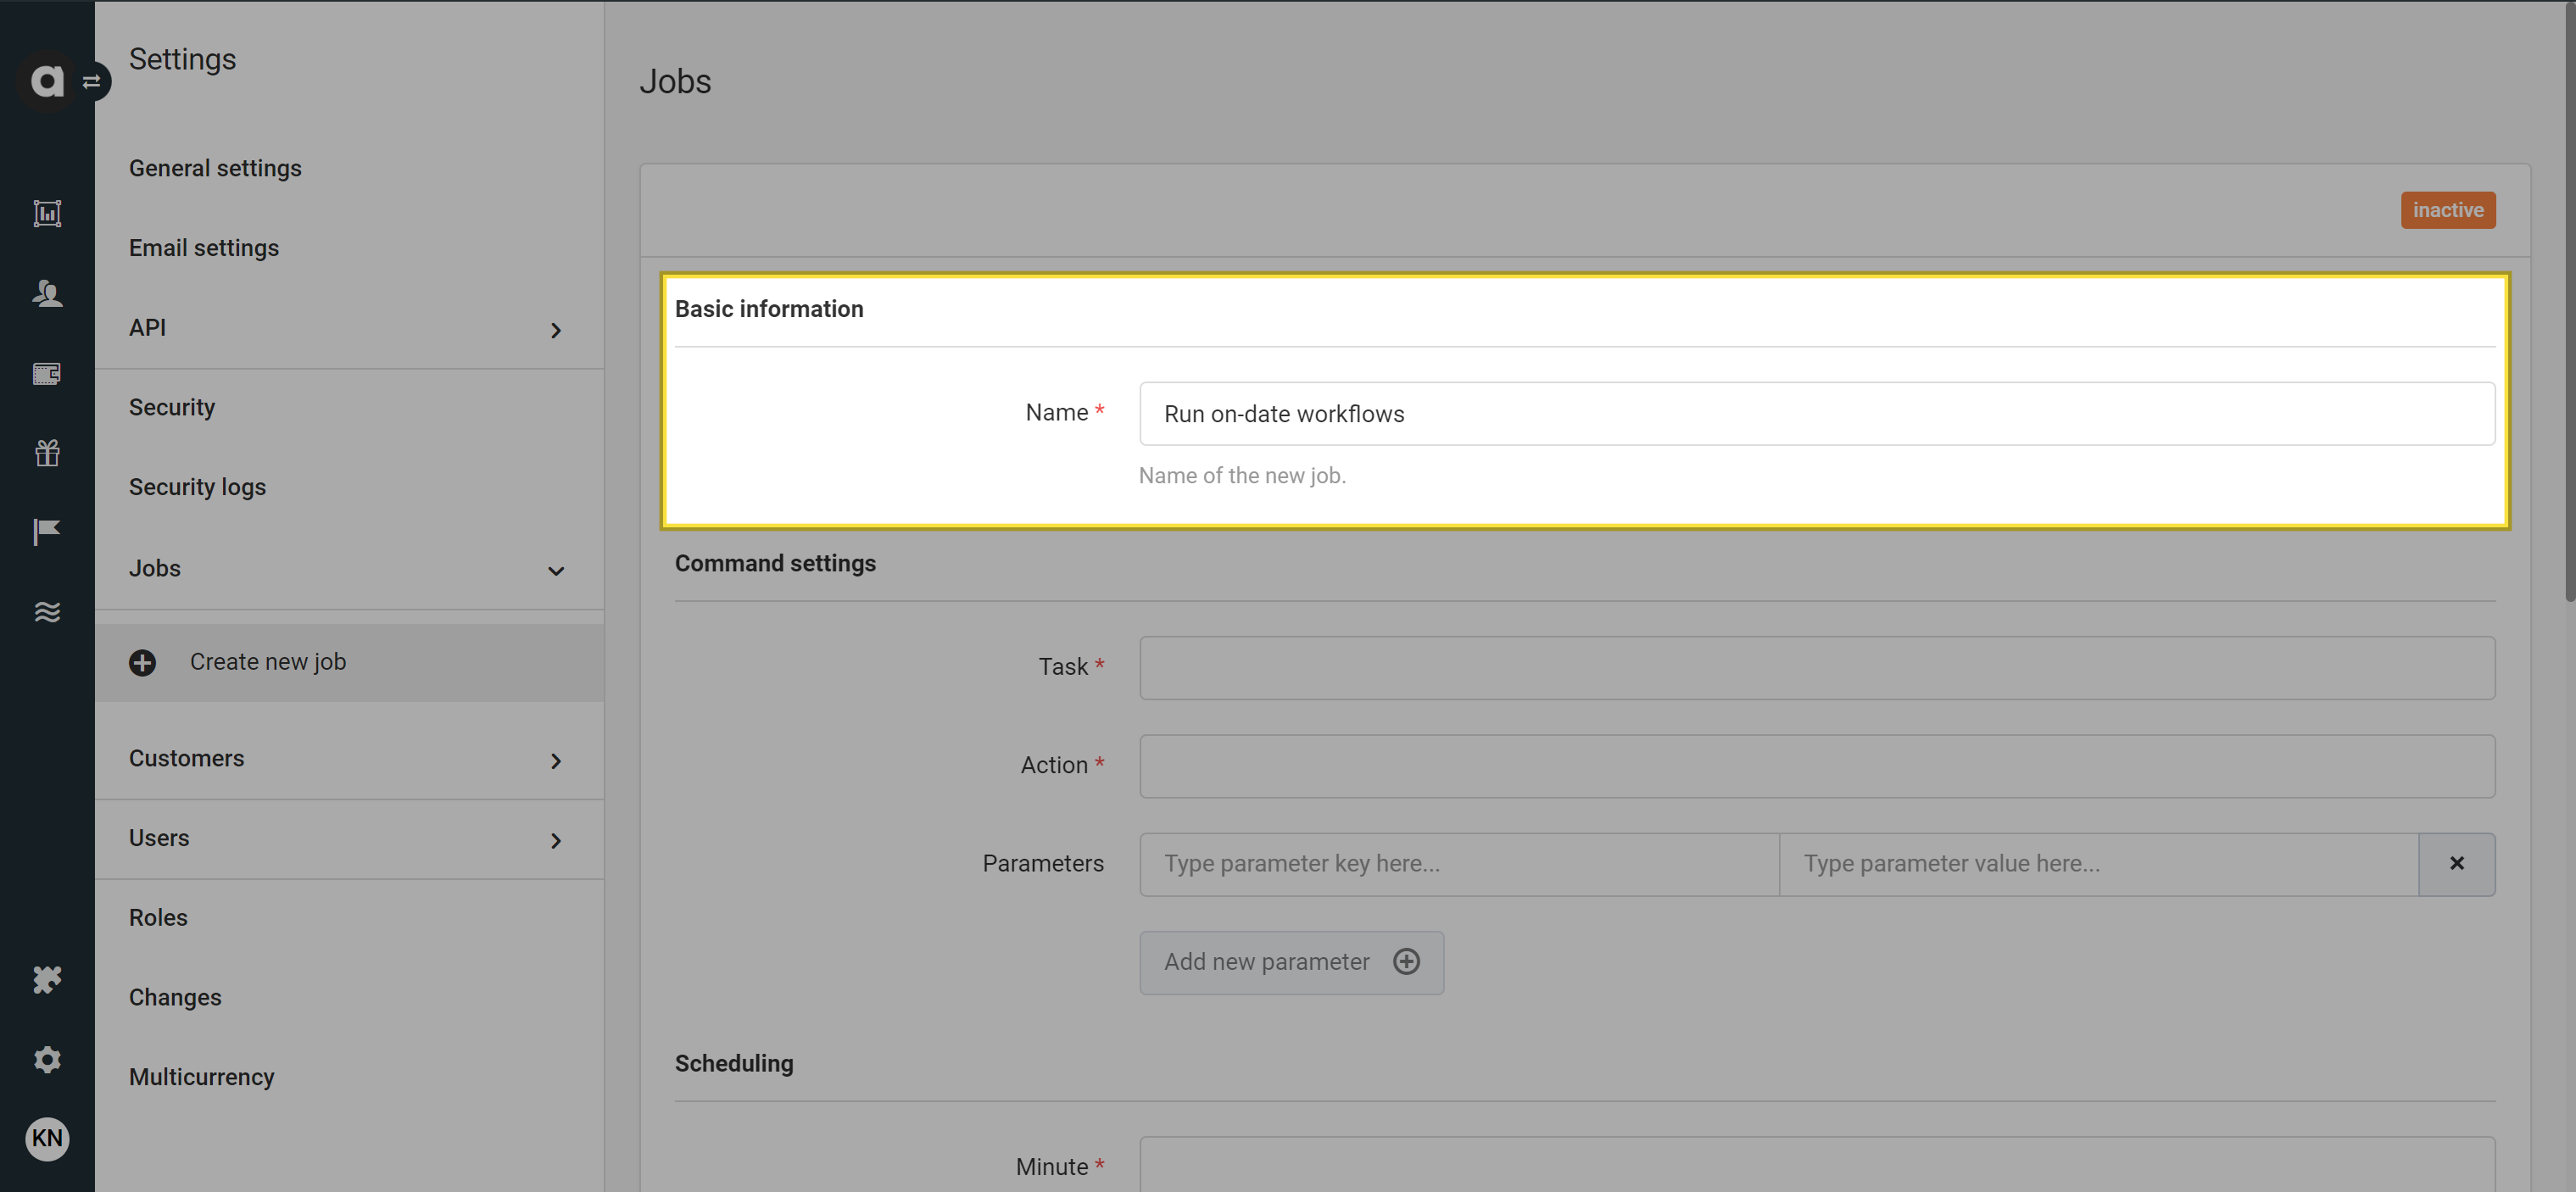
Basic information
Name the job
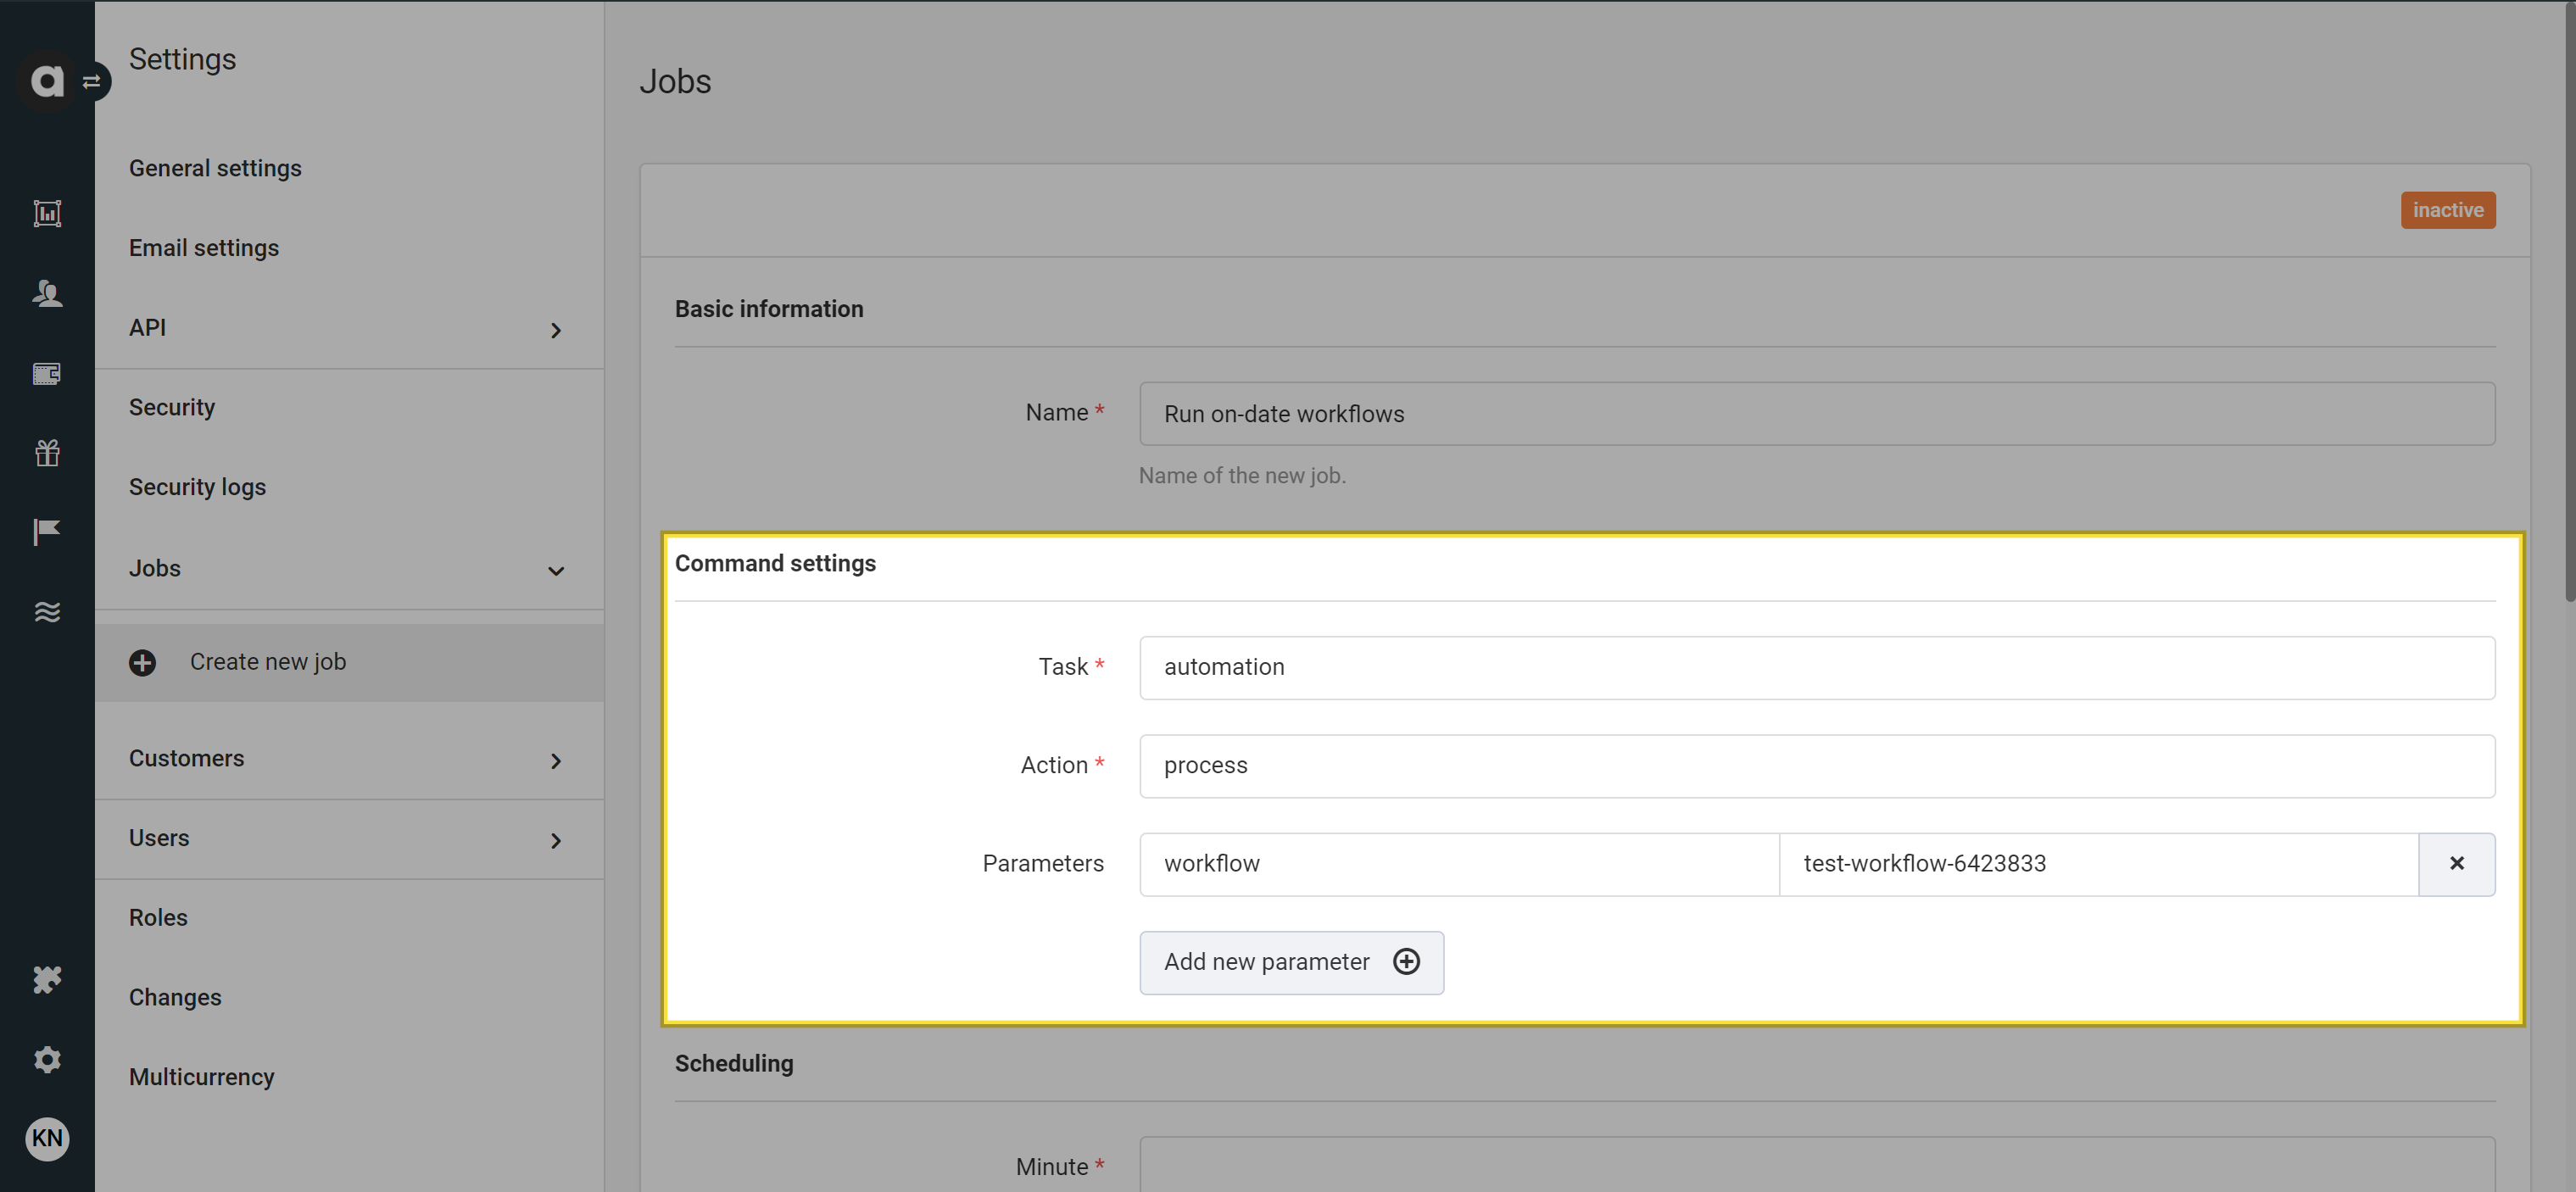
Command settings
Enter the task and the corresponding action the job should perform
Click Add new parameter to include a parameter key and its corresponding value.
You can add multiple parameters to a single job.
Scheduling
Specify the timing for cron jobs:
Minute
Hour(s)
Day(s) of month
In addition to numeric values of the month, you can add 'L' to run the job on the last day of the month.Month(s)
Day(s) of week
You can use numbers 1-7 to represent days (e.g., 1=Monday, 7=Sunday).
To set multiple values within a field, separate them with a comma(,). For example, setting the Hour field to ‘1,13’ will run the job at both 1 am and 1 pm).
Adding * to any time setting will schedule the job to run every minute/hour/day/month.
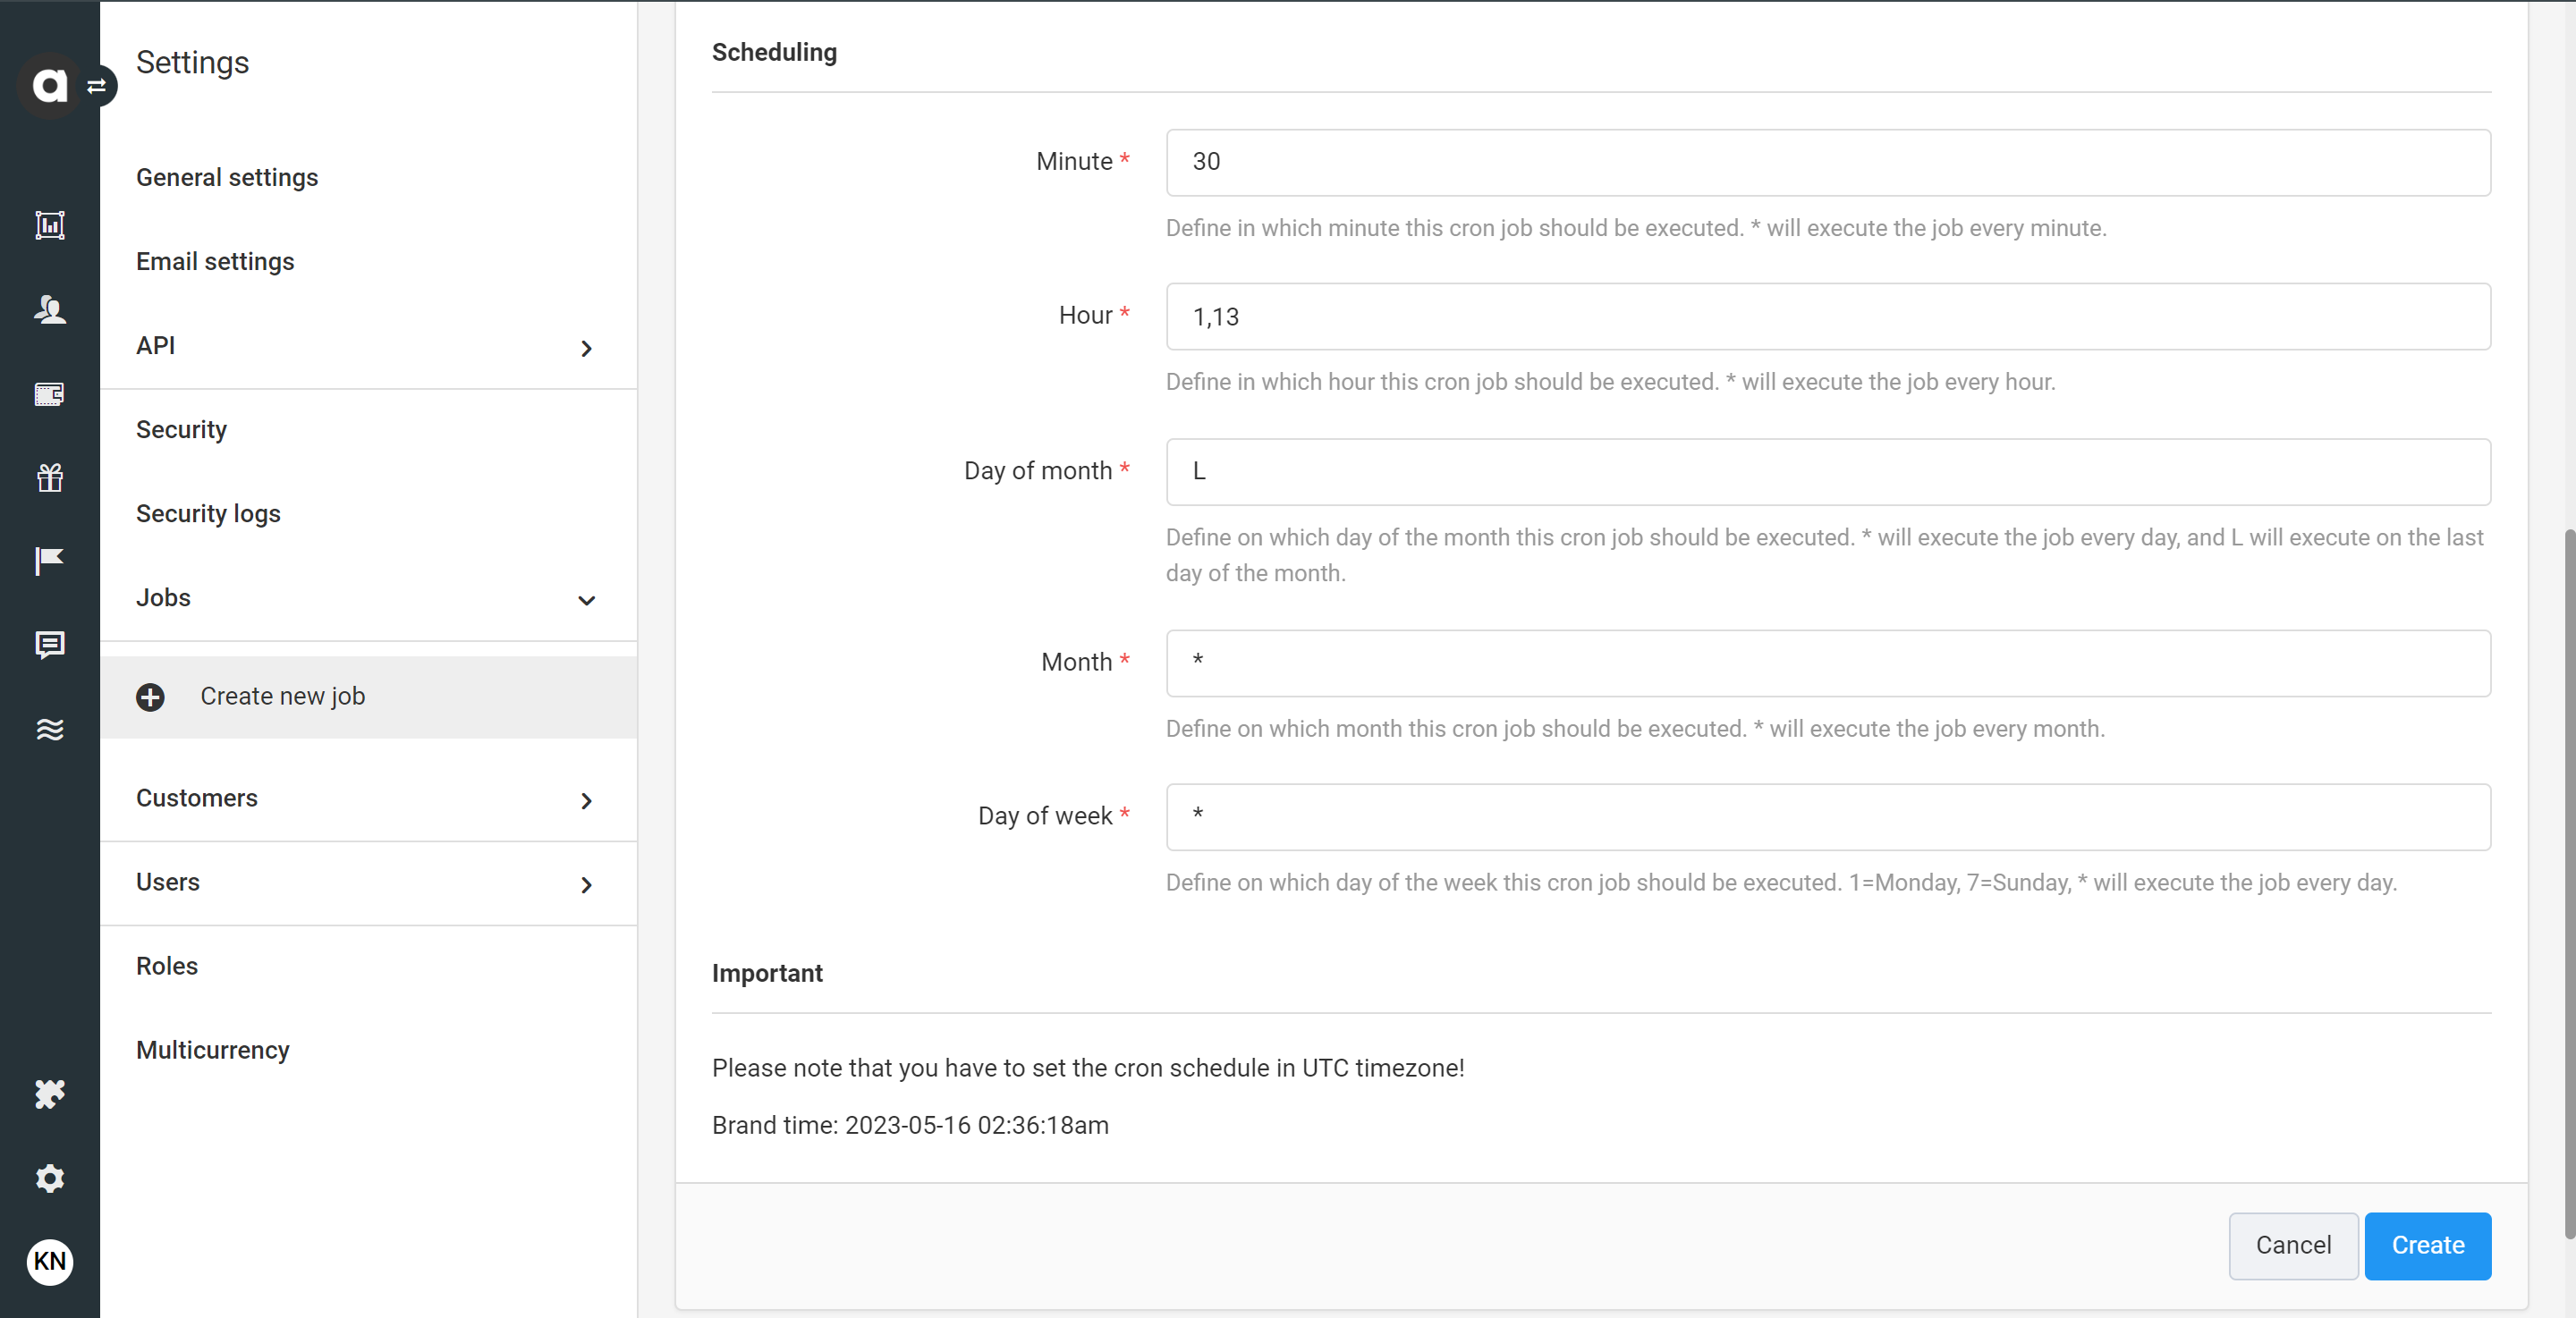
At the bottom of the page, you’ll see vital information about the timezone of your workspace. Ensure you set the schedule according to this highlighted timezone.
Saving and activating the new job
After configuring the job, save your settings by clicking Create at the bottom of the setup page. Initially, the job will be saved as inactive. This means that the job won’t run and will only be listed in the Management UI until you choose to activate it. Once you’ve created your new job, you can activate it at any time by clicking Set active on the top right corner of the offer setup page and confirming the activation in the subsequent dialog.
Managing jobs
Edit a job
Go to the Jobs tab
Click the Edit option under the hamburger button next to the job
Change the settings as needed
Save your changes by clicking Update at the bottom of the page
Deactivate a job
Go to the Jobs tab
Click the Edit option under the hamburger button next to the job
Click the Set inactive button
Confirm your choice in the dialog that appears
Archive a job
Archiving jobs is not possible. Ensure you keep unwanted jobs marked as inactive to prevent them from running.
Search for a job
Use the search bar to find a specific job by its name within the Jobs page list.
Job logs
The Log tab helps to keep track of the job executions and their output.
To open the logs page of a job, click the correspondent hamburger button on the Jobs page and select the 'Log' option. The list displays the following information about each cron job execution:
Created at | The start date and time of the job execution |
Finished at | The end date and time of the job execution |
Output | The result of the job execution |
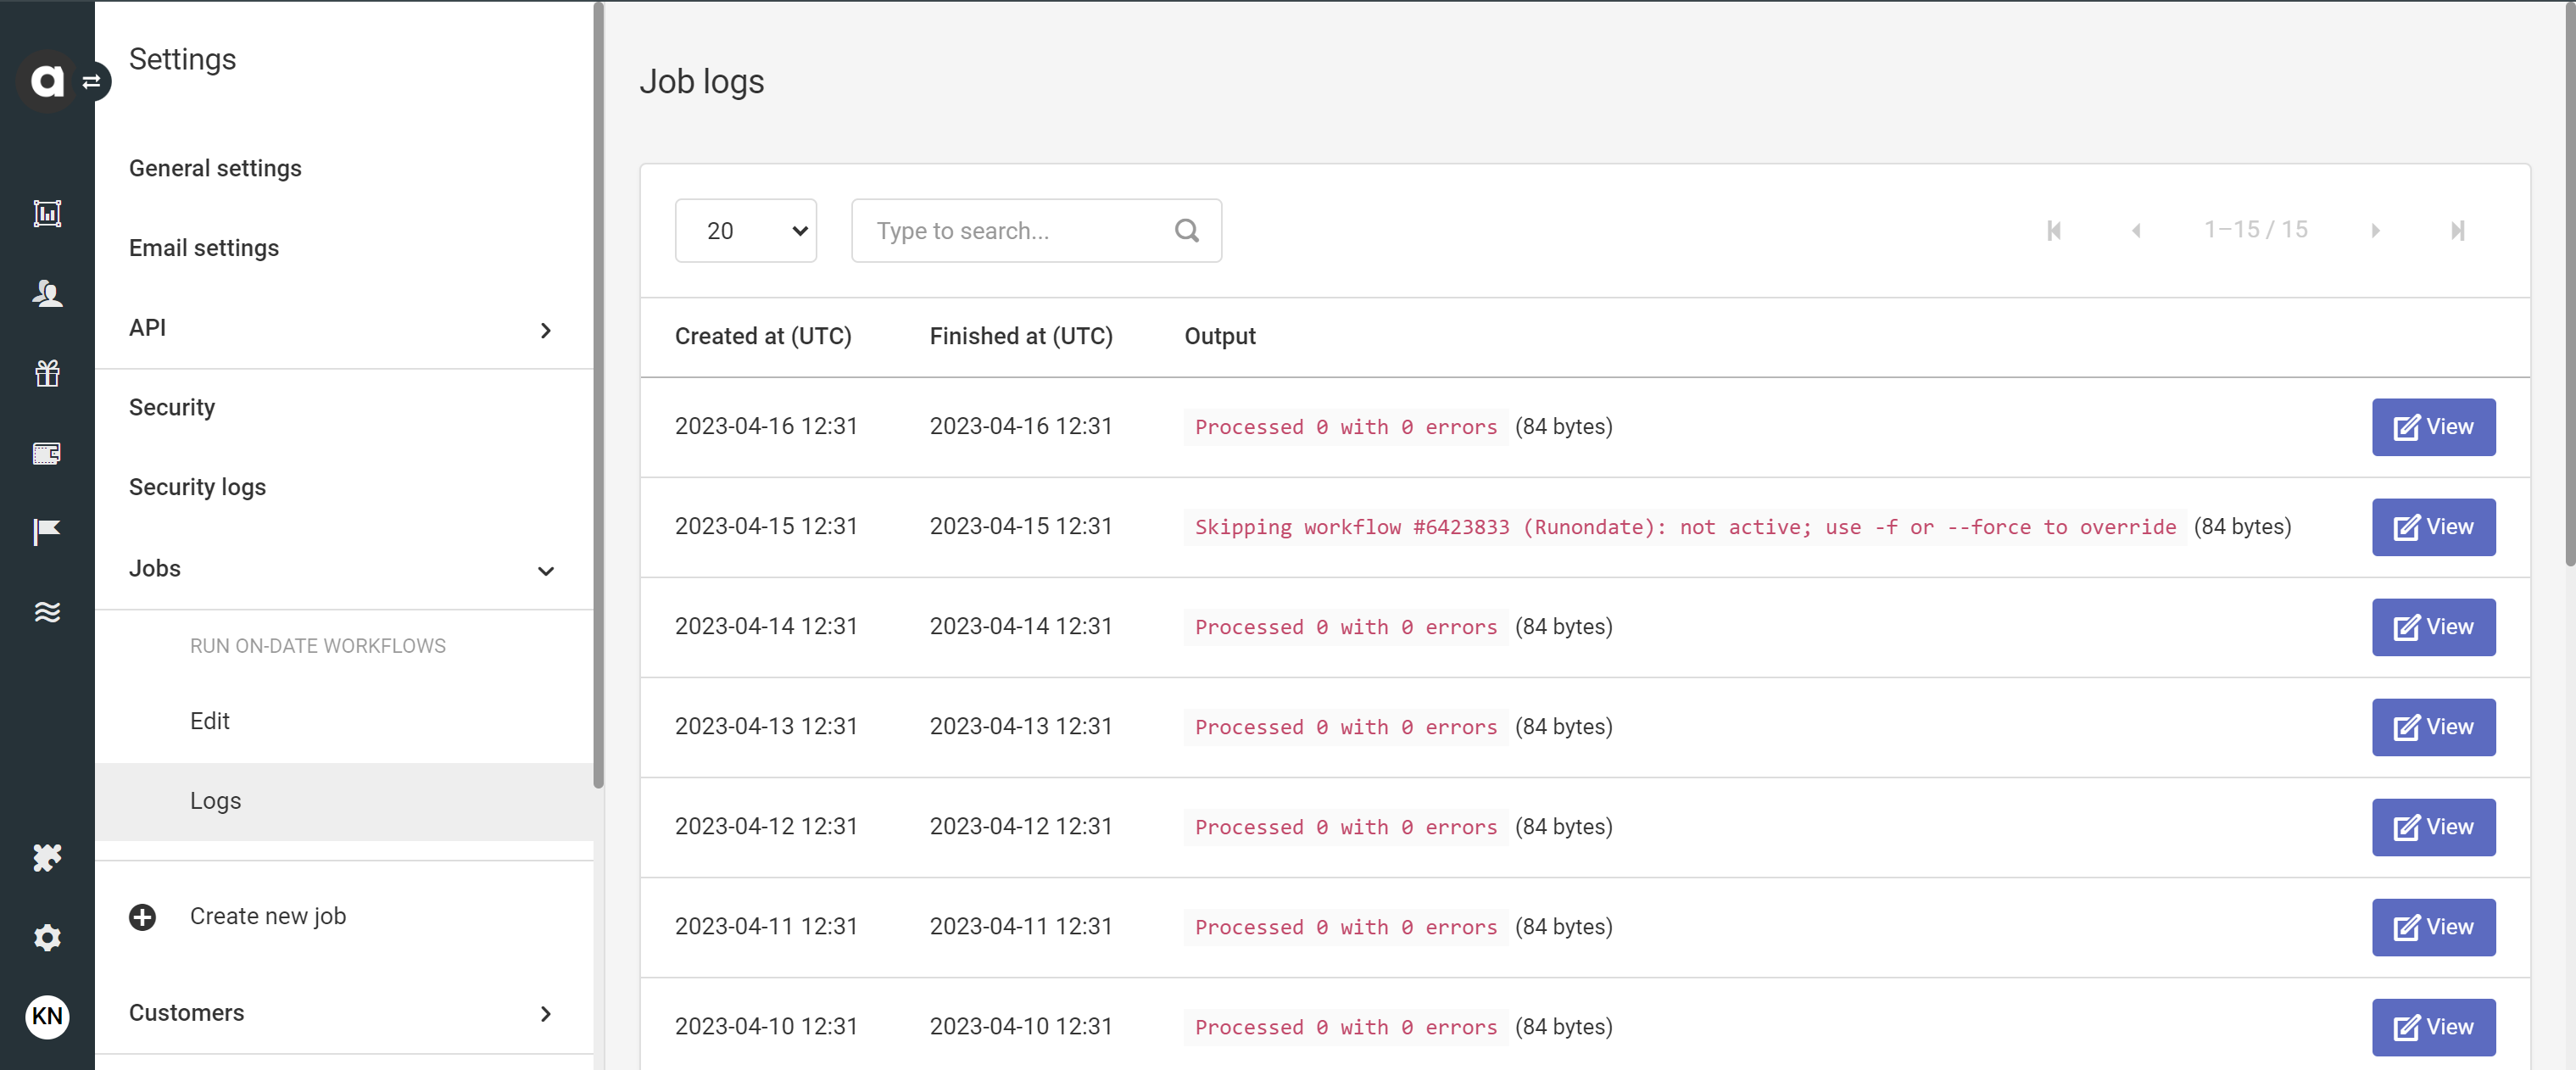
Clicking the View button may provide more detailed information about the job execution.