Antavo provides ready-made flow templates in Klaviyo’s Flow Library. The templates use loyalty events sent from Antavo to trigger personalized customer communications in Klaviyo.
The following templates are available:
Loyalty Welcome Series: Engages new loyalty members during their first week.
First Reward Celebration: Celebrates a member’s first reward and encourages redemption.
Tier Upgrade Celebration: Celebrates tier upgrades and introduces the benefits of the new tier.
Points Expiry Reminder: Reminds members to use their points before they expire.
Birthday Reward Series: Delivers a birthday reward and sends follow-up communications
Prerequisites
Before using an Antavo flow template, install and configure the Antavo integration for your Klaviyo account as described in the Klaviyo integration document.
Step 1: Make the required Klaviyo metrics available in Antavo
A predefined Klaviyo metric triggers each Antavo flow template. Contact Antavo to have the metrics required by the flow templates made available for your workspace.
The templates use the following metrics:
Metric name | Recommended Antavo trigger | Used by |
|---|---|---|
| A customer joins the loyalty program (opt-in) | Welcome to Loyalty |
| A customer claims a reward | First Reward Celebration and Welcome to Loyalty |
| A customer redeems a coupon | First Reward Celebration, Points Expiry Reminder, and Birthday Reward Series |
| A customer moves to a higher tier | Tier Upgrade Celebration |
| The configured points-expiry workflow runs | Points Expiry Reminder |
| The configured birthday workflow runs | Birthday Reward Series |
You can verify that the metrics are available under Flows → Create flow → Your metrics in Klaviyo. If you still cannot find the required metrics after Antavo has enabled them, contact Antavo for assistance.
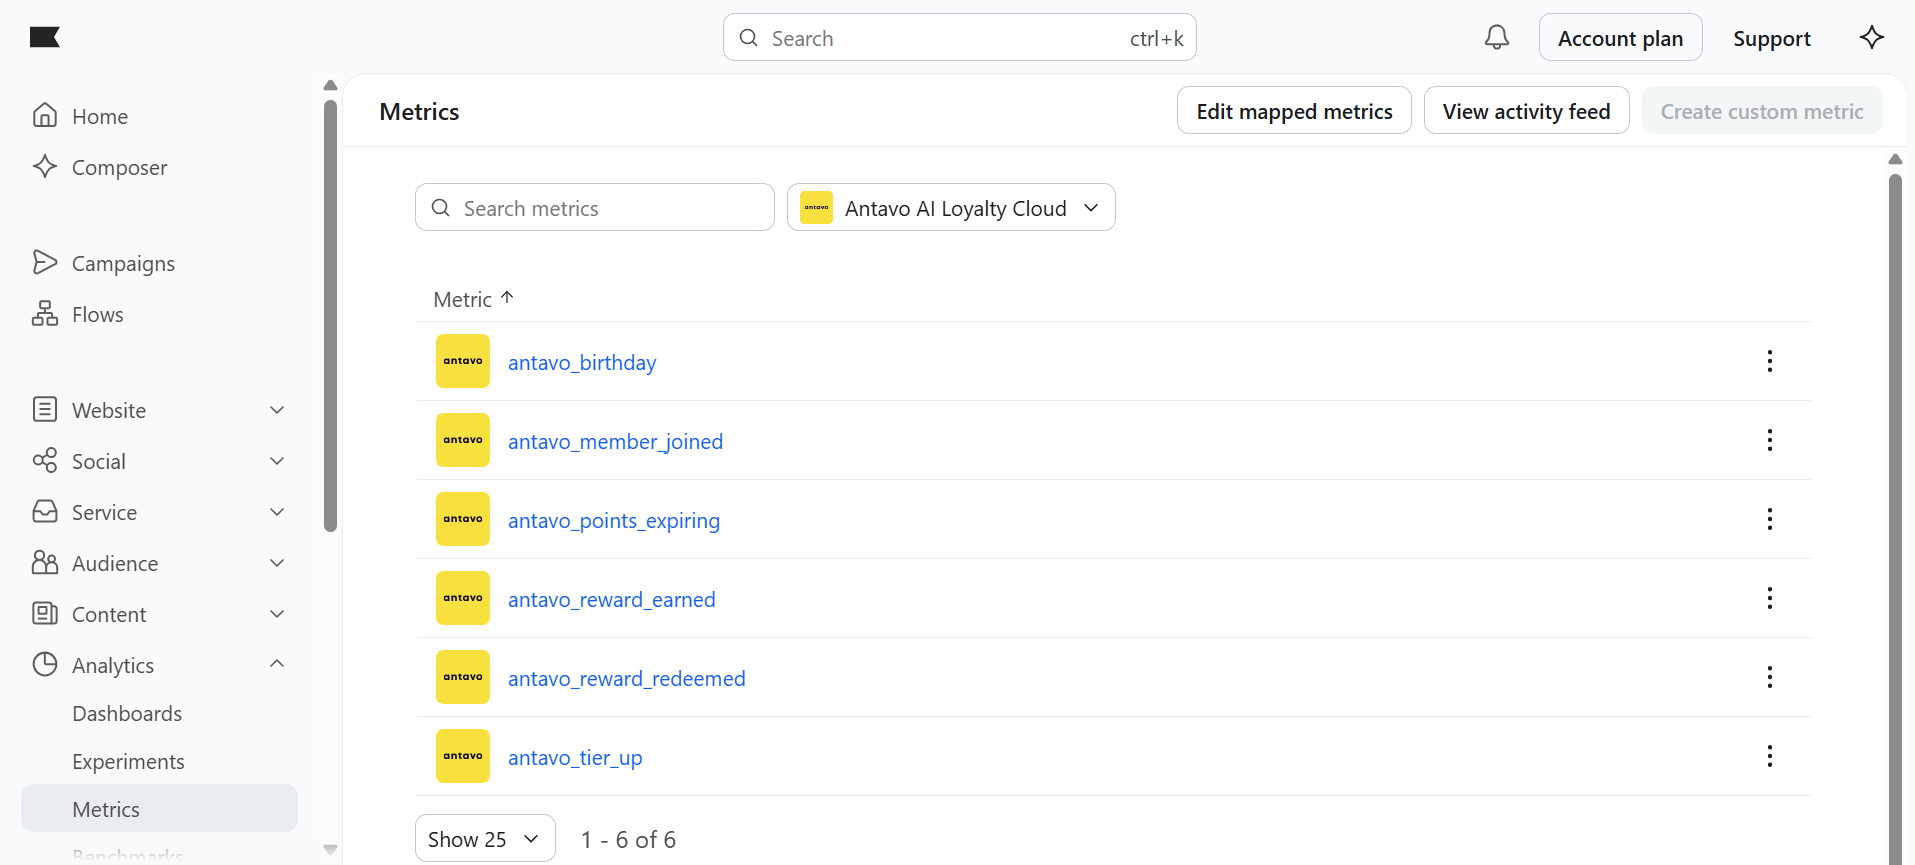
The metrics are not sent to Klaviyo automatically. Each metric must be connected to the relevant loyalty activity through an active Antavo Workflow. Follow the steps in Step 2: Configure event synchronization in Antavo to continue.
Step 2: Configure event synchronization in Antavo
Create an Antavo workflow for each metric required by the templates you want to use.
To configure event synchronization:
Open the Workflows editor in the Antavo Management UI
Click Create new general workflow. Fill in the required fields.
Drag and drop an Event trigger node onto the canvas
Select the Antavo loyalty event that should trigger the workflow
Click Update
Add a Sync Klaviyo Event action node to the canvas
Select the required metric from the Event dropdown
Add the event data to be sent in the payload as key-value pairs
Click Update
Connect the Event trigger node to the Sync Klaviyo Event node
Save and activate the workflow
For example, to use the Loyalty Welcome Series template, configure the workflow to run when a customer opts in to the loyalty program and select antavo_member_joined in the Sync Klaviyo Event node.
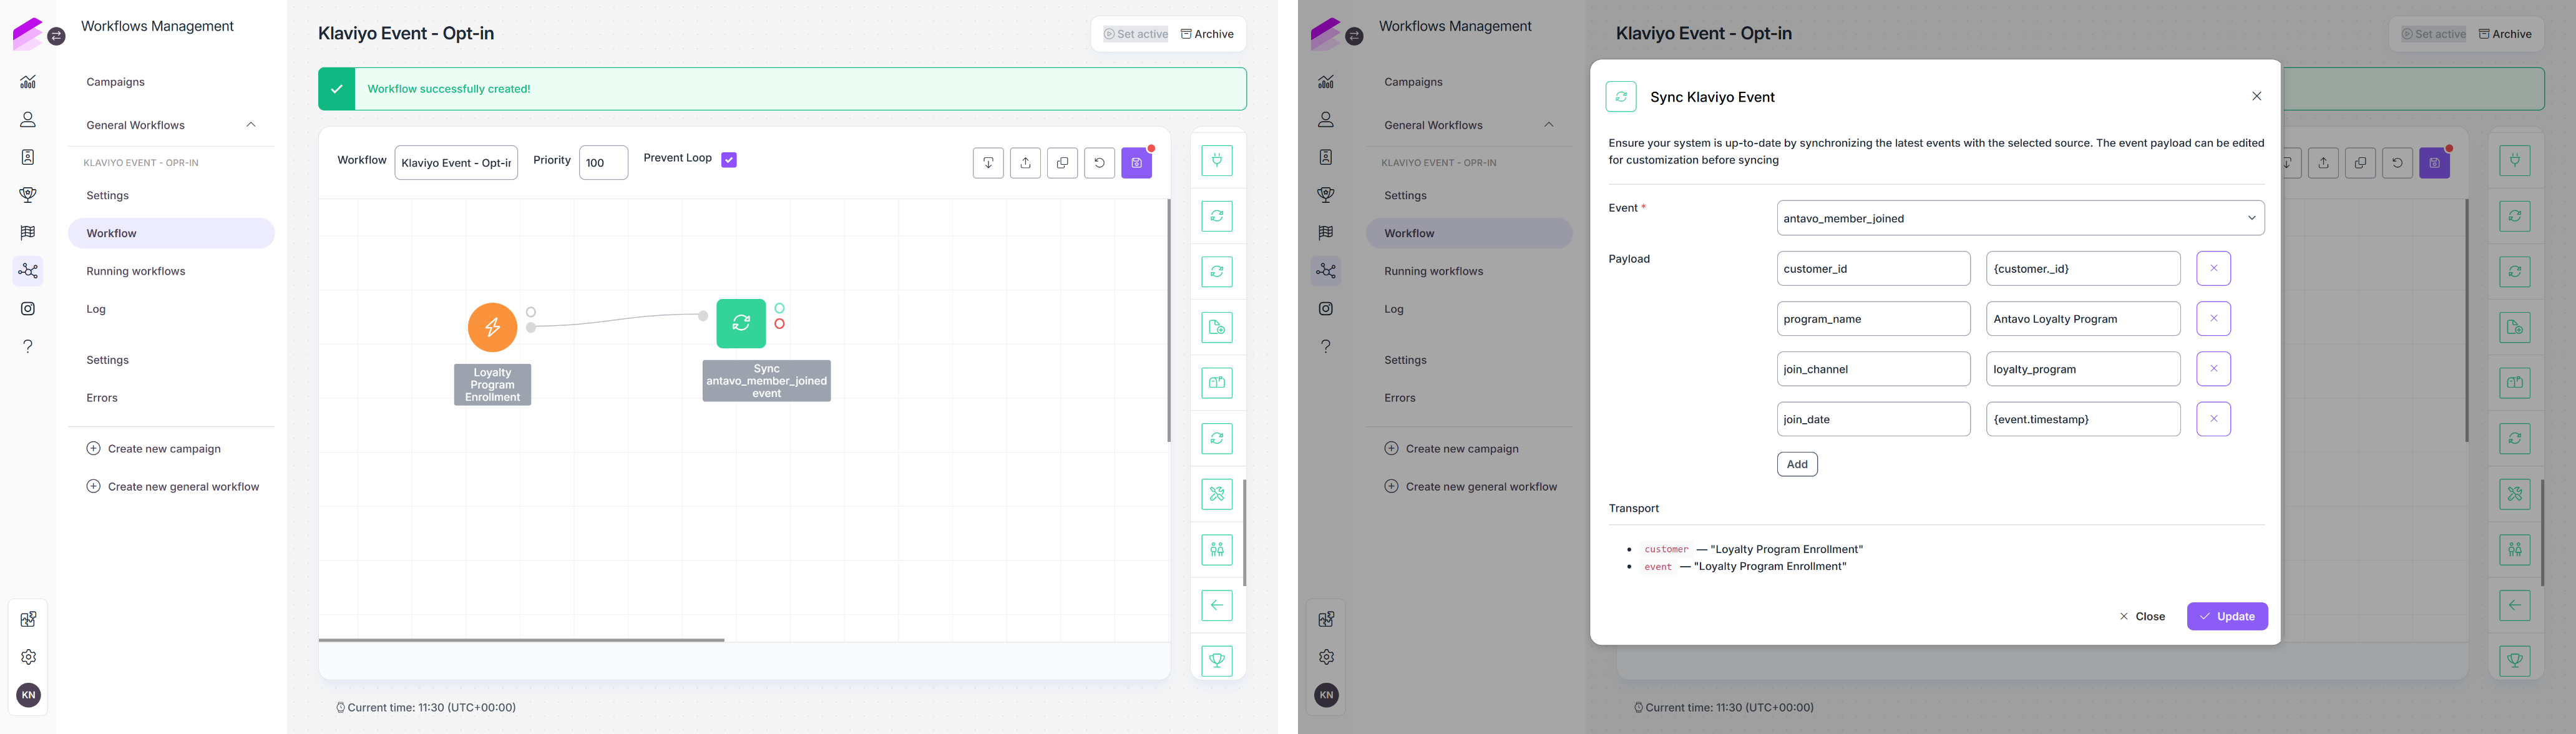
Antavo workflow canvas: Event trigger connected to a Sync Klaviyo Event node and Sync Klaviyo Event node configuration, with the event name entered in the Event field.
For general information about synchronizing events through the Workflows editor, see Klaviyo integration.
Step 3: Install a template from the flow library
To install an Antavo flow template:
In Klaviyo, navigate to Flows
Click Browse ideas to open the flow library.
You can also access the templates through the Antavo app listing.
Select the Antavo flow template you want to use
Add the template to your Klaviyo account
The installed flow is created in Draft status. It does not send messages until you review its configuration and set it live.
.png)
Step 4: Customize a flow template
The installed templates can be customized to match your loyalty program, communication strategy, and customer journey. You can edit the flow structure, timing, conditions, splits, and message content based on your needs.
Customize the emails
Review and update every email included in the template before activating the flow. The emails contain generic content, instructions, and placeholders that must be replaced with details specific to your loyalty program and brand.
To customize the emails
Select an email in the flow
In the email details sidebar, click Edit to open the email template editor
Read the yellow instruction block at the top of the template to identify the content and placeholders that must be updated.
Delete the block before activating the flow.Replace the placeholder image blocks with your logo and brand imagery
Update all yellow-highlighted placeholders, including program names, reward names, URLs, point values, tier names, and expiration details
Adjust the copy, colors, and fonts to match your brand
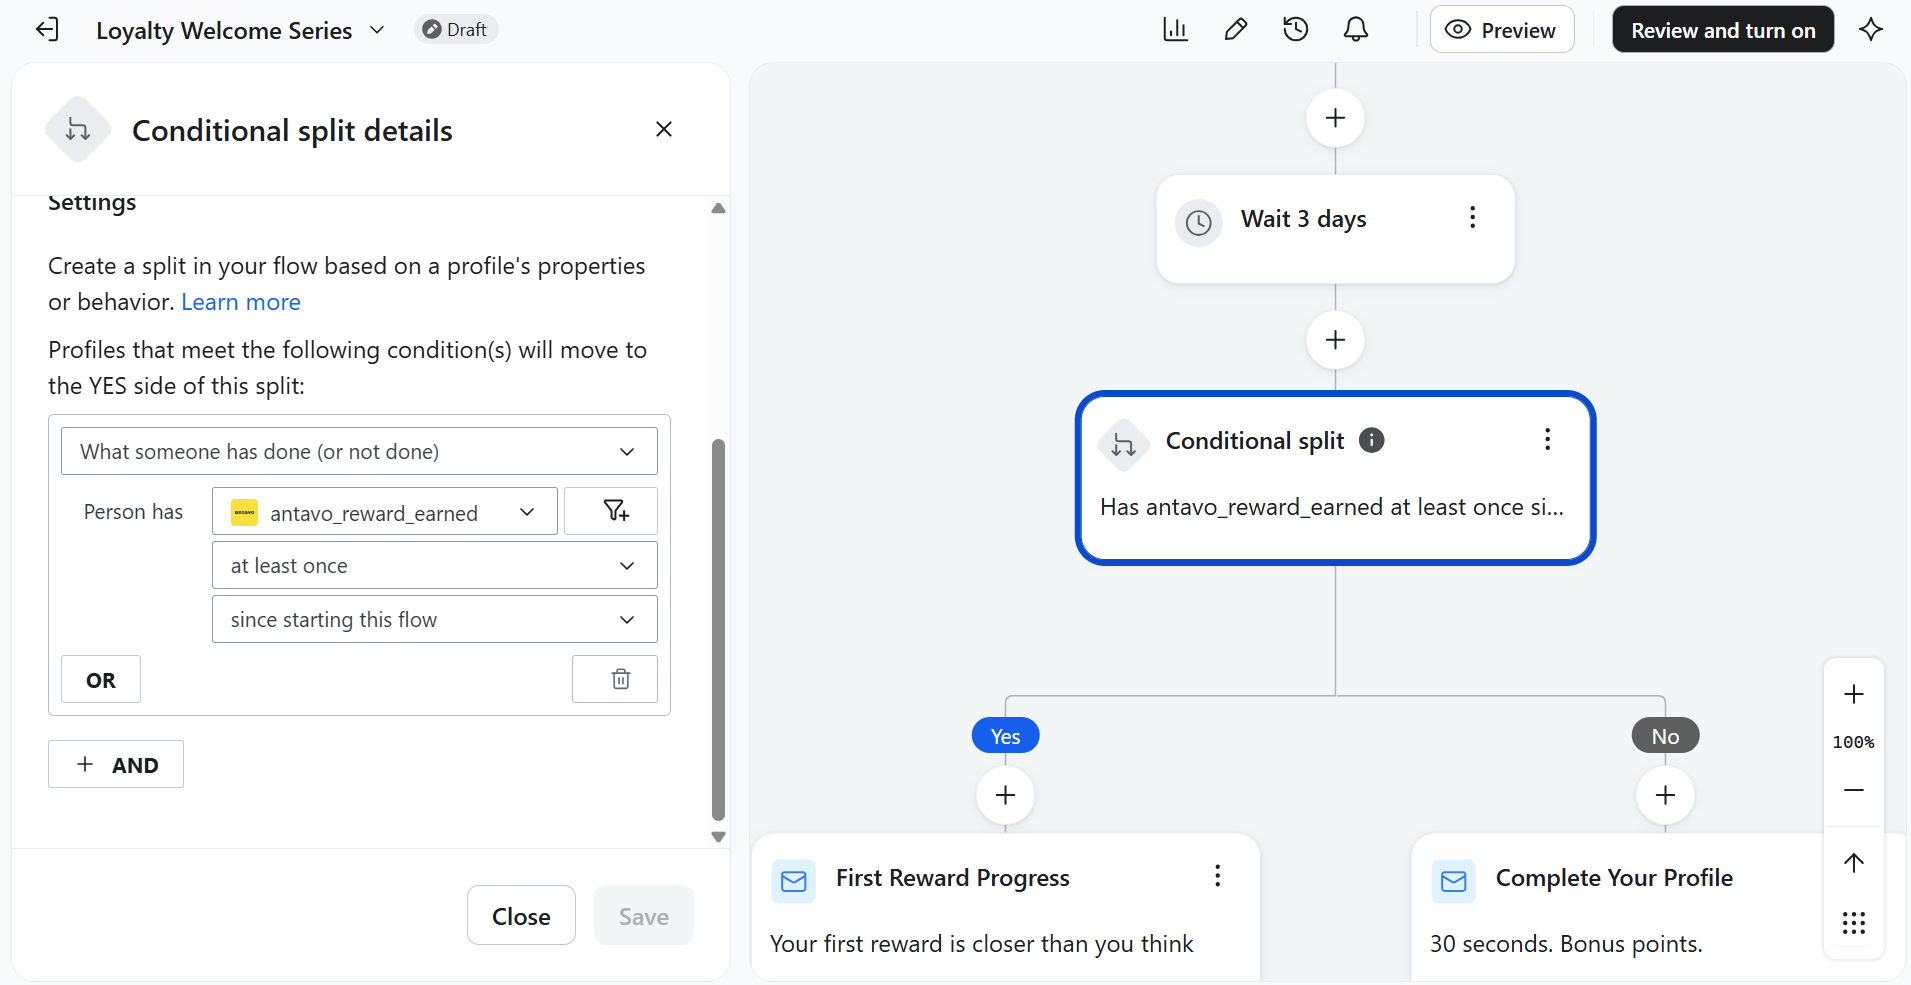
Review conditional splits in the flow and update the profile properties they use.
For example, the Loyalty Welcome Series includes a split that checks whether the customer has completed their profile. Replace the placeholder property with the corresponding profile property used by your loyalty program.Make sure you delete the yellow instruction block
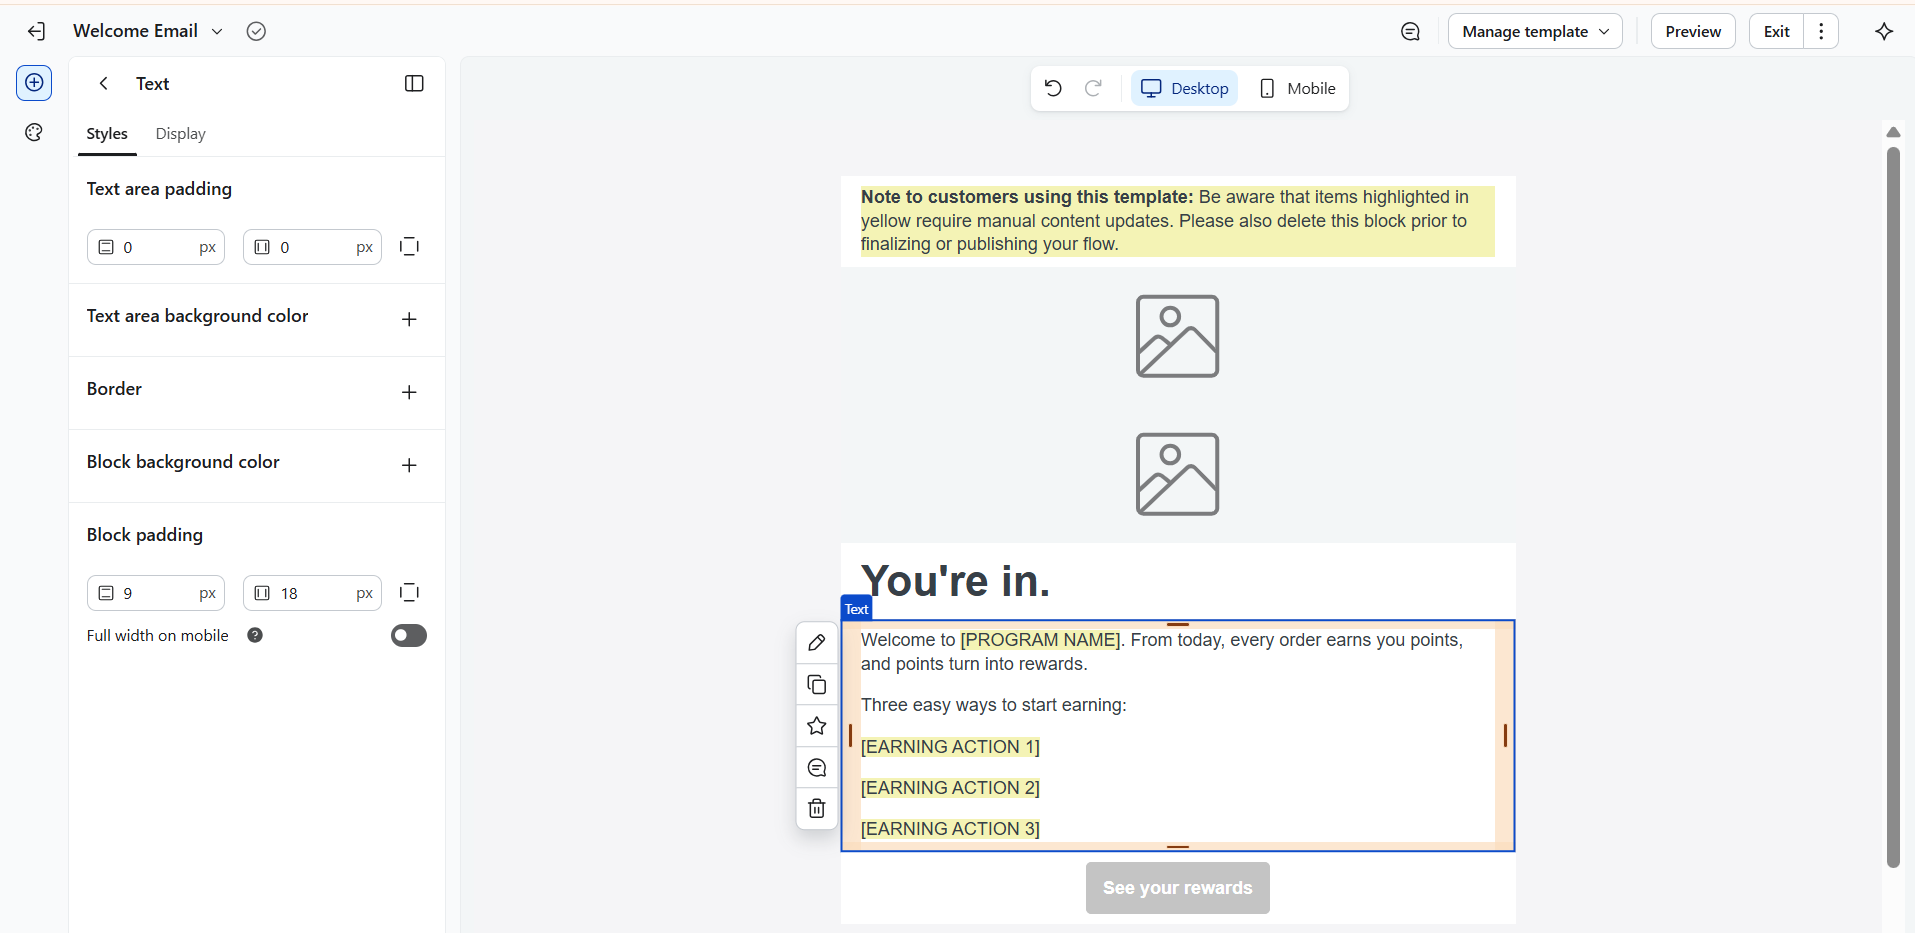
A welcome template email before customization with placeholder image blocks and yellow-highlighted items to update.
Step 5: Testing and activating the flow
Test each flow before activating it.
Set the flow and all messages to Manual status before triggering the test event.
Profiles cannot enter a flow while it is in Draft status, and events received in this status are not applied retroactively. In Manual status, profiles can enter the flow and move through its steps, but messages are held for review rather than sent automatically.Trigger the relevant loyalty event in Antavo using a test customer
Confirm that the event appears on the test customer’s profile in Klaviyo
Confirm that the test customer enters the expected flow
Review the content and rendering of each message
Test all links
Verify the flow’s conditional splits and timing
Confirm that the event payload contains all data used by the flow
Once you have verified that the flow works as expected, set each message and the flow to Live.
Klaviyo’s Smart Sending setting functionality may prevent a test message from being sent if the test profile has recently received another message within the configured time period. Use a new test profile for each flow or temporarily disable Smart Sending while testing.