Salesforce Service Cloud enables customer service agents to work faster and more productively across customer service channels such as phone, email, web chat, and social media. This helps make customer service frictionless, helps businesses improve customer satisfaction scores, and reduces costs.
This document describes the steps necessary to configure Salesforce Service Cloud, then introduces specific supported use cases.
Installing the package
Before installing the application, ensure that the Antavo Loyalty Cloud is fully configured. This includes setting up the required API endpoints, API secrets, modules, and integration components.
The managed package can be installed in both sandbox and production environments from the AppExchange Marketplace.
Salesforce Marketplace install
Open the AppExchange Marketplace from your Salesforce organization by navigating to Setup → Apps → AppExchange Marketplace, then search for the Antavo app.
Alternatively, you can access the Marketplace listing directly by following this link and starting the installation from there.
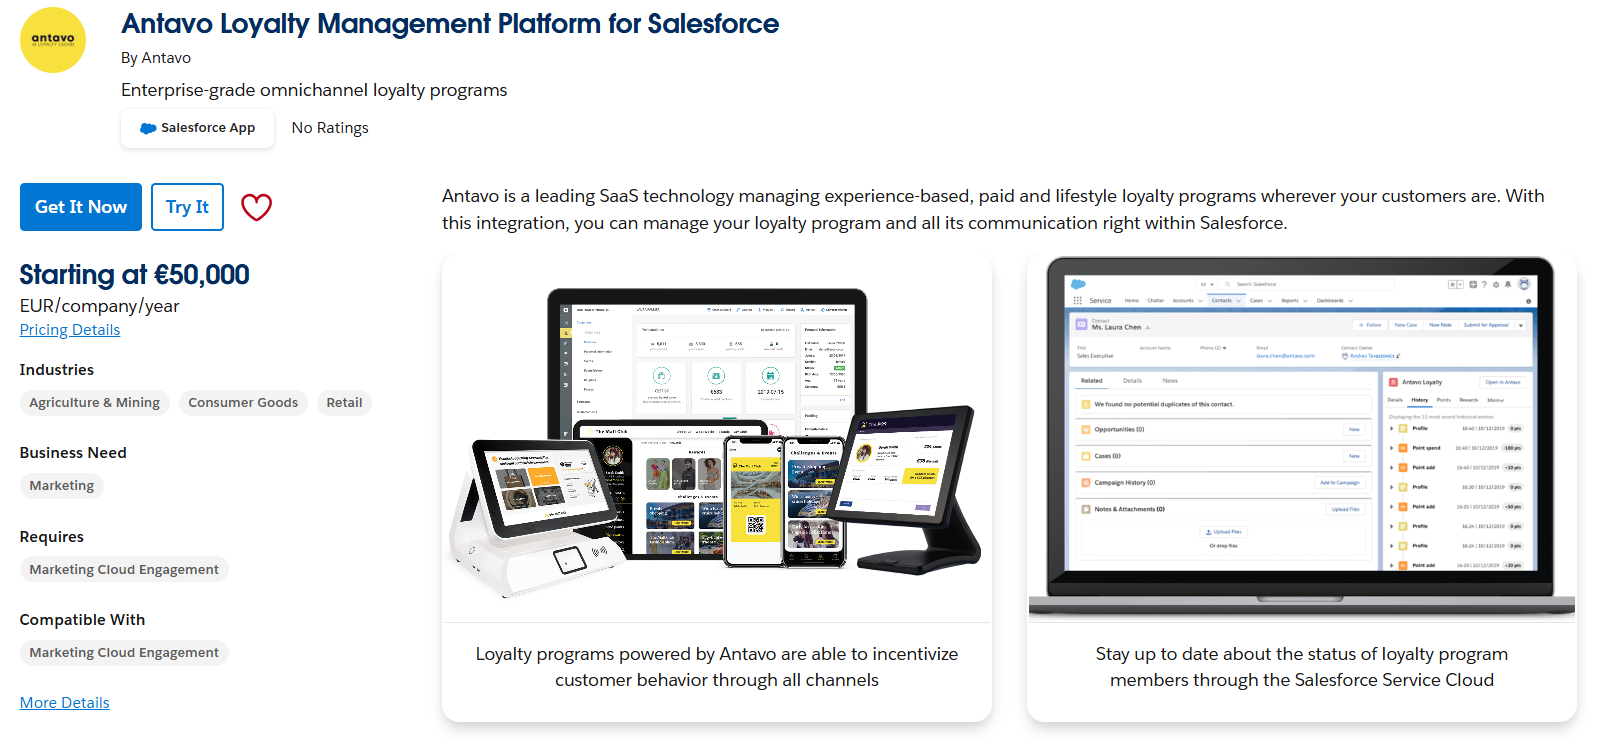
Get the package
Click the Get it Now button. If this is the first time you are installing an application / managed package from the machine you are working on, you might get prompted to log in again by Salesforce. Upon successful login, you will be asked to grant your organization access to the AppExchange API.Confirm your payment details (optional)
In some cases, you might be asked to confirm your payment details before you can proceed with the installation.
Click the Go to AppExchange Website button to confirm your payment details.
Installation is available based on your existing access rights and entitlements to the Antavo Loyalty Engine, no additional action is required in this regard.
Select the installation location
After confirming your payment details, you will be able to select the organization where you want to install the managed package. Both production and sandbox installations are supported. Depending on your choice, you will need to press the Install in Production or Install in Sandbox buttons.

Confirm installation details
On the next screen, you will have the chance to review the details of the installation, including the release name and version number. You will also need to accept the terms and conditions, which can also be viewed directly on the Antavo website.
By clicking Confirm and Install, the installation will begin. Please make sure that you have the necessary privileges to install the package before commencing.
.png "304978c9-d168-4b23-b2ba-b8bec5740e68(1).png")
Post-installation setup
You have now successfully installed the Antavo Loyalty managed package in your Salesforce organization. However, some steps need to be completed before users in your organization can start using the package.
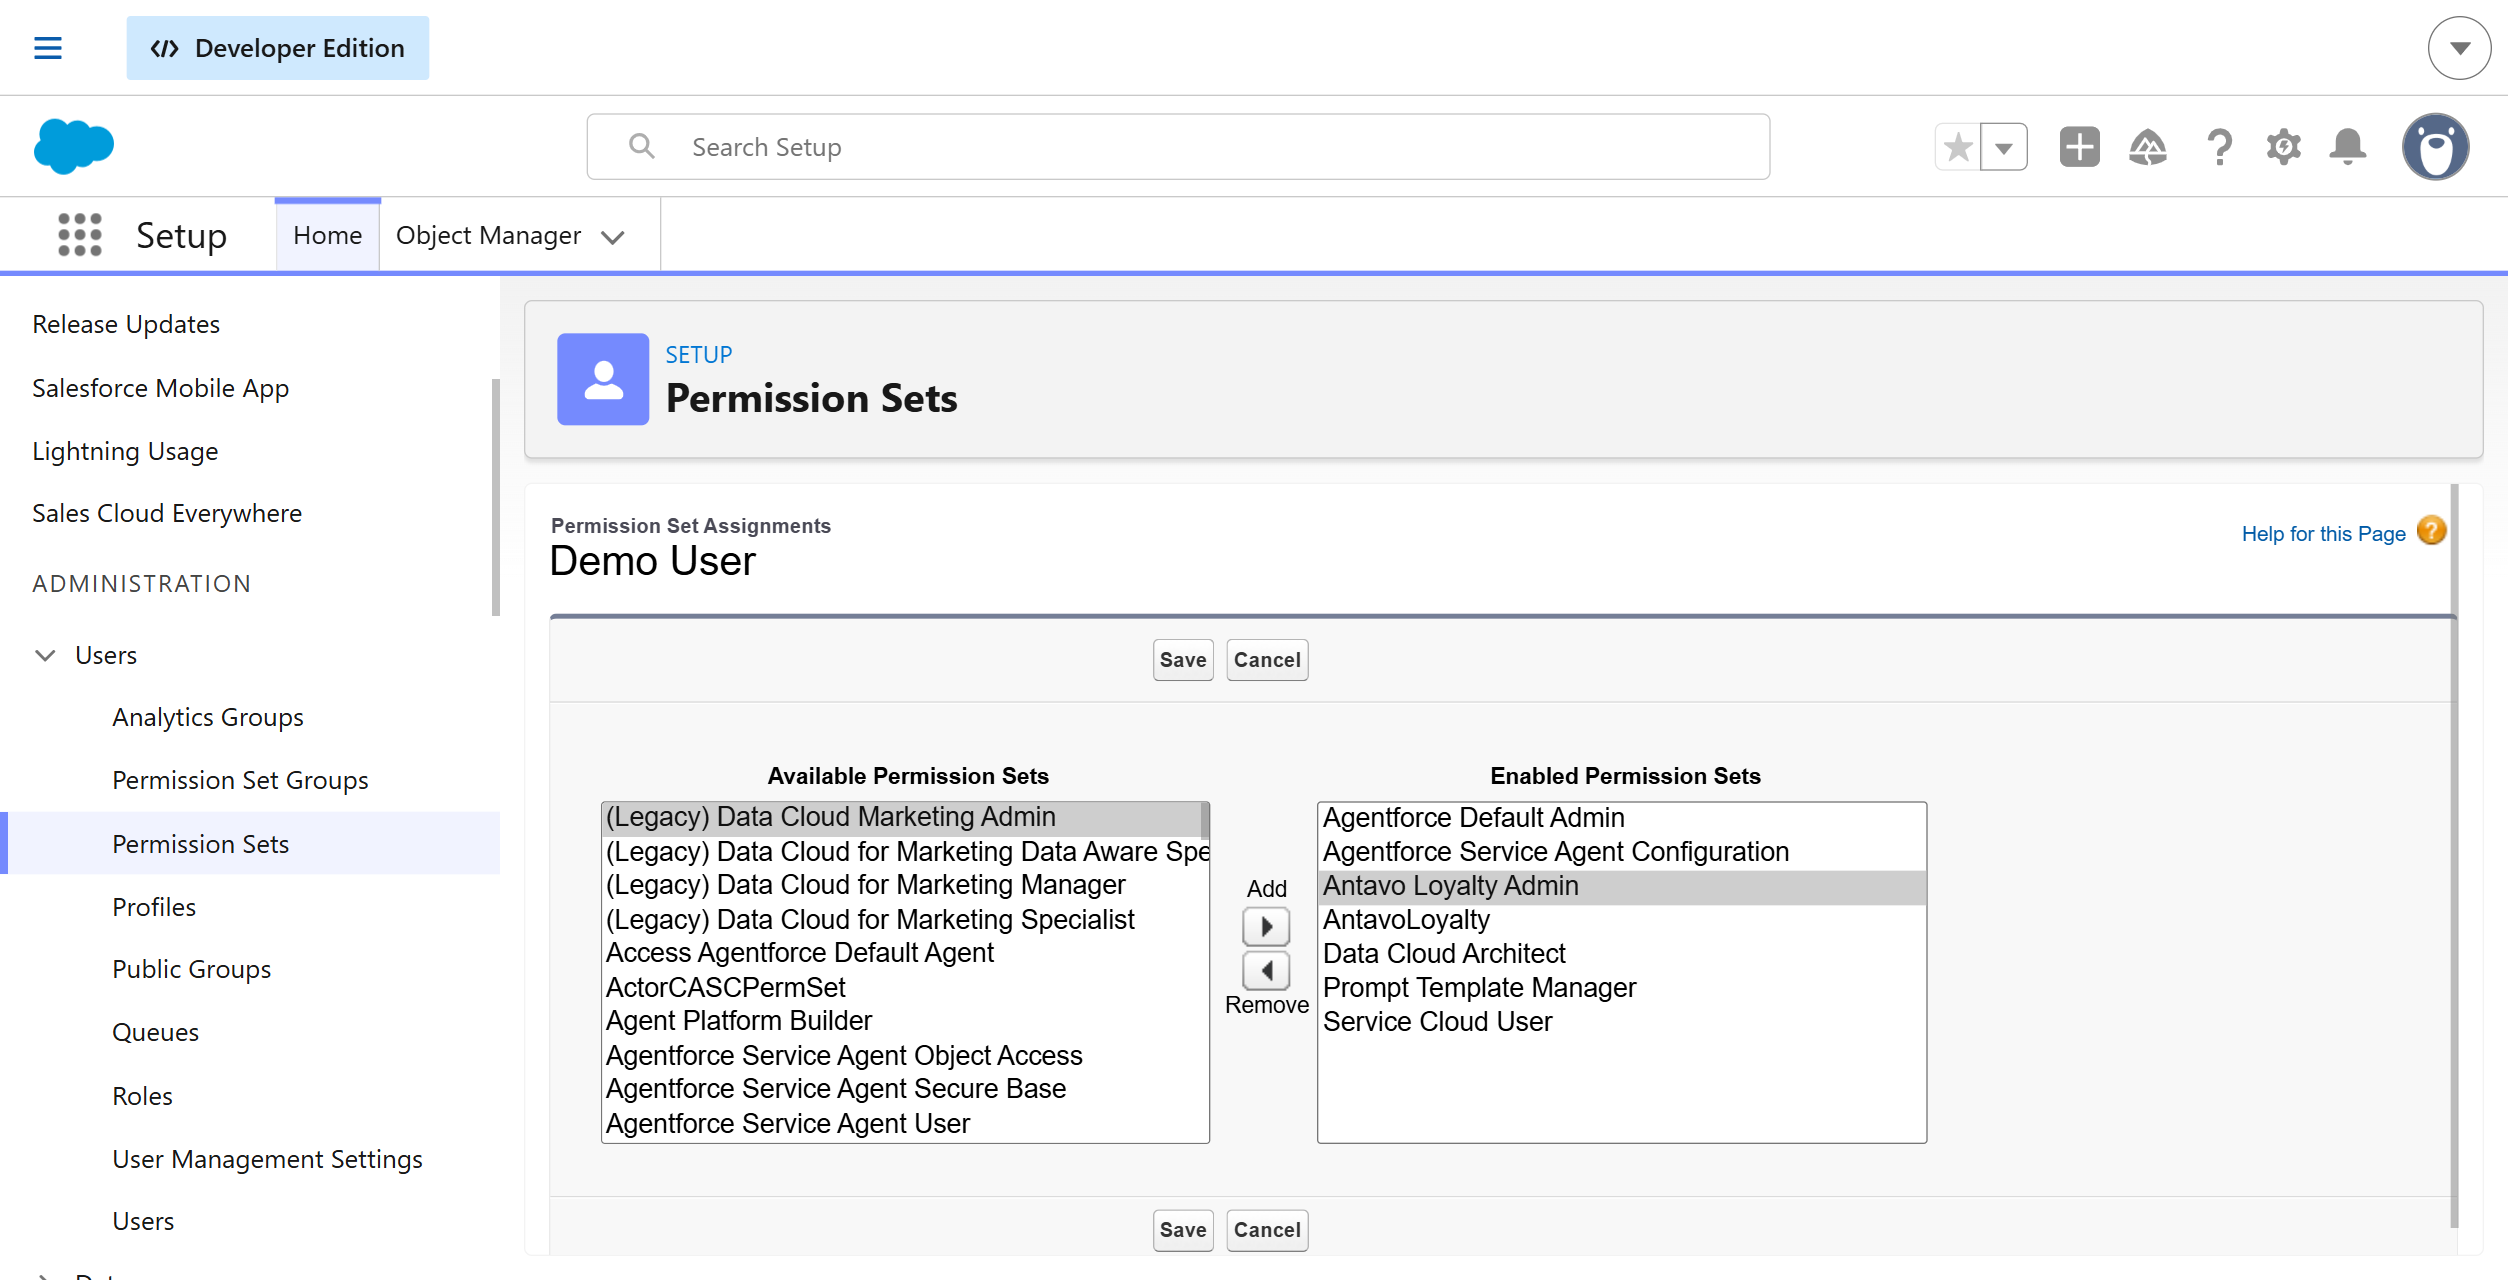
Assign permission sets to relevant users
The package delivers two permission sets:
Antavo Loyalty Admin: Assign this to a System administrator user, who will configure the Antavo integration.
AntavoLoyalty: Assign this to non-admin users, who are expected to manage loyalty programs but not to configure the Antavo integration in Antavo’s Management UI.
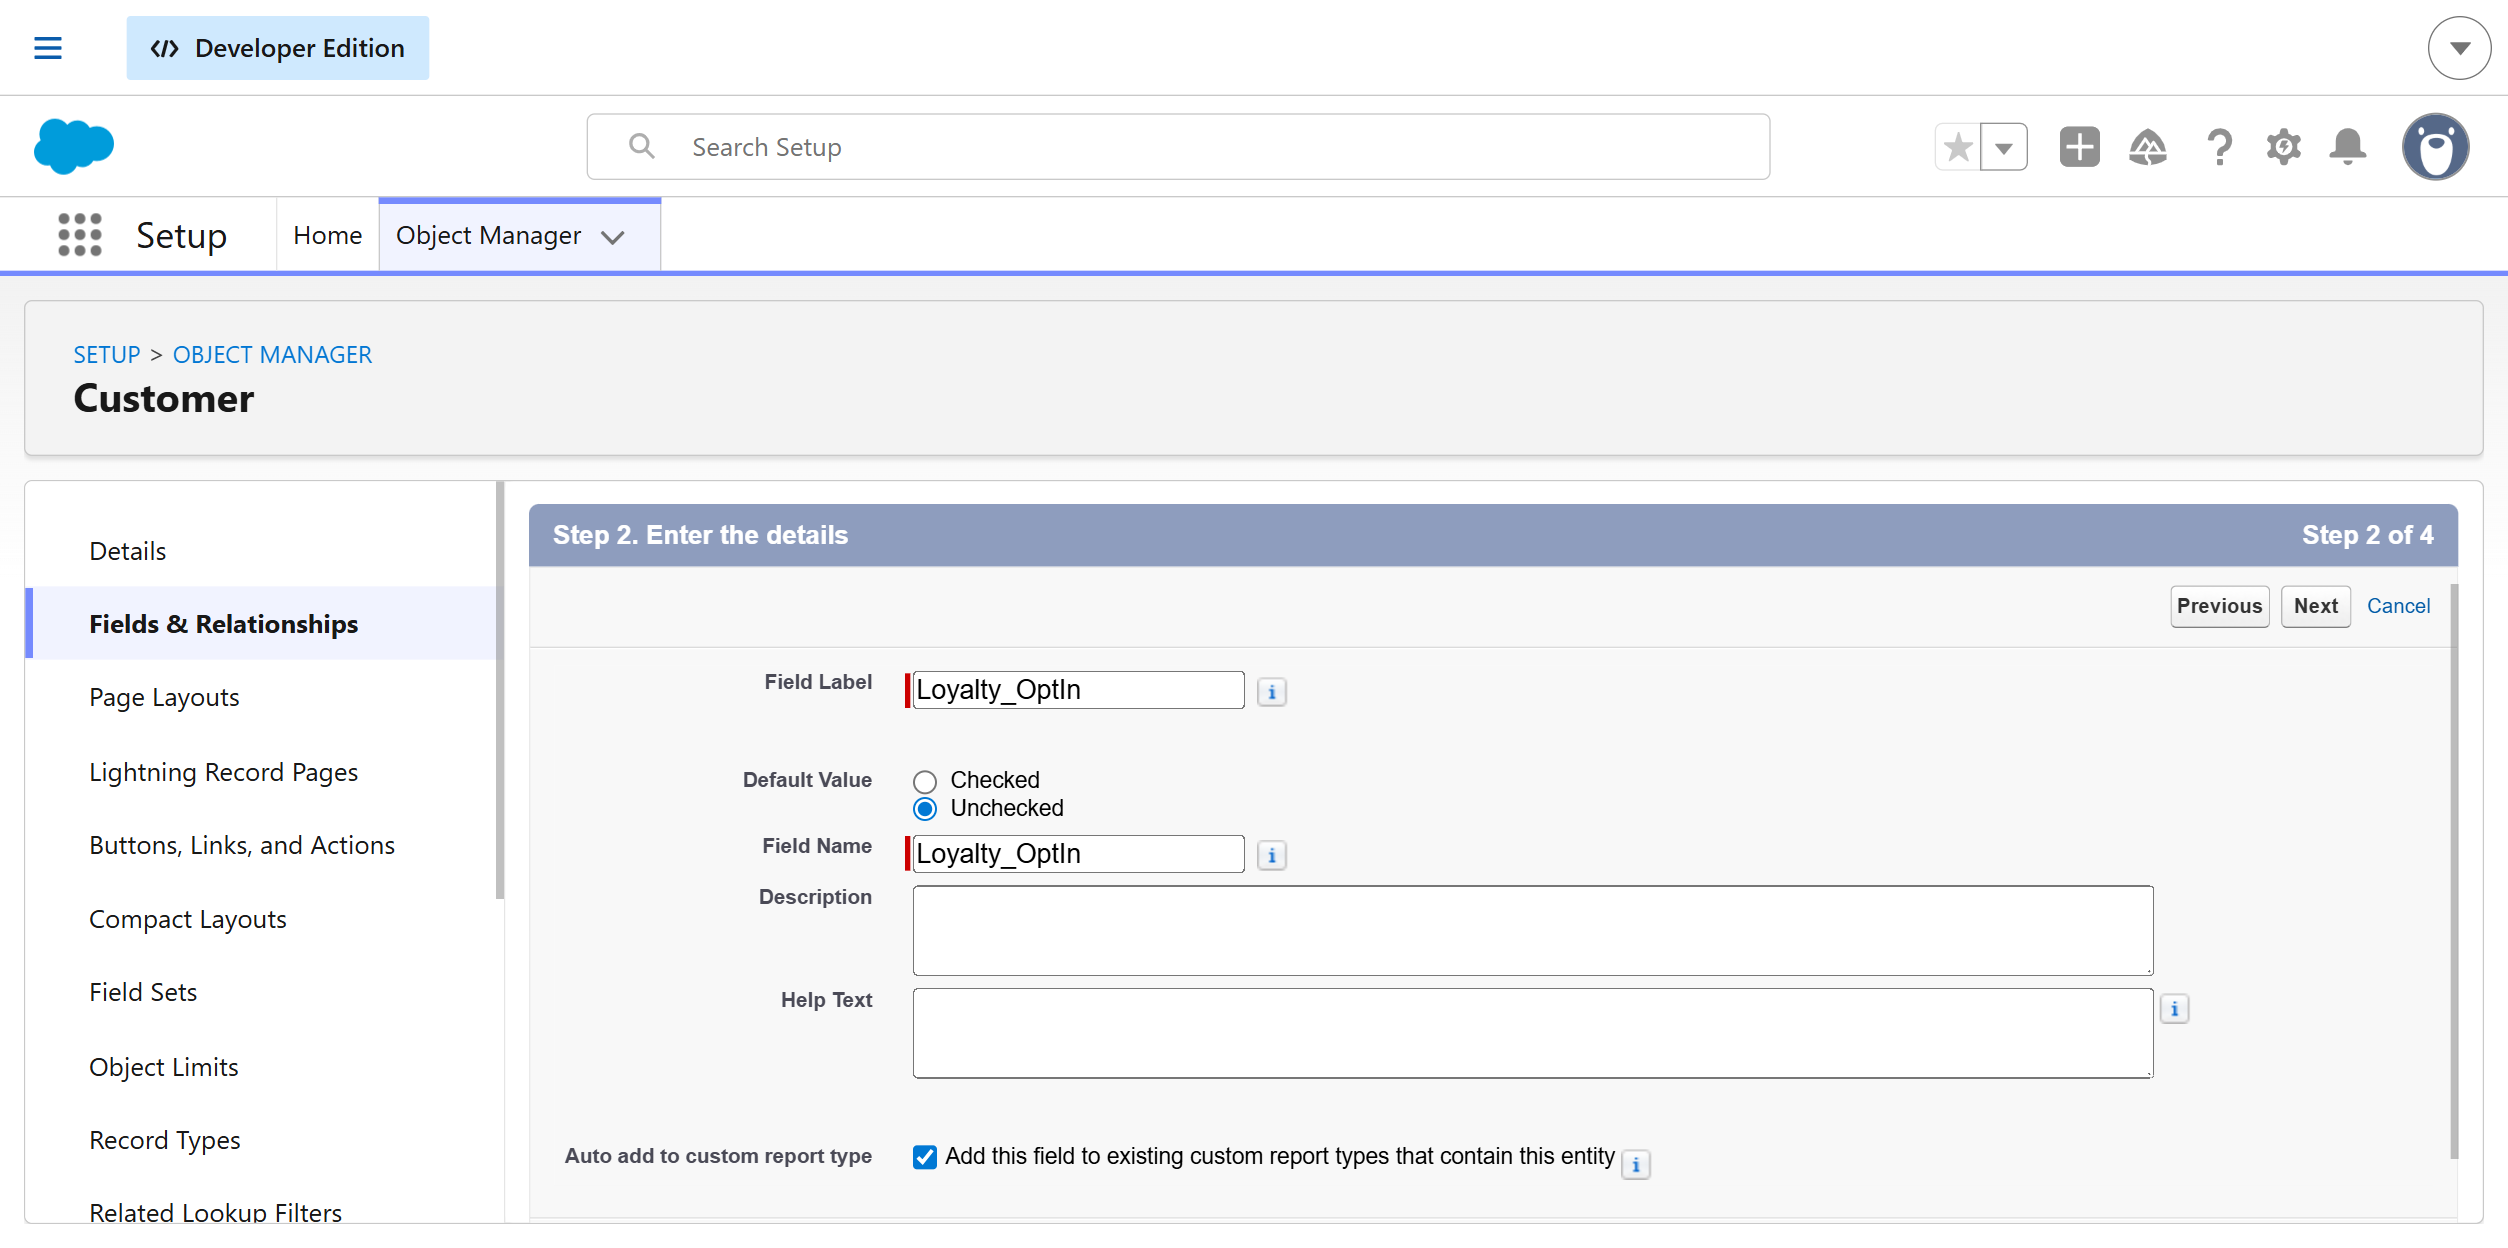
Create the Antavo Loyalty fields on the SObject that will be enrolled in Loyalty programs
Every SObject in Salesforce that should participate in an Antavo loyalty program must be configured with the required fields. All fields that will be synchronized with Antavo must exist on the relevant SObjects before configuring field mappings.
Additional details about synchronization mappings are described in the Mapping Configuration section of this document.
The Salesforce integration supports Antavo’s Multi-accounts and Tiers modules in Antavo. To use these modules, the following must be configured in Antavo:
Multi Accounts: An account must be set up.
Tiers: A tier structure with tier levels must be configured for the tier structure.
If these modules are not enabled or used in your Antavo environment, you can skip creating the related Salesforce fields shown in the examples below.
Single SObject Configuration
If you want to enroll a Customer__c Salesforce object in an Antavo Loyalty program, create the required Antavo Loyalty fields on the Customer__c object before configuring mappings.
First_Name__cLast_Name__cDoB__cEmail__cLoyalty_OptIn__cLoyalty_OptIn_Date__cLoyalty_Status__cLoyalty_Last_Synced__c- this field must not be mapped for synchronization with AntavoLoyalty_Claimed_Rewards__cLoyalty_{account id}_Earned_Points__cLoyalty_{account id}_Earned_Points__cLoyalty_{account id}_Expired_Points__cLoyalty_{account id}_Spendable_Points__cLoyalty_{account id}_Pending_Points__cLoyalty_{account id}_Reserved_Points__cLoyalty_{account id}_Spent_Points__cLoyalty_Tiers_{tiers stucture id}_Level__c
Add all accounts and tier structures with their corresponding IDs.
Next, create the required mapping configurations in the Antavo Mapping Configuration tab of the Antavo Loyalty application.
profileAntavo action: Maps the customer profile-related fields of the selected Salesforce SObject.
Multiple SObjects Configuration
Alternatively, several SObjects in Salesforce can be created and their relevant fields then mapped:
Customer__cFirst_Name__cLast_Name__cDoB__cEmail__cSource_System__cDefault_Language__cCountry__cGenderLoyalty_Claimed_Rewards__cLoyalty_OptIn__cLoyalty_OptIn_Date__cLoyalty_Last_Synced__c(Note: this specific field must not be mapped for synchronization with Antavo)etc.
Customer_Registration__cBrand__cRegistered_Service__cCustomer_Status__cDouble_OptIn_State__cPreferred_Store__cSubscription_Type__cetc.
Checkout__cTranslation_ID__cTotal__cCoupon__cIP_Address__cUser_Agent__cSource__cetc.
Checkout_Item__cTransaction_ID__cTotal__cProduct_ID_ccProduct_Name__cProduct_URL__cQuantity__cPoints_Rewarded__cSubtotal__cPrice__cDiscount__cPoints_Capped__cetc.
Add Antavo SObject tabs to the Antavo Loyalty Application
Add all Salesforce SObjects related to your Antavo Loyalty integration to the Antavo Loyalty application so users can access all loyalty-related information from one place.
To configure this:
Navigate Setup → Apps → App Manager
Locate the Antavo Loyalty application edit interface
Open the Navigation Items section
Add the relevant SObject tabs to the Navigation Items list
Click Save
Configure the Antavo Settings
Navigate to Antavo Loyalty → Antavo Settings and configure the following:
Antavo API credentials
Enter the API credentials obtained from the Antavo Loyalty Engine Management UI under Settings → API tab.
The API Secret is only displayed when credentials are generated. Please contact the team member who has access to this information.Email recipients
Configure one or more email recipients who should receive notifications when the DeleteLogsScheduler job removes accumulated log records.HTTP Callout Max Retry Count
Define the maximum number of retry attempts for failed HTTP requests sent to Antavo.
Each failed retry increments theFailed_Callout__c.Attempts_Count__cvalue. Once the configured retry limit is reached, no additional retries are attempted, and an email notification is sent to the configured recipients.HTTP Request Logging
Enable logging all HTTP requests, including successful ones. This can help with troubleshooting and debugging, but it may generate a large number of log entries that should be reviewed and cleaned up regularly.
After completing the configuration, click Save.
Connect your Antavo instance to your Salesforce organization
Configure Salesforce's Antavo Loyalty Connected App credentials in Antavo
Use the connected app that is distributed with the Antavo Loyalty package. This Web Server OAuth flow mandates that a specific user authorizes the connection between Antavo and Salesforce, and because of this, all subsequent record modifications made through this connection will be attributed to that specific user.
Under the Management UI of the Loyalty Engine, navigate to Modules → Salesforce Sales Cloud
Enter the credentials for the packaged connected app. These are available from the Connected App in the packaging organization.
For the consumer key and secret, contact the Antavo Service Desk.Authorization flow: Web Server
Click the Connect button
Log in to your Salesforce organization and authorize the connection
Configure field mapping in Antavo
After a successful OAuth authorization in the Loyalty Engine, navigate to the Field Mappings tab of the Service Cloud module interface, where you can map Antavo fields to a Salesforce SObject and its relevant fields and Record Type.
If you are configuring the integration with the Tiers and Multi-accounts module enabled, make sure the tiers and accounts are configured.
Map the following fields:
Customer fields
Default Fields
claimed_rewardslast_syncedoptin_datestatusopt_inaccounts.{account id}.earnedaccounts.{account id}.spendableaccounts.{account id}pendingaccounts.{account id}.reservedaccounts.{account id}.spentaccounts.{account id}.expiredtiers.tier_{tier structure id}._idtiers.tier_structure02._id
Add all accounts and tier structures with their corresponding IDs.
Custom Fields
Birthdate
Email
First name
Last name
any other custom field
Mapping the Record Type ID
Fill in the Record Type ID of the mapped SObject that you want to use when newly created records from Antavo are synced to Salesforce.
Use the same Record Type ID value for all field mappings related to the same SObject.
Only provide a Record Type ID if the Salesforce SObject has custom record types configured.
If the SObject only uses the default Master record type in both Salesforce and Antavo, leave the Record Type ID fields empty. However, if the Salesforce SObject contains additional record types, you must specify the Record Type ID in the mapping configuration, even when using the Master record type.
To find the Record Type ID value in Salesforce:
Open Salesforce and click the Gear icon in the top right corner
Select Developer Console
In the Developer Console, navigate to Debug → Open Execute Anonymous Window
Run the following Apex code:
System.debug(
        Schema.SObjectType.Customer__c
                .getRecordTypeInfosByDeveloperName()
                .get('Retail_Customer')
                .getRecordTypeId()
);
Update the values in the example as needed:
Replace
Customer__cwith the API name of your Salesforce SObject.Replace
Retail_Customerwith the API name of the Record Type.
After executing the code, copy the Record Type ID from the Debug log output and use it in the Antavo mapping configuration.
Click Save when you're done.
Configure field mapping in Salesforce
Configure field mappings in Salesforce under Antavo Loyalty → Antavo Mapping Configuration.
You can create separate mapping configurations for the following Antavo actions:
profilecustomer_registrationcheckoutcheckout_itemevent/{custom_event_name}- for any custom event synced to Antavoany additional custom Salesforce SObjects that should be synced to Antavo
For the predefined actions listed above, the value of the Antavo Action field must match the exact values shown here. These mappings are processed explicitly by the integration based on the configured Antavo Action value.
For any additional custom SObjects, the Antavo Action field can contain any custom value.
To create a new mapping configuration, click New on the Antavo Mapping Configuration page. For example, create a new record to configure the Customer Profile (profile) mapping.
SObject Mapping
Customer Profile Mapping (
profile)
Create a new mapping configuration for theprofileAntavo action. This mapping defines which Salesforce SObject represents the Antavo customer profile.You can use any Salesforce SObject for this purpose, but the following values must remain unchanged:
Antavo Action:
profileAntavo Object:
core/customer
Fill in the configuration fields as follows:
SObject
Select the Salesforce SObject whose records should be enrolled in Antavo Loyalty programs.RecordTypes
After selecting the SObject, its available Record Types will appear in the Available list. Move one or more Record Types to the Selected list.If the SObject only has the default Master record type, select the Master record type.
Only records that belong to the selected SObject, and the selected Record Types will display the Antavo Loyalty Lightning component on their record page and be eligible for automatic synchronization with Antavo.
Synchronization only occurs if the field mapped to the Antavo
opt_infield is set toTRUE.For child objects related to the
profilemapping, such ascustomer_registration,checkout,checkout_item, or custom event objects, all related record types must also be mapped for synchronization.For example, in the
Checkout Item → Checkout → Customerhierarchy, the following conditions must be met:the Checkout Item record type is mapped,
the Checkout record type is mapped,
the Customer record type is mapped,
and the top-level parent object mapped with the profile action is enrolled in Antavo Loyalty.
Default OptIn Status
Enable this if newly created records of the mapped SObject should automatically be enrolled in Antavo Loyalty.
This setting is only relevant for theprofileAntavo action and should not be enabled for other mapping configurations, such as:customer_registrationcheckoutcheckout_item
Active
Enable this option to activate this mapping configuration immediately after saving. Leave it disabled if you want to save the configuration as a draft.
Repeat the same process to configure SObject and field mappings for the other Antavo actions described in this section.
Checkout Transaction Mapping (
checkout)Antavo Action:
checkoutAntavo Object:
core/transaction
Checkout Transaction Item Mapping (
checkout_item)Antavo Action:
checkout_itemAntavo Object:
The value of this field is not used because Checkout Transaction Items are never synced to Antavo independently. Instead, they are always synced as nested records under their parent Checkout Transaction. You can enter any placeholder value, for exampleirrelevant.
Customer Registration Mapping (
customer_registration)Antavo Action:
customer_registrationAntavo Object:
custom/customer_registration
Field Mapping
To map Salesforce fields to Antavo fields for a selected mapping configuration, click New Field Mapping. Each field mapping connects a Salesforce SObject field to its corresponding Antavo field.
For Customer (profile) mappings, commonly used Antavo fields include:
idfirst_namelast_namebirth_dateemailopt_inloyalty_opt_in_dateloyalty_statusloyalty_claimed_rewardsany additional Antavo fields you want to sync
Do not map the loyalty_last_synced Antavo field to any Salesforce field. This field is updated automatically during synchronization from Antavo to Salesforce. Mapping it in both directions would create an endless synchronization loop.
Example of the loop:
A Salesforce user updates a Customer field, such as
emailThe Salesforce AFTER UPDATE trigger sends the update to Antavo
Antavo updates the
loyalty_last_syncedfieldThe Antavo → Salesforce sync updates the Salesforce record
The Salesforce AFTER UPDATE trigger runs again
The record is synced back to Antavo repeatedly
After configuring all required field mappings, click Save.
Finding Antavo Field Names:
Customer fields: Navigate to Settings → Customers → Fields. Use the value in the Unique ID column as the Antavo field name.
Checkout/CheckoutItem fields: Refer to the developer documentation (checkout, checkout_item). Use the values from the Name column as the field names.
Custom event fields: Navigate to Modules → Custom Events. Open a custom event and use attribute names as the Antavo field names.
Custom entity fields: Navigate to Modules → Custom Entities. Open the custom entity and use attribute names as the Antavo field names.
Required Field Mappings by Antavo Action:
profileidemailfirst_namelast_nameopt_in
checkoutid- map to SalesforceIdcustomer- map to the lookup field referencing the parent customer SObjecttotalaccount- map to the field containing the Antavo Point Account identifier
checkout_itemid- map to SalesforceIdproduct_nameproduct_idquantitypricetotalsubtotal
customer_registrationid- map to SalesforceIdcustomer- map to the lookup field referencing the parent customer SObjectbrand
Custom events
event/customer- map to the lookup field referencing the parent customer SObjectevent/account- map to the field containing the Antavo Point Account identifiermap all additional event attributes defined in Antavo
Field value substitutions
Field value substitutions allow you to map different field values between Salesforce and Antavo when the accepted values do not match. This is commonly used for picklist or enumeration fields.
For example:
Salesforce values: M and F
Antavo values: Male and Female.
In this case, you can configure substitutions so that:
Mis sent to Antavo asMaleFis sent to Antavo asFemale
To configure field value substitutions:
Open the relevant Mapping Configuration
In the Mapped Fields table, locate the field you want to configure
Click the dropdown arrow at the end of the row
Select: Map Values from the context menu
A modal window will open where you can define Salesforce values and their corresponding Antavo values. Value substitutions are only applied to the specific field where they are configured. Only exact value matches are replaced, partial value substitutions are not supported.
Create a Trigger in Salesforce
You need to create a trigger on the mapped SObject in Salesforce.
You have two options here:
Option 1: In case there isn't already a trigger created for the mapped SObject
Create a trigger and name it after your SObject, e.g.: CustomerTrigger.
Paste the following code snippet in your trigger declaration:
trigger CustomerTrigger on Customer__c (before insert,after insert, after update) {
 if(Trigger.isBefore){
   if (Trigger.isInsert) {

antavo.AntavoTriggerHandler.onBeforeInsert(Trigger.operationType, Trigger.new, Trigger.newMap, Trigger.old, Trigger.oldMap);
      }
    }
    if (Trigger.isAfter) {
        if (Trigger.isInsert) {

antavo.AntavoTriggerHandler.onAfterInsert(Trigger.operationType, Trigger.new, Trigger.newMap, Trigger.old,
Trigger.oldMap);
        }
        if (Trigger.isUpdate) {

antavo.AntavoTriggerHandler.onAfterUpdate(Trigger.operationType, Trigger.new, Trigger.newMap, Trigger.old,
Trigger.oldMap);
}
}
}
Option 2: You already have an existing trigger on the SObject that you need Antavo-integrated
In this case, you'll be adding three lines to your existing trigger's declaration, for each:
Before inserting: Add the following line of code to the relevant block in your existing trigger declaration:
antavo.AntavoTriggerHandler.onBeforeInsert(Trigger.operationType, Trigger.new, Trigger.newMap, Trigger.old,Trigger.oldMap);
After inserting: Add the following line of code to the relevant block in your existing trigger declaration:
antavo.AntavoTriggerHandler.onAfterInsert(Trigger.operationType, Trigger.new, Trigger.newMap, Trigger.old, Trigger.oldMap);
After update: Add the following line of code to the relevant block in your existing trigger declaration:
antavo.AntavoTriggerHandler.onAfterUpdate(Trigger.operationType, Trigger.new, Trigger.newMap, Trigger.old, Trigger.oldMap);
Create similar triggers, or add similar lines to existing triggers for the other SObjects that need to be synced to Antavo.
Not all SObjects need to invoke trigger handling on all three trigger operations. Here's a list of commands that must be present in every SObject's trigger per Antavo Action:
profileantavo.AntavoTriggerHandler.onBeforeInsert(Trigger.operationType, Trigger.new, Trigger.newMap, Trigger.old,Trigger.oldMap);antavo.AntavoTriggerHandler.onAfterInsert(Trigger.operationType, Trigger.new, Trigger.newMap, Trigger.old,Trigger.oldMap);antavo.AntavoTriggerHandler.onAfterUpdate(Trigger.operationType, Trigger.new, Trigger.newMap, Trigger.old,Trigger.oldMap);
checkoutNo trigger is needed on the Checkout SObject. The sync is initiated in a trigger on the child Checkout_Item__c SObject
checkout_itemantavo.AntavoTriggerHandler.onAfterInsert(Trigger.operationType, Trigger.new, Trigger.newMap, Trigger.old,Trigger.oldMap);
customer_registrationor any subsequent custom entityantavo.AntavoTriggerHandler.onAfterInsert(Trigger.operationType, Trigger.new, Trigger.newMap, Trigger.old,Trigger.oldMap);antavo.AntavoTriggerHandler.onAfterUpdate(Trigger.operationType, Trigger.new, Trigger.newMap, Trigger.old,Trigger.oldMap);
Custom events
antavo.AntavoTriggerHandler.onAfterInsert(Trigger.operationType, Trigger.new, Trigger.newMap, Trigger.old, Trigger.oldMap);
Drag the antavoLoyaltyWidget Lightning Web component on the SObject detail page
Do not use the deprecated
AntavoLoyaltyDataAura component, use theantavoLoyaltyWidgetLightning Web Component instead.
To add the component:
Open a record detail page for the mapped SObject
Click the Gear icon and select Edit Page
In the Lightning App Builder, open the Components tab on the left
Under Custom - Managed, locate the
antavoLoyaltyWidgetcomponentDrag the component into the page layout area
Click Save
If prompted, click the Activate button to make the page available to users
If the activation dialog does not appear automatically, click the Activation button
Select Assign as Org Default
Choose Desktop and phone
Click Save
Once the changes are saved, click the Arrow button in the upper-left corner of the Lightning App Builder to return to the record page.
Schedule jobs in Salesforce
Schedule a job to delete log records
Create a scheduled job to regularly clean up stored log records.
This scheduled job deletes log records older than 30 days and sends the deleted logs as an email attachment to the recipients configured in Antavo Settings.
To configure the job:
Navigate to Setup → Custom Code → Apex Classes
Click Schedule Apex
Configure the job with the following values:
Job Name:
Delete LogsApex Class:
DeleteLogsSchedulerFrequency:
Monthly
Configure the remaining schedule settings as needed. It is recommended to choose a Preferred Start Time outside of active business hours.
Click Save
To verify the job was scheduled successfully, navigate to Setup → Environments → Jobs → Scheduled Jobs and confirm that a Delete Logs scheduled job appears in the list.
Schedule a job to retry failed callout requests
The FailedCalloutsRetryScheduler job must run more frequently than once per day. Since the Salesforce Schedule Apex UI only supports Monthly, Weekly, or Daily intervals, this job must be scheduled using Anonymous Apex.
To configure the job:
Open the Developer Console.
Navigate to Debug → Open Execute Anonymous Window
Run the following Apex code:
antavo.FailedCalloutsRetryScheduler fcrScheduler =
    new antavo.FailedCalloutsRetryScheduler();

String schInterval = '0 0 * * * ?';

System.schedule(
    'Retry Failed Callouts Hourly',
    schInterval,
    fcrScheduler
);
This configuration schedules the retry job to run hourly.
After executing the code, verify the scheduled job under Setup → Environments → Jobs → Scheduled Jobs and confirm that a Retry Failed Callouts Hourly scheduled job appears in the list.
Supported use cases
Once the antavoLoyaltyWidget component has been properly placed on the Record Page, you can begin managing customer data in the loyalty program.
The following use cases are supported:
Check the customer’s event history
Add or subtract points on the customer’s account per loyalty cards/point accounts
Claim rewards on the customer’s behalf
Check or change the customer’s membership status
Check the customer’s and point balance
Look up the contact using the search, or select a recently accessed contact from the Contact drop-down menu in the main navigation
Locate the Antavo Loyalty component on the Record Page
Select the Loyalty Card / Point Account from the dropdown you would like to see the points for (optional; only necessary if the Points Economy Antavo module is enabled and there are multiple point accounts configured)
Click the Details tab in the Antavo Loyalty component
See the information on the tab
The following information will be displayed:Lifetime points: The number of points the customer has accumulated during their membership. Points that have expired or have been otherwise invalidated will not be deducted from this balance.
Available points: The number of spendable points in the customer's account.
Spent points: The number of points the customer has spent during their membership.
Reserved points: The number of points that have been reserved in the customer's account after claiming physical rewards. These points are converted to Spent points once the physical reward has been shipped to the customer.
Pending points: The number of points pending on the customer's account. Pending points are usually awarded for purchases that need to be confirmed once the return policy period has passed.

Check the customer’s event history
The customer’s event history displays the most recent actions the customer has performed in the loyalty program. By default, this view shows the last 15 events. More events can be viewed by logging into Antavo. Follow these steps to access the Events History:
Look up the Contact using the Search or select a recently accessed Contact from the Contact drop-down menu in the main navigation
Locate the Antavo Loyalty component on the Record Page
Selecting the Loyalty Card / Point Account from the dropdown does not affect the contents of this tab
Click the History tab in the Antavo Loyalty component
Click the arrow on the left side of each event to see more details.

Add or subtract points on the customer account
If your brand is running a points-based loyalty program, you can administer points on the customer’s account directly through Salesforce Service Cloud.
There are 3 different actions supported:
Add points: This adds points to the customer account, increasing both the available and lifetime points of the customer
Subtract points: This deducts points from the customer account, decreasing both the available and lifetime points of the customer
Spend points: This spends points on the customer’s behalf, so the points remain in the lifetime points but are no longer available points to spend.
Follow these steps to administer points on the customer account:
Look up the Contact using the Search or select a recently accessed Contact from the Contact drop-down menu in the main navigation
On the Record Page, locate the Antavo Loyalty component
Select the Loyalty Card / Point Account from the dropdown you would like to alter the points for (optional, only necessary if the Incentivized purchase and Multi-Accounts Antavo modules are enabled)
Click the Points tab in the Antavo Loyalty component
Select the action that you would like to perform on the account
Enter the number of points you would like to add, subtract or spend on behalf of the customer
Specify a reason that will be visible in the Events History when someone inspects the customer's previous actions. We recommend including a clear statement about why you are performing the action
Click Submit to finalize the action.

Claim rewards on behalf of the customer
Check the list of rewards available for the customer to claim, select and claim them right away in Salesforce Service Cloud. Our solution checks for the rewards available in the Antavo Management UI, taking the following criteria into account:
The customer has enough points to claim the reward, if the reward costs points
The customer is a member of a valid segment, if the reward is limited to certain customer segments
The date and time are within the claim boundaries set during the setup of the reward
The reward is in stock if the reward stock is managed by Antavo
Follow these steps to claim a reward on behalf of the customer:
Look up the Contact using the Search or select a recently accessed Contact from the Contact drop-down menu in the main navigation
On the Record page, locate the Antavo Loyalty component
Selecting the Loyalty Card / Point Account from the dropdown does not affect the contents of this tab
Click the Rewards tab in the Antavo Loyalty component
Select the reward that you would like to claim from the list by ticking
The checkbox beside the reward image
Click Claim to claim the reward

Check and change the customer’s membership status
The Membership tab can be used to view the customer’s current membership information. If the customer is enrolled in the loyalty program, you will see the date when they joined. You will also be able to opt the customer out directly from here.
If the customer is not yet a member of the program, you can enroll them in the program using this tab.
Look up the Contact using the Search or select a recently accessed Contact from the Contact drop-down menu in the main navigation bar
Locate the Antavo Loyalty component on the Record page
Selecting the Loyalty Card / Point Account from the dropdown does not affect the contents of this tab
Click the Membership tab in the Antavo Loyalty component
The date on which the customer joined the program will be displayed
Click Opt-out to remove the customer from the loyalty program.
Follow these steps to enroll (opt-in) the customer in the loyalty program:
Look up the Contact using the Search or select a recently accessed Contact from the Contact drop-down menu in the main navigation
Locate the Antavo Loyalty component on the Record page
Click the Membership tab in the Antavo Loyalty component
A notice will be displayed to you that the customer is not a member currently
Click Opt-in to enroll the customer in the loyalty program
Platform Governor Limits Utilization
Scenario: Create/Modify an SObject record in Salesforce
This might include:
Customer
Customer Registration
Checkout Transaction
Loyalty Card
Any other arbitrary custom entities that are mapped for synchronization
Salesforce Governor Limit: Maximum number of asynchronous Apex method executions per a 24-hour period
Allowance: 250,000 or the number of user licenses in your org multiplied by 200, whichever is greater
Utilization: 1 per record
Notes: This would depend on the number of SObject records modified:
Create/Update a single record via the Salesforce UI, would result in a single Async execution for the record.
Bulk update/create via Data Loader would result in number-of-records/200 Async executions.
In both cases, the async executions will be accumulated per a sliding 24-hour period.
Scenario: Incoming REST request via the Antavo integration
Salesforce Governor Limits:
Concurrent API Request
Allowance: 25
Utilization: 1
Notes: Per sync request from Antavo to Salesforce
Total API Request Allocations
Allowance: 100,000 + (number of licenses x calls per license type) + purchased API Call Add-Ons
Utilization: 1
Notes: Per sync request from Antavo to Salesforce
Scenario: Log entries and Failed Callouts rotation
Salesforce Governor Limits:
Maximum number of Apex classes scheduled concurrently
Allowance: 100
Utilization: 2
Notes: See below
Maximum number of batch Apex jobs queued or active concurrently
Allowance: 5
Utilization: 2
Notes: See below
Outbound Email messages per day
Allowance: 5000
Utilization: 1
Notes: See below
All three limits share a common note: The utilization would depend on the time-frequency of the scheduled jobs:
DeleteLogsScheduler: clears entries older than 30 days, processing batches of 2,000 records in size.The client may schedule these to run whenever suits them - recommended once a month.
FailedCalloutsRetryScheduler: processes Failed Callout recordsThe client may schedule these to run whenever suits them - recommended hourly.