By adding your offline store locations to the Stores module, you can use the loyalty platform to run loyalty campaigns tailored to specific stores. This functionality provides an overview of how your loyalty program is performing in each store.
To track store-specific customer actions, coordinate with your developer to ensure that the store identifier is included with the transactional data sent through the Events API.
To access the configuration page, open the Modules menu and search for the Stores module. The page will display the list of stores already added with the following information:
Name | The name of the store |
Identifier | The unique identifier of the store |
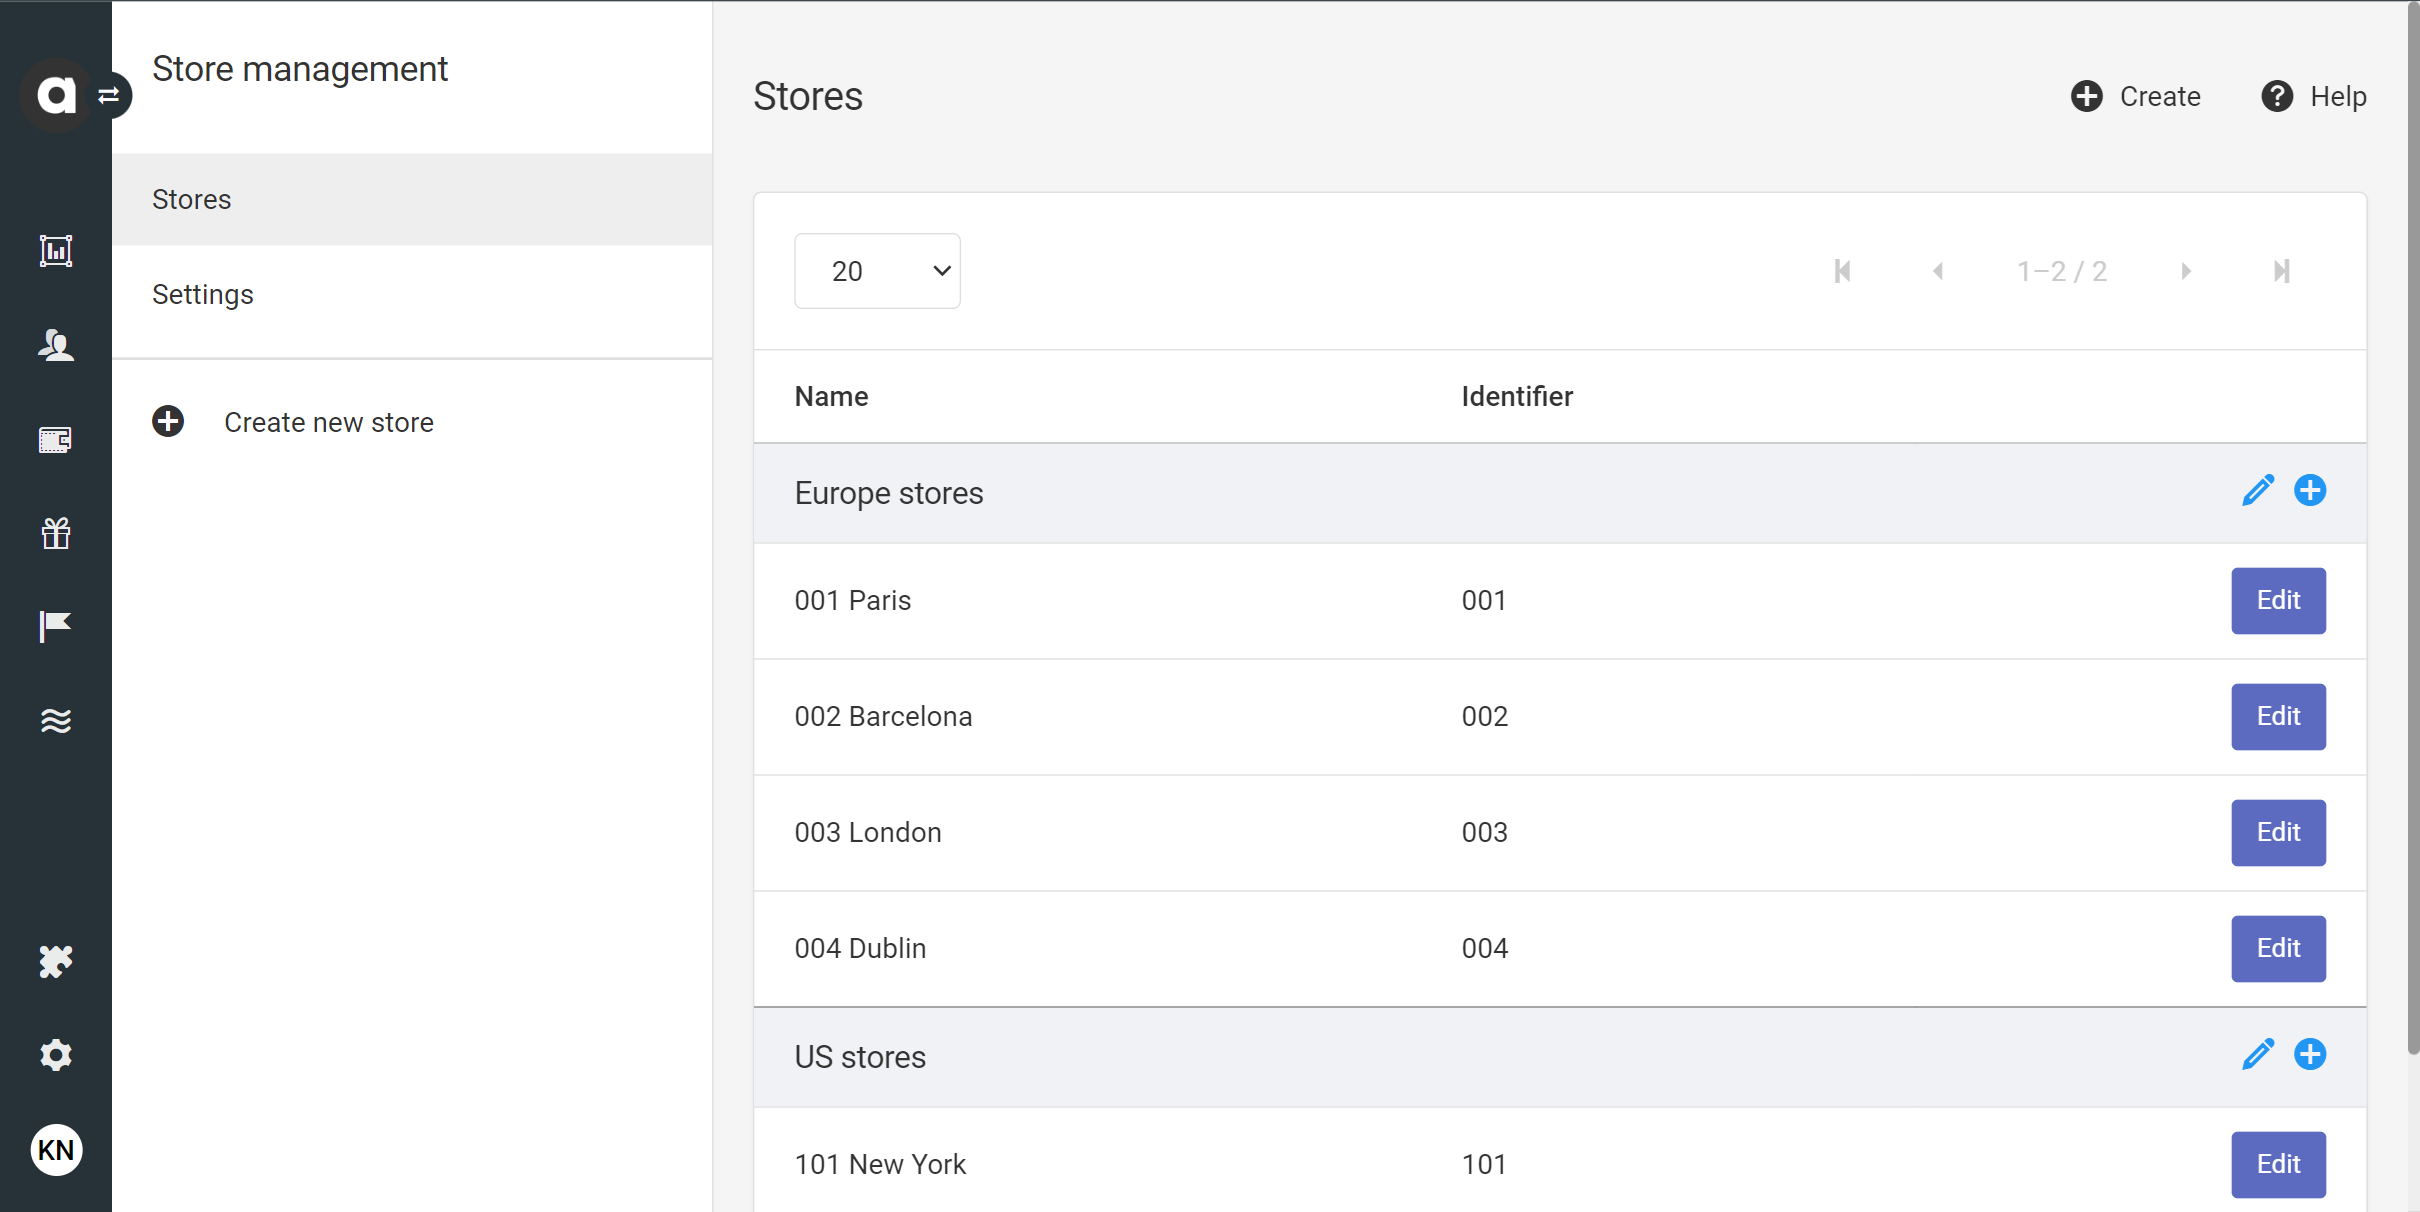
The list of stores is sorted based on the store grouping.
Adding a new store
Click the Create new store button in the sidebar of the Stores module page, or the Create button in the top right corner
Basic information
Set the store identifier
The Store ID must be written using only lowercase letters, numbers, and underscores (_).Do not use spaces, uppercase letters, or special characters.
Add the store name
Add a group
You can select a previously added group or create a new one by typing the name of the group in the field.Set the store currency

Location
Enter the country
Enter the county
Add the state
Add the zip code
Enter the city
Enter the address
The location you enter will appear on the map.

Click the Create button at the bottom of the page to save your settings.
Managing stores
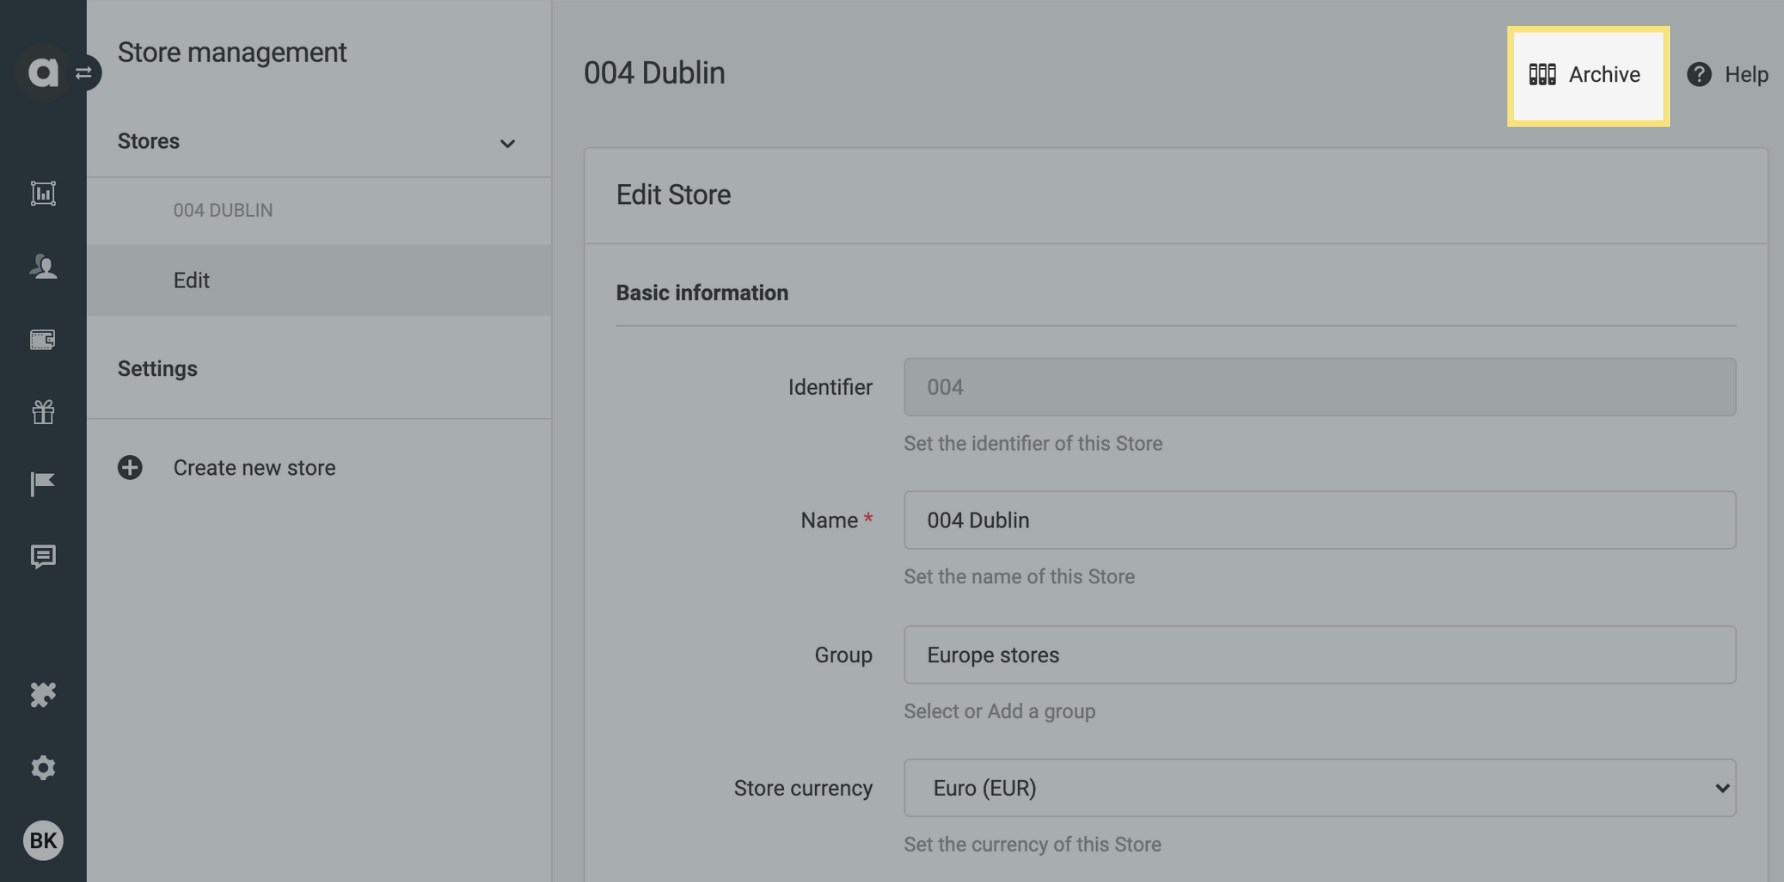
Edit a store
Navigate to the module configuration page
Click on the Edit button next to the store you’d like to edit
Change the settings of the store
Click the Update button
Archive a store
Navigate to the module configuration page
Click on the Edit button next to the store you’d like to delete
Click on the Archive button on the right-hand side of the page
Confirm your choice in the dialog that appears
Settings
Under the Settings tab, you can configure store usage in your loyalty program mechanics.
Select models
The dropdown in the Models field lists the possible Antavo entities where store-related information might be relevant. Choose the entities to which you want to connect a store.Enter store fieldset name
The text entered in the Fieldset field will appear as the name of the store configuration field on the configuration interfaces of the selected entities.
