Antavo’s Wallet module offers a seamless way to enhance the loyalty program with offline interactions. Loyalty passes feature a barcode or QR code for identification. Customers can download these passes onto their mobile devices, use them to collect points, or redeem rewards at your offline stores and events.
Mobile passes serve various purposes within loyalty programs, functioning as customers’ membership cards, coupons, or tickets earned through program participation. To enable this functionality, your POS system should be integrated so that sales associates can scan the barcode or QR code stored in the customer’s mobile app.
The Wallet module also tracks when customers add or remove passes from their digital wallets. These registered events can be used to reward engagement actions, such as downloading a pass for the first time, or to monitor wallet activity.
Apple Passes are stored in customers’ Apple Wallets, exclusive to iOS devices. However, Google Passes are compatible with both Android and iOS through Google Pay. You have the flexibility to offer customers either one type of pass or both.
Access the module configuration page by clicking the wallet icon in the sidebar. The page will open to the collection of passes you have already set up, showing the following information:
Name | The name of the pass |
Pass type | The type of the past (coupon, membership, or event) |
Status | The status of the pass (active, inactive, or draft) |

Creating a new pass
Pass setup starts with the Pass editor, allowing you to choose pass colors, relevant images, and enter text for mobile passes. Create an unlimited number of pass designs to save and use later on any pass type.
The intuitive WYSIWYG editor provides an instant preview of how modifications impact both Apple and Google Passes. Use the selector on the top of the page to switch between views and applicable settings.
Click Create new pass on the sidebar to start building a new pass
Type selection
Select the type of pass you want to create
Coupons: Passes can be used as rewards, offering customers delightful coupons for discounts when making a purchase in your physical stores. There are two ways to reward customers with discount coupons:
Claimable rewards
Customers redeem coupon rewards by spending their points on the membership site.Surprise and delight benefits
Unlike claimable rewards, instant rewards are not visible on the membership site. Instead of redeeming points, customers receive benefits when they complete specific actions. You can set up a rule in Antavo’s Workflows editor with a Reward claim action node. Alternatively, you can use an Assign pass action node without a reward being assigned, but this only issues a static coupon, meaning the same coupon code is displayed for every customer’s pass. When using surprise and delight benefits, it’s important to notify customers of the new reward through a workflow that triggers an email message from your provider’s system.
Membership pass: The membership pass can also be used as a digital loyalty card. It identifies the customer by their ID, enabling customers to earn points in your physical stores through purchases and check-ins at offline locations. Upon enrollment in the loyalty program, customers automatically receive an email containing a barcode or QR code representing their unique customer ID. Additionally, you have the option to include the membership pass in the registration email sent by your email provider. Customers can also access and download their membership passes at any time by logging into the membership site.
Event pass: Similar to coupons, event passes guarantee entry into a specified offline event. Please note that both coupon and event passes can only be assigned to Coupon-type rewards. Therefore, both coupons and event rewards should be configured as coupon-type rewards in the Reward editor.
There are visual distinctions between the passes on Apple Passes: coupons have a perforated edge at the top, membership passes are flat, and ticket passes have a small cutout.
Tick the checkbox to enable Apple Wallet
Tick the checkbox to enable Google Pay
Select an account
If the Multi-accounts module is enabled in your workspace, the Account field appears under the Points Economy section. Use this selector to define which account the pass should belong to. The selected account determines how wallet-related events (pass download and pass removal) are recorded and attributed in multi-account loyalty programs.Select user group(s)
If you use the User group module and have enabled the Pass templates entity in the settings, you need to assign a group to the template. Unauthorized users will not be able to access the pass template in the Management UI.Click Select at the bottom of the page to continue

Pass Template
Template of Apple Wallet Passes
Basic information
Variant group id
Add the template to a variant group by selecting a previously added group or by entering a new group ID. This enables workflows to look up a pass based on the variant group and switch the template of an assigned pass to another template within the same variant group if necessary (eg, switching the template of the membership pass when the customer upgrades from Silver membership tier to Gold membership tier).Name
Enter the administrative name of the pass template that appears in the Management UI.Organization name
This name will appear in the header of the push notifications sent to the customers' mobile devices. This setting is useful if you use the Multi-accounts module and want to clarify which account the current pass update belongs to.
Colors
Choose a background color
Select a label color
This will be the color of the label texts of the fields on the front of the pass, except for the primary fields. For Apple passes, the label for primary fields can be changed using the foreground color.Select a foreground color
This will be the color of all texts other than labels on the front of the pass.

Assets and Retina assets
Upload an icon
The icon image is displayed along with push notifications and lock-screen notifications.Upload your logo
The logo image is displayed in the top left corner of the pass.Upload the strip image
The strip image is displayed under the logo and the header field, behind the primary fields as a background image. The image will be center-cropped if it is too large.
For Apple passes, it’s also possible to upload retina (HiDPI) images to improve the visual quality of passes. It depends on the resolution of the customer’s mobile device if the standard or the retina assets are displayed. While uploading standard assets is mandatory, adding retina assets is optional.
Asset size requirements:
Asset | Standard resolution asset size | Retina resolution asset size | |
|---|---|---|---|
Icon image | 29×29 pixels | 58×58 pixels | |
Logo image | 160×50 pixels | 320×100 pixels | |
Strip image | event tickets | 375×98 pixels | 750×196 pixels |
gift cards, coupons | 375×144 pixels | 750×288 pixels | |
other | 375×123 pixels | 750×246 pixels | |
On the Pass Template editor page, oversized Apple images are resized after upload to comply with a predefined width limit while preserving the original aspect ratio. The Pass Template maximum image sizes are as follows:
Asset | Standard resolution asset size | Retina resolution asset size | ||
|---|---|---|---|---|
Size | Max width | Size | Max width | |
Icon image | XS | 64 pixels | L | 1920 pixels |
Logo image | M | 512 pixels | L | 1920 pixels |
Strip image | M | 512 pixels | L | 1920 pixels |

Click the Next button at the bottom of the page to continue
Template of Google Pay Passes
Basic information
Variant group id
Add the template to a variant group by selecting a previously added group or by entering a new group ID. This enables workflows to look up a pass based on the variant group and switch the template of an assigned pass to another template within the same variant group if necessary (e.g., switching the template of the membership pass when the customer upgrades from Silver membership tier to Gold membership tier).Name
Enter the administrative name of the pass template that appears in the Management UI.Organization name
This name will appear in the header of the push notifications sent to the customers' mobile devices. This setting is useful if you use the Multi-accounts module and want to clarify which account the current pass update belongs to.
.png "pass_google_pay_basic_info (1).png")
Tier information
available for Membership passes only
Tier Label
The designation for the tier is displayed above the actual tier, for example, Tier Status or Tier.Tier
Insert the variable specifying the name of the customer's current tier status in the applicable tier structure.
You can create tier structures and specify tier statuses in the Tiers module.
Messages and contact information
available for Membership passes only
These fields are also available in the Content settings of the pass editor. Changes made here apply to all customers' passes. However, updates made in the Content settings affect a specific customer's pass only when there's a change in customer data field values.
Message
Add the array of personalized messages displayed in the app.Text modules
Enter general text content you’d like to share.Links
Add links to your pass.

Colors
Choose a background color
Assets
Upload an icon
The icon image is displayed along with push notifications and lock-screen notifications.Upload your logo
The logo image is displayed in the top left corner of the pass.Upload the strip image
The strip image is displayed under the logo and the header field, behind the primary fields as a background image. The image will be center-cropped if it is too large.
Asset size requirements:
Asset | Asset size |
|---|---|
Logo image | 660×660 pixels minimum |
Strip (hero) image | 1032×336 pixels minimum |
On the Pass Template editor page, oversized Google images are resized after upload to comply with a predefined width limit while preserving the original aspect ratio. The Pass Template maximum image sizes are as follows:
Asset | Asset size | |
|---|---|---|
Size | Max width | |
Logo image | M | 512 pixels |
Strip (hero) image | M | 512 pixels |
.png "membership_pass_google_pay_assets (2).png")
Click the Next button at the bottom of the page to continue
Pass content
Content of Apple Wallet Passes
Header
Add logo text
The text will appear on the logo image
Apple Wallet Fields
Header fields
Primary fields
Secondary fields
Auxiliary fields
Back fields

The basic structure of the front side of an Apple Pass and how the elements of a pass are positioned
To access the backside of the pass, click on the pass preview. Unlike the front side, which has limited space, the back side of the pass is scrollable, allowing for the inclusion of additional information. This space is ideal for providing details such as Terms of Use or customer service contact information.
Apple passes have up to 3 header fields, 1 primary field, up to 4 secondary fields, and up to 4 auxiliary fields. The maximum number of combined secondary and auxiliary fields is 4. However, the number of back fields is unlimited.
Please note that the number of fields displayed on the pass may vary based on the length of the text in each field. If the text exceeds a certain length, some fields may not be fully displayed on the pass.
Each type of field has the following settings to define:
Label of the field
Value of the field
In addition to general text, you can include expressions (e.g., {customer.score} or {coupon.code})Change message
Enter the text for the notification that will appear on the customer’s screen when the field gets updated.
To remove a field, click the X icon on the right-hand side of the corresponding field.
Basic information
Add a description
The description appears on the back of the Apple Pass.Select the relevant date - for Event-type passes only
Choose the date and time when the pass becomes relevant, such as the start time of an event.
Barcode
Select the type of code
Choose between barcode or QR code format.Add the code content
Enter general text, a URL, or customer and coupon properties. Note that the pass is not assigned if the barcode content is empty.Enter alternative text
This text will appear under the code.

Content of Google Pay Passes
Basic information
Merchant name
Enter the name of the brand.Offer title - for Coupon- and Event-type passes only
Enter the name of the coupon.Balance - for Coupon-type passes only
The value of the coupon.Program name - for Membership-type passes only
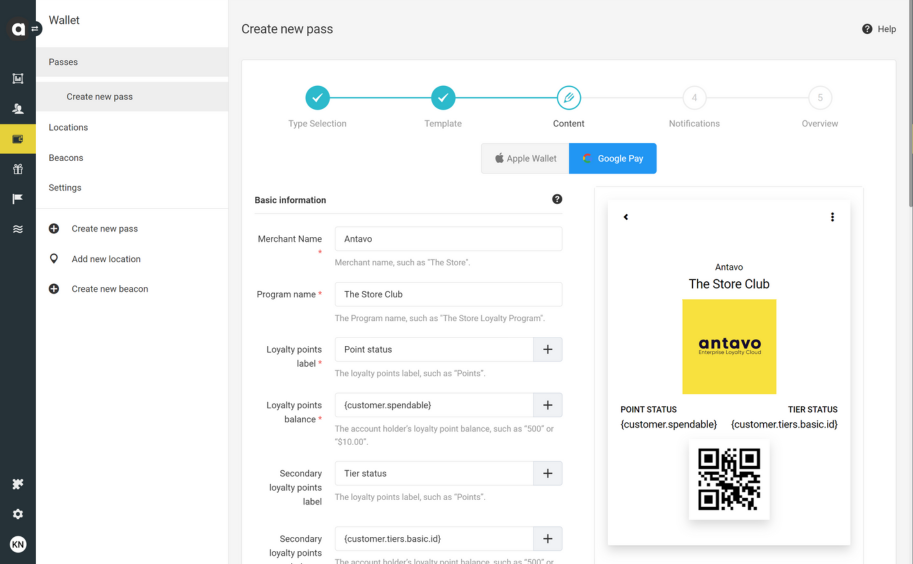
Enter the name of the program that the pass allows the customer to participate in.Loyalty points label and balance - for Membership-type passes only
Secondary loyalty points label and balance - for Membership-type passes only
Offer information
for Coupon- and Event-type passes only
Offer provider
Enter the name of the brand that provides the coupon.Details
Provide all relevant details about the offer.Disclaimer
Enter any necessary terms and conditions for the offer.
Member information
for Membership-type passes only
Member name label and member name
Membership ID label and ID
Messages and contact information
These fields are also available in the Template settings of the pass editor. Changes made here affect a specific customer's pass only when there's a change in customer data field values. However, changes made in the Template settings apply to all customers' passes.
Messages
Add the array of personalized messages displayed within the app.Text modules
Enter general text content you’d like to share.Links
Add links to your pass.
Offer expiration
for Event-type passes only
Start date and end date
Select the timeframe during which the pass is valid for event check-ins.
Barcode
Select the type of code
Choose between a barcode or QR code format.Add the code content
Input general text, a URL, or customer and coupon properties.Enter alternative text
This text will be displayed below the code.
Once you’ve finalized the content settings of the Google Pass and/or Apple pass, click Next at the bottom of the page.
Notifications
Push notifications
Currently, push notifications are only available for Apple passes.
The beta version includes push notifications delivered as wallet notifications displayed on the lock screen.
Tick the box to enable push notifications. These can be triggered using Antavo's Workflows module by adding a Push notification action node.
Please note that the push notifications services have to be configured to make the beta version of push notifications operational. If you can see an alert on the top of the page referring to a missing service configuration, please make sure you have the wallet processQueue services configured.
Locations
Locations
Select locations from the dropdown list that should trigger a push notification
Learn how to add locations under the Locations section of this manual.Click the Add location button
Add the text of the message in the field that appears
Trigger distance
Enter the distance of the location where the notification should be triggered.
You can add up to 10 physical locations to a membership pass for all members, regardless of their city or country of origin. A notification push is triggered for any members who are within the trigger distance of any of the 10 locations.
Beacons
Beacons
Select the beacons that should trigger notifications
Learn more about how to add beacons and the content of the beacon-triggered notification under the Beacons section of this manual.Click the Add beacon button
Add the text of the message in the field that appears

Overview
Before saving the newly created pass, a final preview shows what customers will see on their mobile phones. If you’d like to make changes, navigate back to any stage of the pass setup. If you’re satisfied with the end result, click the Create button at the bottom of the page.

The new pass will immediately appear in the list on the Passes page.
Activate the pass
After saving for the first time, the status of the new pass is draft. You can activate the pass right away using the Set active button on the upper right-hand side of the setup page and confirm the activation in the dialog that subsequently appears.
If you want to deactivate an active pass, you can do so by clicking the Set inactive button. This will change the pass status to inactive, which means it appears only in the list on the module configuration page in the Management UI.
Locations
The beta version provides the Locations tab that lists the previously saved locations serving as references to send location-triggered push notifications.
To add a new location:
Click the Add new location button on the sidebar
Add the name of the location
Enter the location coordinates, or use the search field to define the location
Click the Save button

Beacons
In addition to location-based notifications, you can use beacons to trigger push messages. Beacons are Bluetooth devices that retain a field around themselves, transmitting that they are there. When a mobile enters this field and Bluetooth is enabled on the customer’s phone, the pass can pick up on that and display a notification associated with the field.
To add a new beacon:
Enter the unique name of the beacon
Add the major identifier of the beacon
Add the miner identifier of the beacon
Enter the Proximity UUID
Add the unique identifier of the beacon
Enter the text of the push notification that the beacon should trigger. This text will be displayed on the lock screen when the pass is currently relevant.
![]()
Settings
Template settings
Select the default membership pass template from the dropdown menu.
General settings
Enable Token Expiration to make wallet tokens expire after a set period, or keep it unchecked to keep tokens valid indefinitely.
Enabling token expiration improves security by preventing long-term access through outdated links. It also ensures members always receive the most recent version of their wallet pass.If you enabled token expiration, enter a relative time format (e.g., +30 days, +2 hours) to define how long tokens should remain valid.
When configuring the expiration period for download link tokens, please ensure that the validity period remains reasonably short. Longer expiration times can increase the risk of unauthorized access or misuse of the download links.
It's recommended to clearly communicate the link validity period and the expiration date in the email that you sent with the pass download link to customers. Inform customers that, if the link expires, they can still access their pass through their account page on the webstore (e.g., the My Account page). Make this information highly visible to ensure a smooth download experience.
After expiration, a new token must be generated by calling the wallet API endpoint again.
Apple developer settings
Before you start using Apple Passes in your loyalty program, fill in the details of your Apple Developer Certificate.
Select the update service type
Add your Team Identifier
Add your Pass Type Identifier
Add the name of your certificate
Add the password you specified when generating the certificate.
Google developer settings
If you’d like to use the Google Pay passes, please enter the following Google credentials.
Project identifier
Private key identifier
Private key
Client email
Client ID
API
The customers/customer_id/wallet API endpoint is capable of returning the pass download link and the download deep link* so that you can display the pass on the membership site. However, this data is not included in the response by default. Please ensure you tick the checkbox(es) if you need Antavo to provide this information in the API response.
* available for iframe users only
Pass emails
Please note that pass email notifications are not available for new implementations and are being deprecated. Please use the Trigger Marketing Communication workflow action to send messages to your customers.
Both the Membership pass and Reward pass emails can be customized with Antavo’s email editor, which you can find in the Settings menu:
Navigate to the Settings page of the Antavo Management UI
Click Emails on the left side of the page
Search for the Membership pass email to customize the membership pass email, or the Pass email to customize the reward pass email
Click the hamburger button and select the Edit option
Edit all the texts using our WYSIWYG editor by clicking on the content of the email
Use our built-in HTML and CSS editor for further customization
You can send a test email to yourself to see how the email will look from a loyalty member’s perspective. To do so, click the hamburger button on the Emails page and select the Test send option.
Rewarding pass download
You can reward customers with points for adding their loyalty pass to their digital wallet by building a workflow that grants points when the Pass added to wallet event occurs. To set this up:
Navigate to the Workflows module
Create a new general workflow
Add an Event trigger as the workflow starting point and select Pass added to wallet as the triggering event.
This ensures the workflow runs each time a customer downloads their loyalty pass.

Add a Trigger event node to issue a Point add event
In Attributes, set points (e.g., 10)
Add a reason attribute describing why the points were added for traceability

Insert filters (optional)
Event filters to target specific pass types or platforms (e.g., only Apple Wallet).
Customer filter to target certain customers (e.g., tiers or segments)
.png)
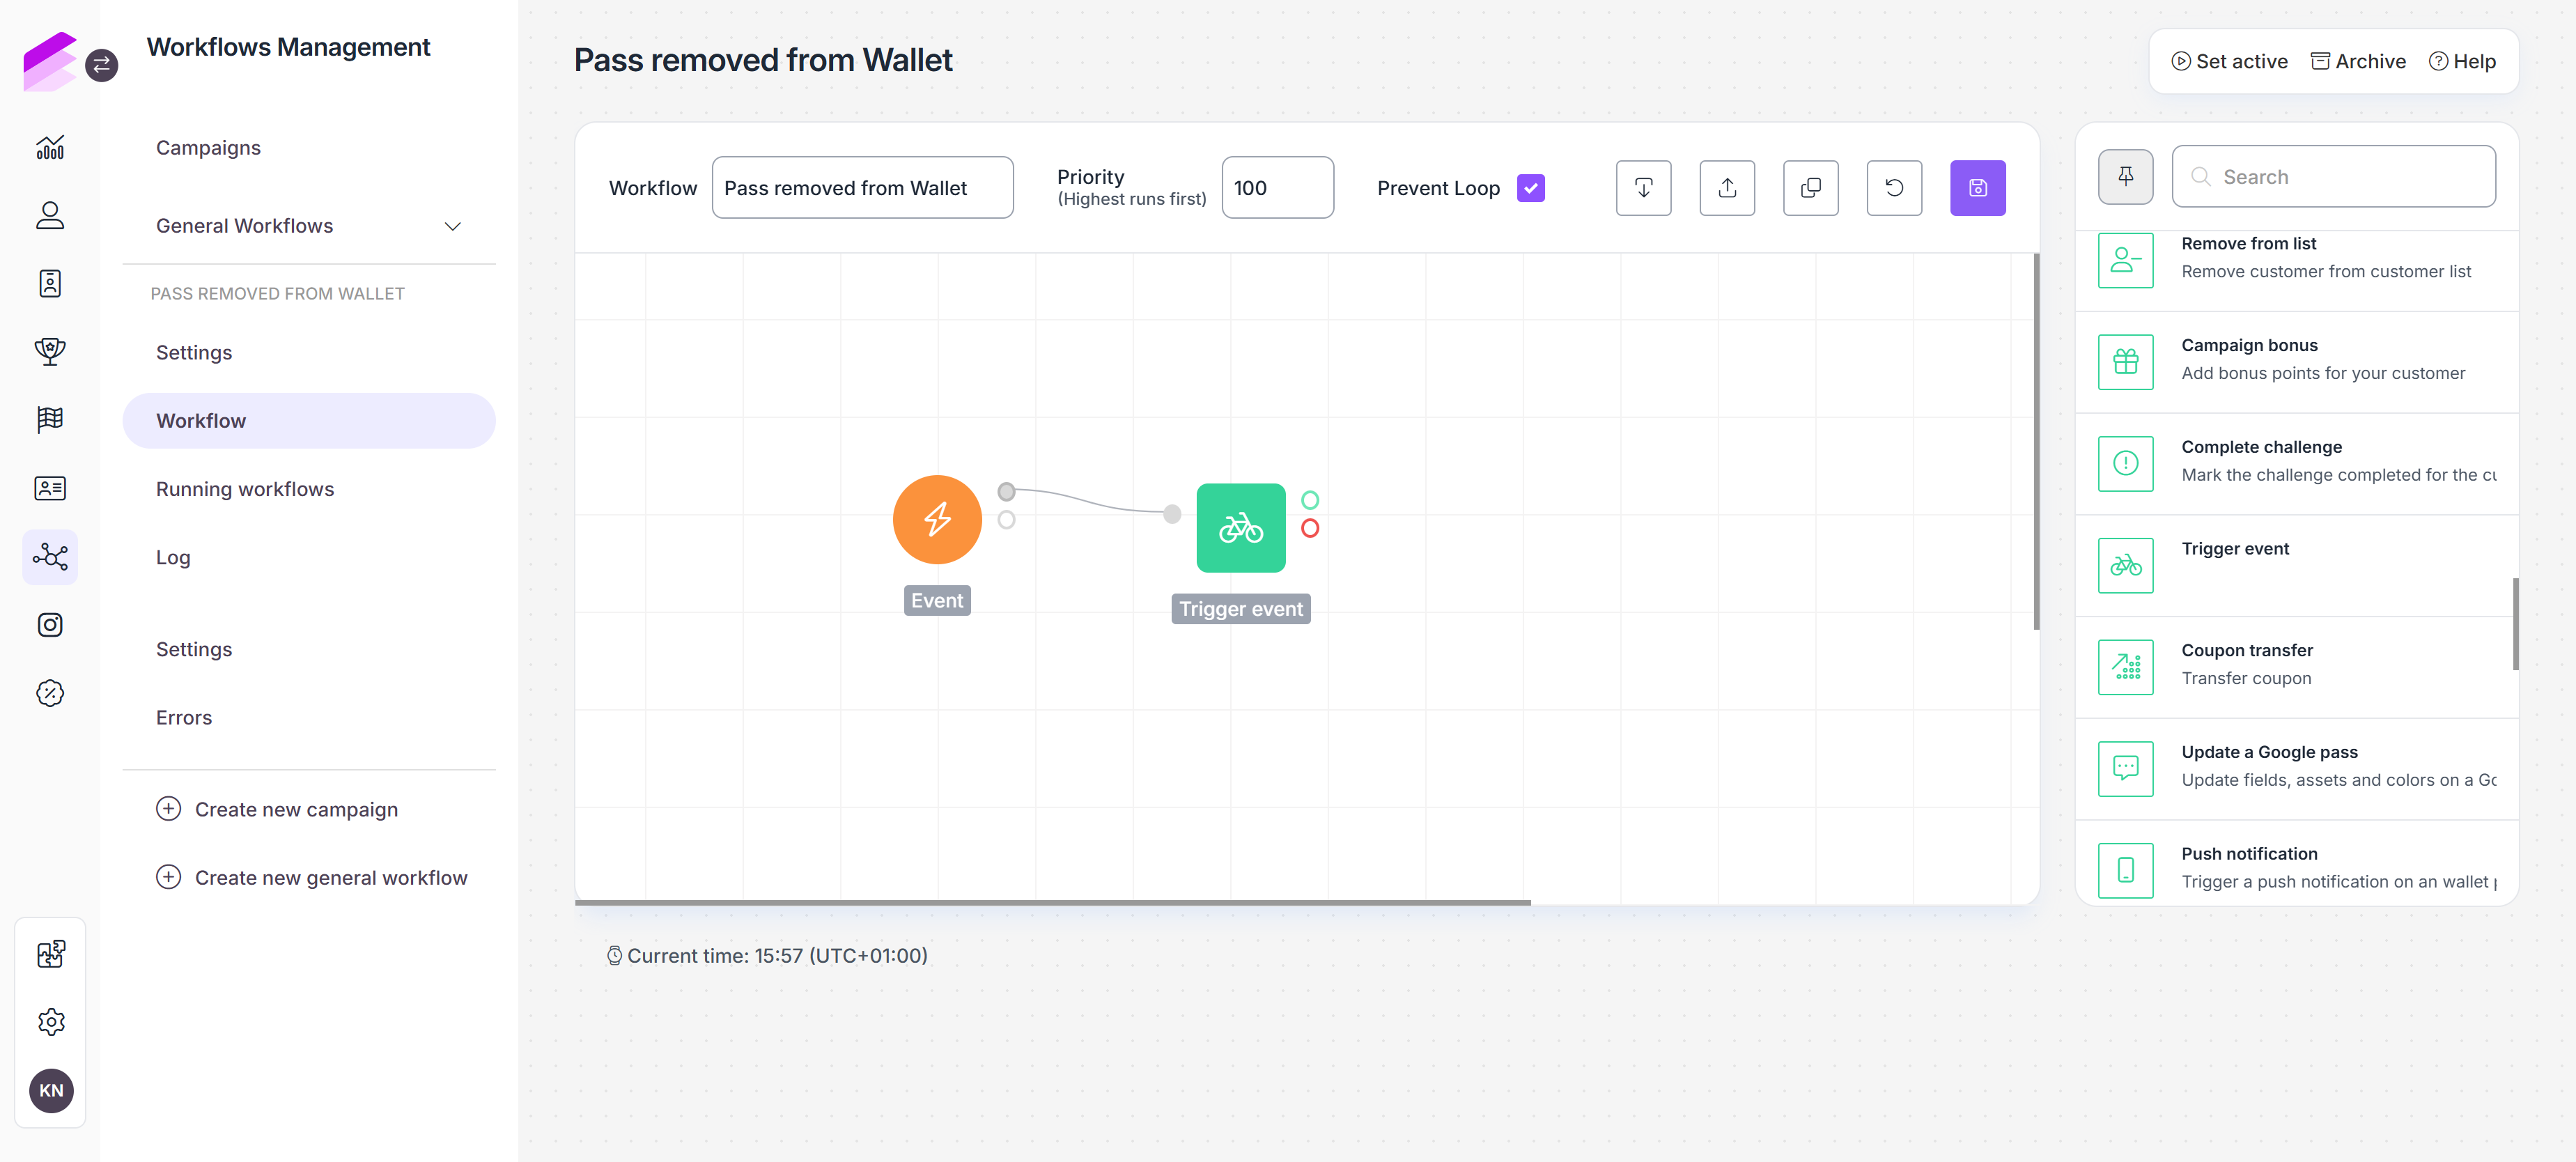
You may want to deduct points when a pass is removed to prevent customers from deleting their passes after earning points. For this, you need to create another workflow triggered by the Pass removed from wallet event.
Navigate to the Workflows module
Create a new general workflow
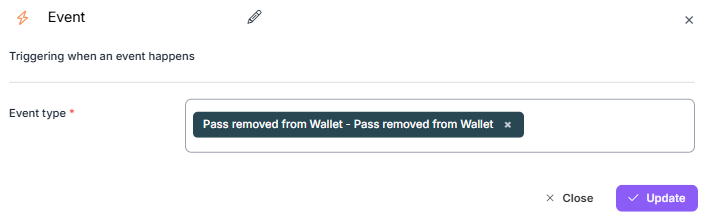
Add an Event trigger as the workflow starting point and select Pass removed wallet as the triggering event
This ensures the workflow runs each time the loyalty pass is removed from the customer’s wallet.
Add a Trigger event node with a Point sub event to subtract points
In Attributes, set points to the amount previously awarded for the download
Add a reason attribute explaining the deduction for traceability

Although you can also use the Modify event workflow node to adjust points directly on the Pass added or Pass removed events, this method is not recommended. Negative point values in events increase the customer’s spent points rather than reducing the earned points, which can distort reporting and is not suitable for this use case.