The Journey Editor is where you review and refine the member journeys generated from your Concept Whiteboard.
Each journey represents how your loyalty program responds when members perform specific actions, meet certain conditions, or interact with rewards, tiers, or benefits.
The editor allows you to zoom into the logic behind each journey and adjust the steps that define how your program behaves.
Opening the Journey Editor
After generating the member journeys, you can open any journey from multiple locations:
From the Loyalty Map
Click any station on the Loyalty Map that contains journeys.
In the pop-up list, click a step to open it in the editor.
From the Journey List
Find the journey in the Journey List table.
Click a step to open it.
If you update your Concept Whiteboard later and those changes affect program logic, an Update member journeys button will appear. Regenerating ensures the Journey Editor always reflects the latest version of your concept.
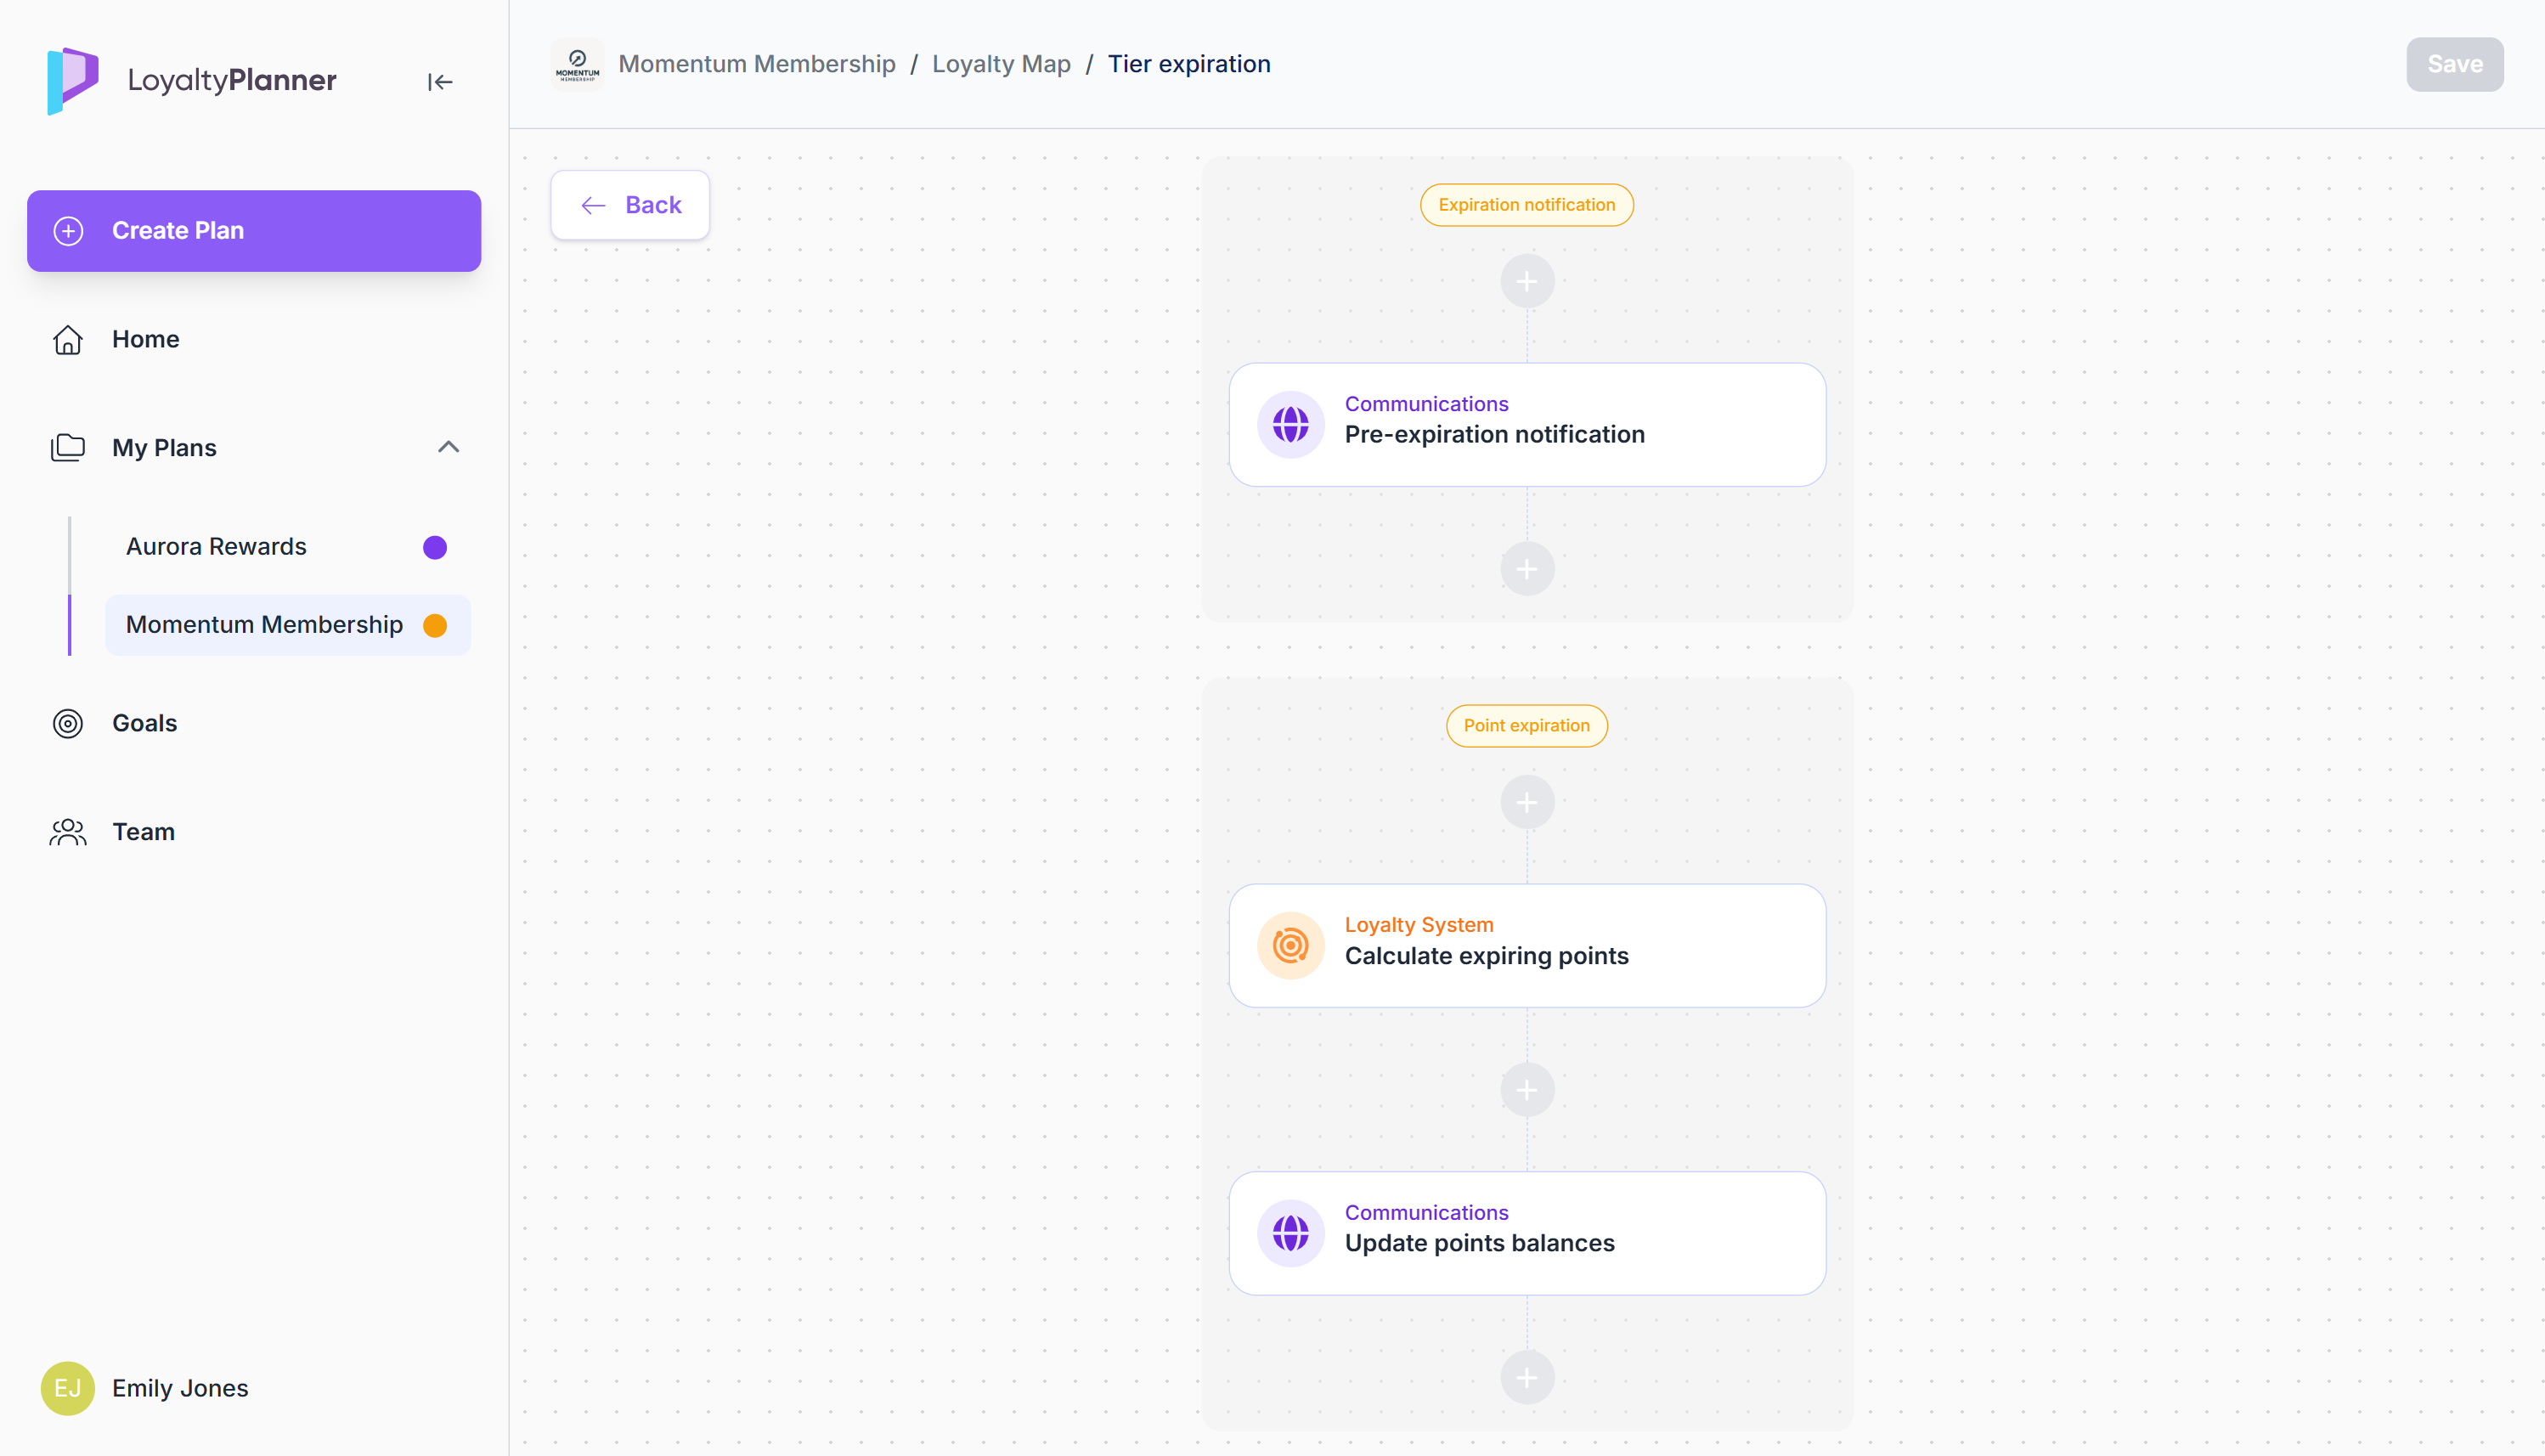
Journey Canvas
When you open a journey, it appears in a simplified vertical canvas made up of moments and steps.
Moments group together the steps that belong to the same phase of the journey.
Moments themselves cannot be edited. If a journey is missing a phase you need, update your Concept Whiteboard and regenerate the journeys.Steps appear in a vertical sequence inside each moment. Each step sits in a swimlane indicating who performs or owns the action:
Member Action (something the member does)
Communications (messages or notifications sent to the member)
Loyalty System (automated loyalty logic)
Processes (internal or operational follow-up steps the loyalty management team performs)
Between steps, you’ll see a + icon, which lets you insert a custom step anywhere in the flow.
Default steps (those generated automatically from your Concept Whiteboard) always follow the order defined during journey generation and cannot be rearranged manually.
Editing a Journey Step
Click a step to open the Step Sidebar with its configuration options.
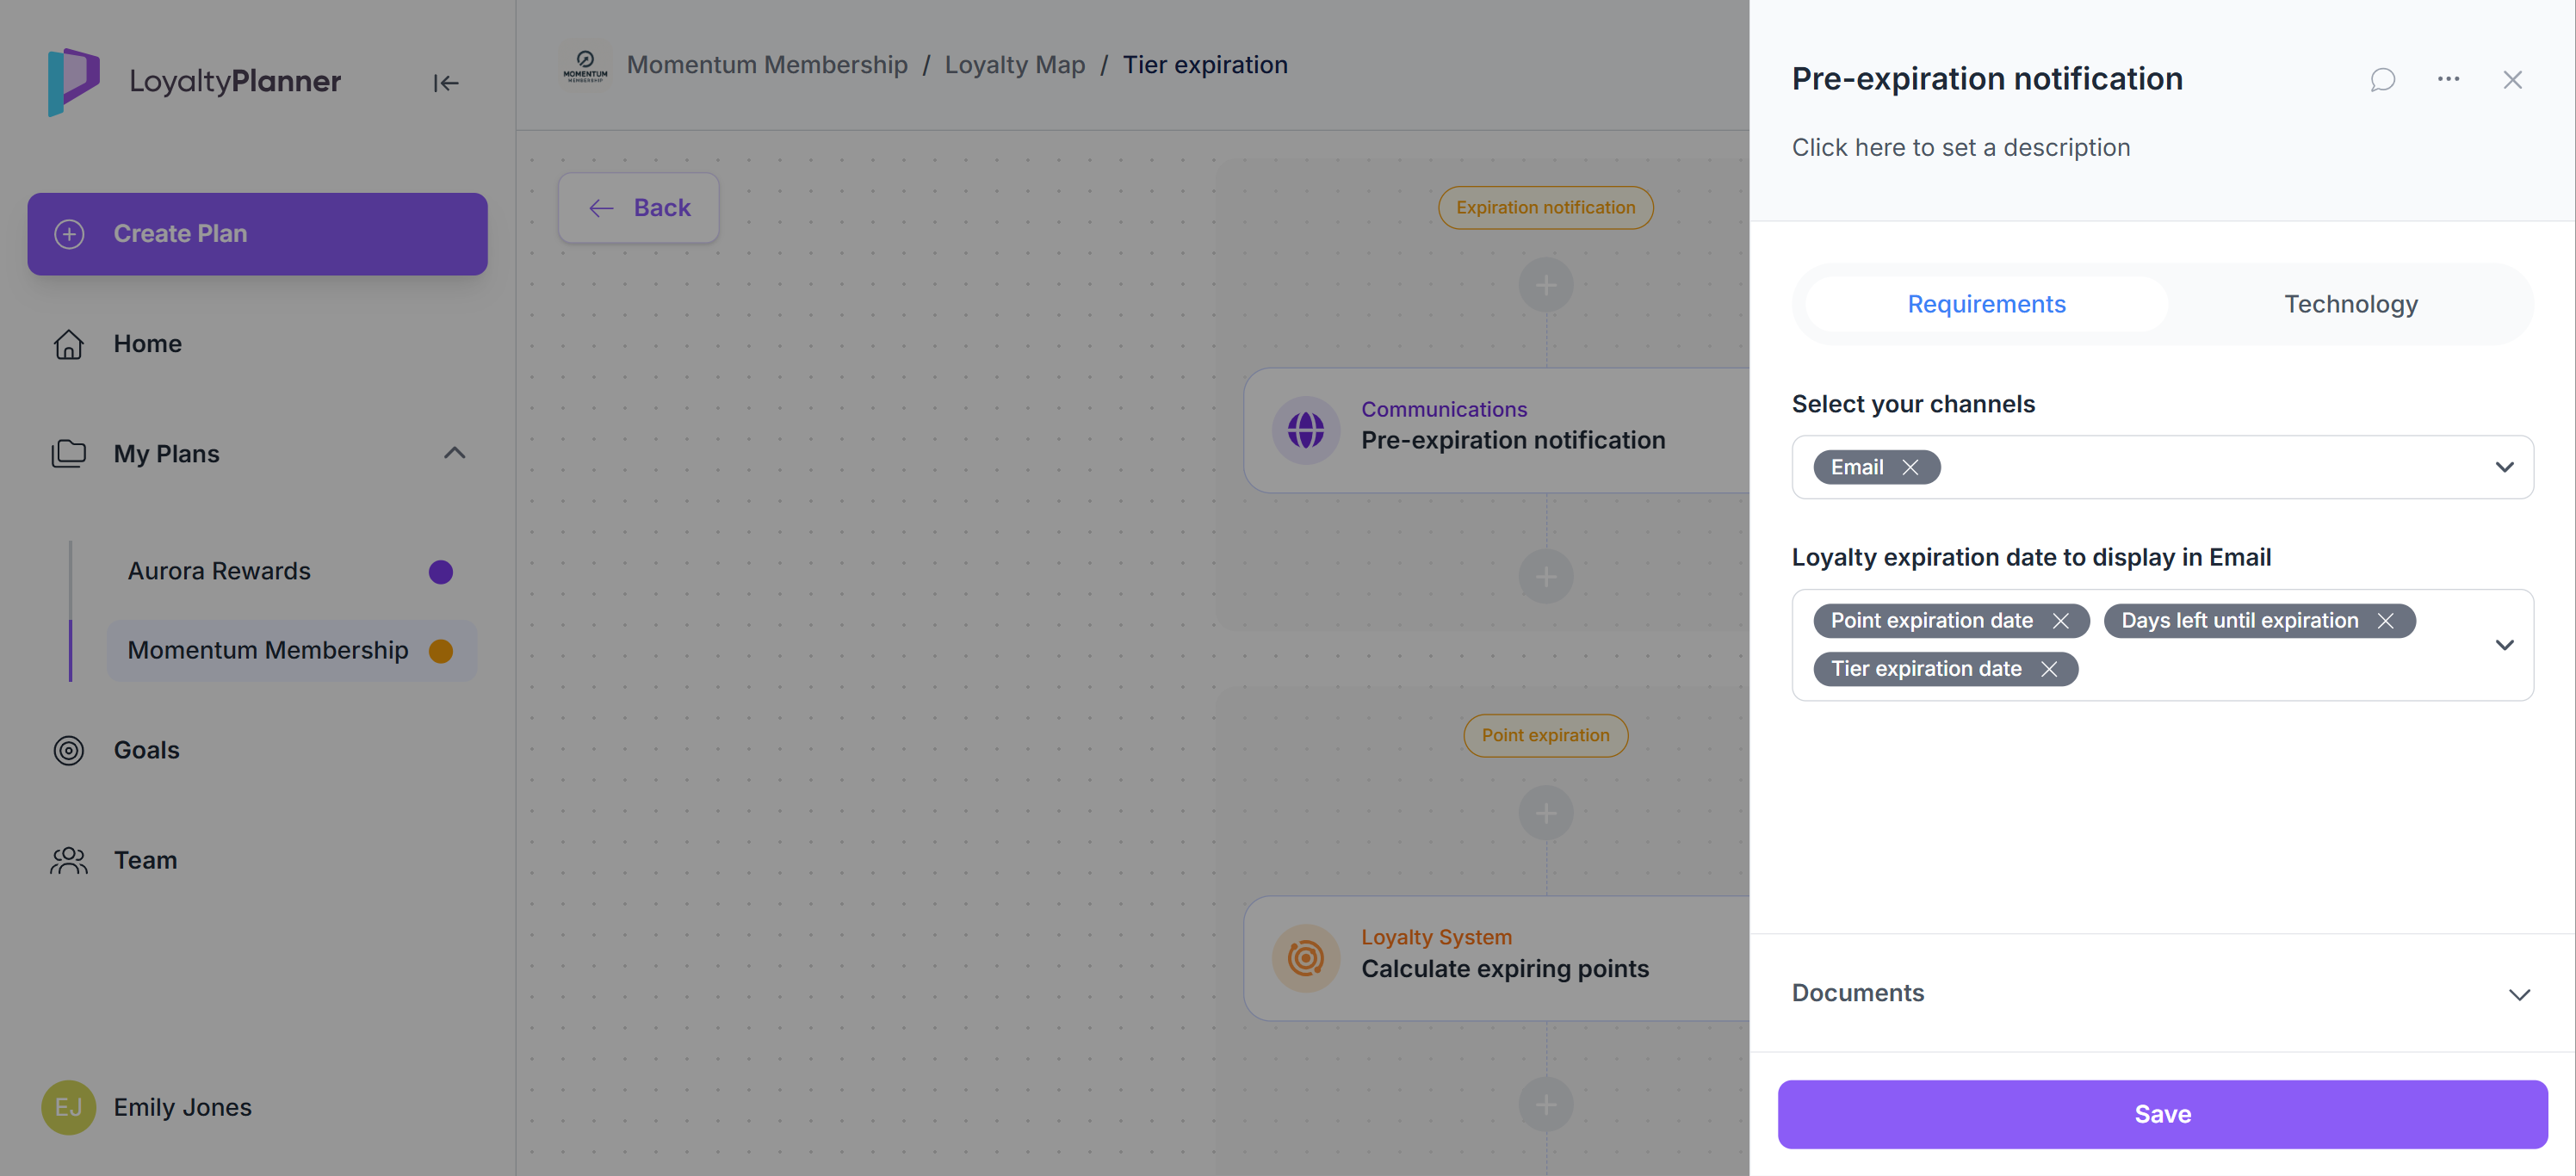
Inside the Step Sidebar, you can update the following:
Step name and description
Edit the name of the step and provide a clear description of what happens at this point in the journey. This helps define the purpose, behaviour, or meaning of the step for anyone reviewing or implementing the journey.
Business requirements
Under Requirements, describe what the step should accomplish from a loyalty or customer-experience perspective. Requirements cover the business logic behind the action, such as:
what information needs to be collected,
what the program should check or validate,
what outcome should the member receive.
These fields vary by step type and help clarify the expected behaviour of the journey.
Technology
This section lists technical considerations that may be needed later when implementing the loyalty program (e.g., implementing an integration or an API call). Items appear as a to-do checklist, and you can mark any requirement as completed by ticking its checkbox.
Documents
Each step has its own Documents section, where you can:
upload supporting files
download any file
delete files
Supported file types include: PDF, Word, Excel, PPT, images, text, and other common formats, up to 10 MB each.
Files uploaded here remain attached to this step only and do not appear on the Plan Overview.
Comments
Each step has its own comment thread that serves as a collaboration channel for discussion and clarification. Click the comment icon at the top of the sidebar to open the comment panel.
You can add comments and reply to others, and all comments remain attached to the specific step.
Saving changes
Only changes to fields inside the sidebar (step name, description, business requirements, technology checklist) require you to click Save at the bottom.
Uploading documents or adding comments does not require saving.
Adding a custom step
Custom steps let you extend a journey with communications or internal processes that are not part of the auto-generated logic. These steps don’t change the underlying program rules but help you document how the journey actually operates in practice.
You can add custom steps between existing steps by clicking the + icon.
A sidebar appears where you provide:
Step name
Step swimlane (communication to the member or internal process the team performs)
Step description
.png)
Clicking Create in the sidebar inserts the new step into the canvas at the selected position.
Custom steps behave like any other step in the editor, you can edit or delete them at any time.
Deleting steps
Both custom and default steps can be removed from a journey by selecting the step and using the … menu in the top right corner of the Step Sidebar. There is no undo for step deletion, however, they can be restored by regenerating all journeys from your Concept Whiteboard.
.png)
Saving Journey Changes
Changes made and saved inside the Step Sidebar (such as updates to descriptions, requirements, adding new steps) are not applied to the journey automatically.
Click Save at the top right of the Journey Editor to apply changes.
.png)
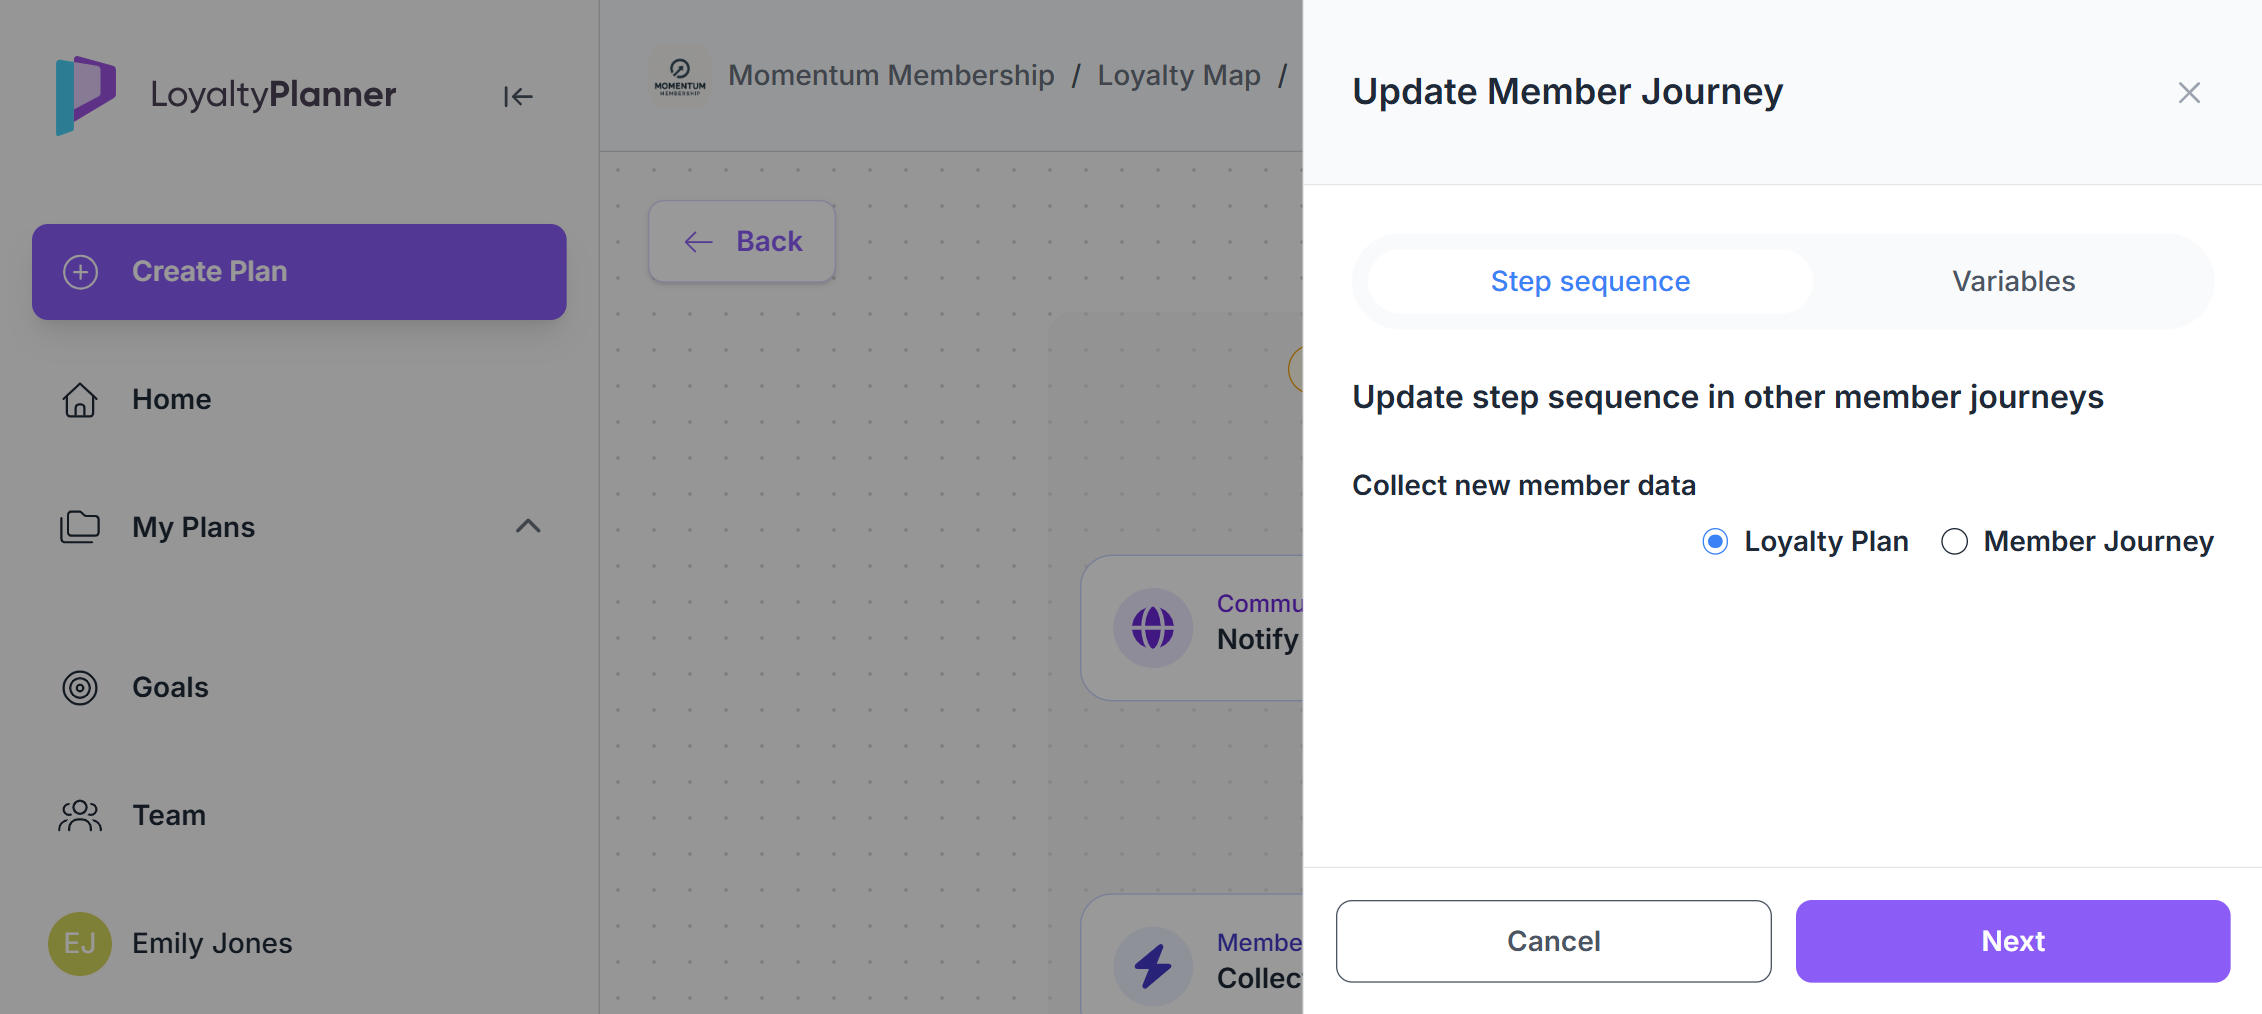
In cases where the same step appears in multiple journeys, you can streamline your work by applying selected fields from the current step to the same step in other journeys.
This allows you to:
copy specific fields or values from the open step,
apply them to the same step across multiple selected journeys,
avoid repeating the same manual edits journey by journey.
This feature helps keep similar journeys consistent without editing each one individually.