When adding new users to the Management UI, you can specify which pages and functions they can access by assigning a role.
By default, only the Administrator role has access to all Management UI pages and functions. If you wish to restrict access for users from specific teams, you can create new roles. These field permissions allow you to safeguard sensitive fields without hiding the entire object from users.
Navigate to the Roles tab to view the list of configured roles which includes the following information:
Role | Name of the role |
Users | Number of assigned users |
Creating a new role
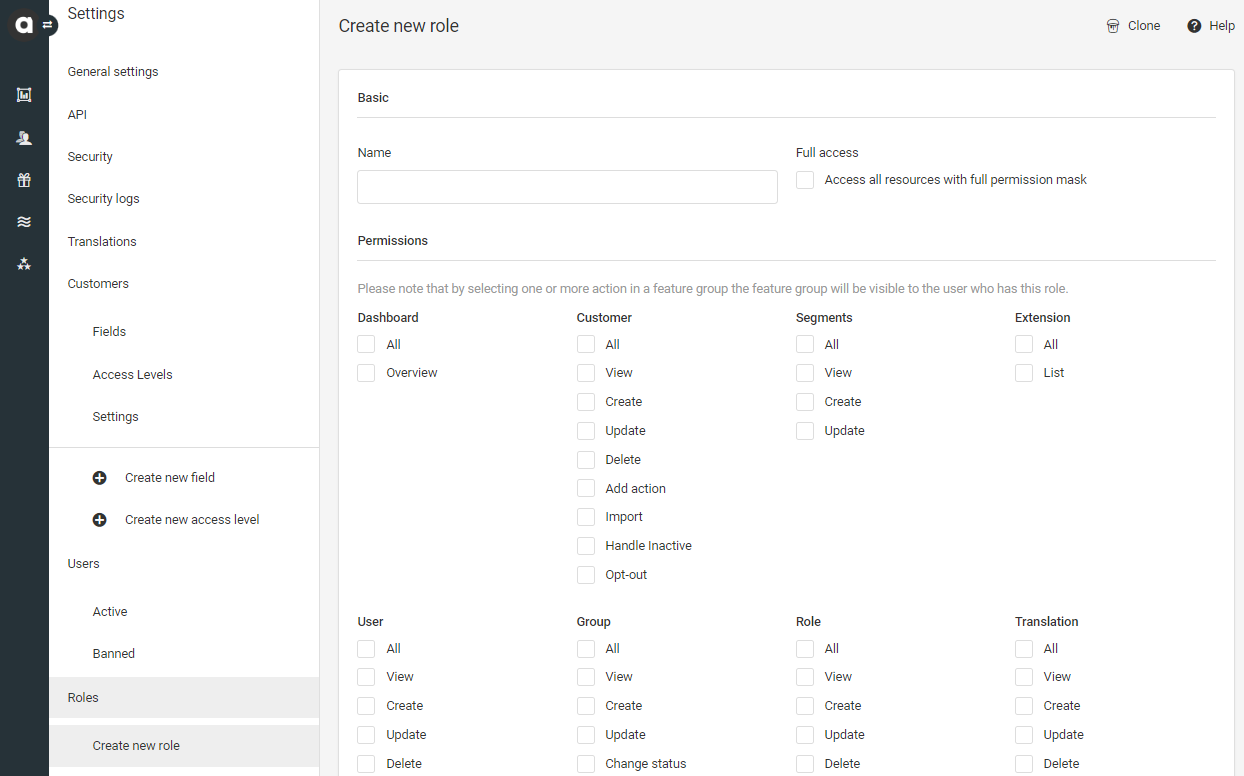
Click Create new role
Name the role
Full access: If you check the Full access box, all permissions will be automatically selected.
If you wish to create a permission mask that only hides certain functionalities, you can select all by checking this box and then deselect the specific ones you want to remove. This can expedite the configuration process.Set up the permission mask
Check all the boxes next to the settings the role should have access to.Click Save

Once you’ve saved a new role, it will be added to the list of roles available for selection when adding/editing a user.
Editing a role
Except for the Administrator role, you can edit all other roles by clicking the Edit button in the roles list. Use the search bar to easily find users.
Cloning a role
If you want to create additional roles with similar privileges, you can choose to clone them. This feature replicated all the settings.
Click Edit next to the role that you would like to duplicate
In the upper right corner, click Clone
Once completed, a ‘Role is successfully cloned ‘ message will appear on the Roles page.Click the Edit button for the newly created duplicated role
Modify the name and permission mask as needed
Click Save

Deleting a role
Roles cannot be deleted from the Management UI.