The API tab serves as the interface where you can view API credentials, explore functionalities, and set access restrictions.
API key and secret
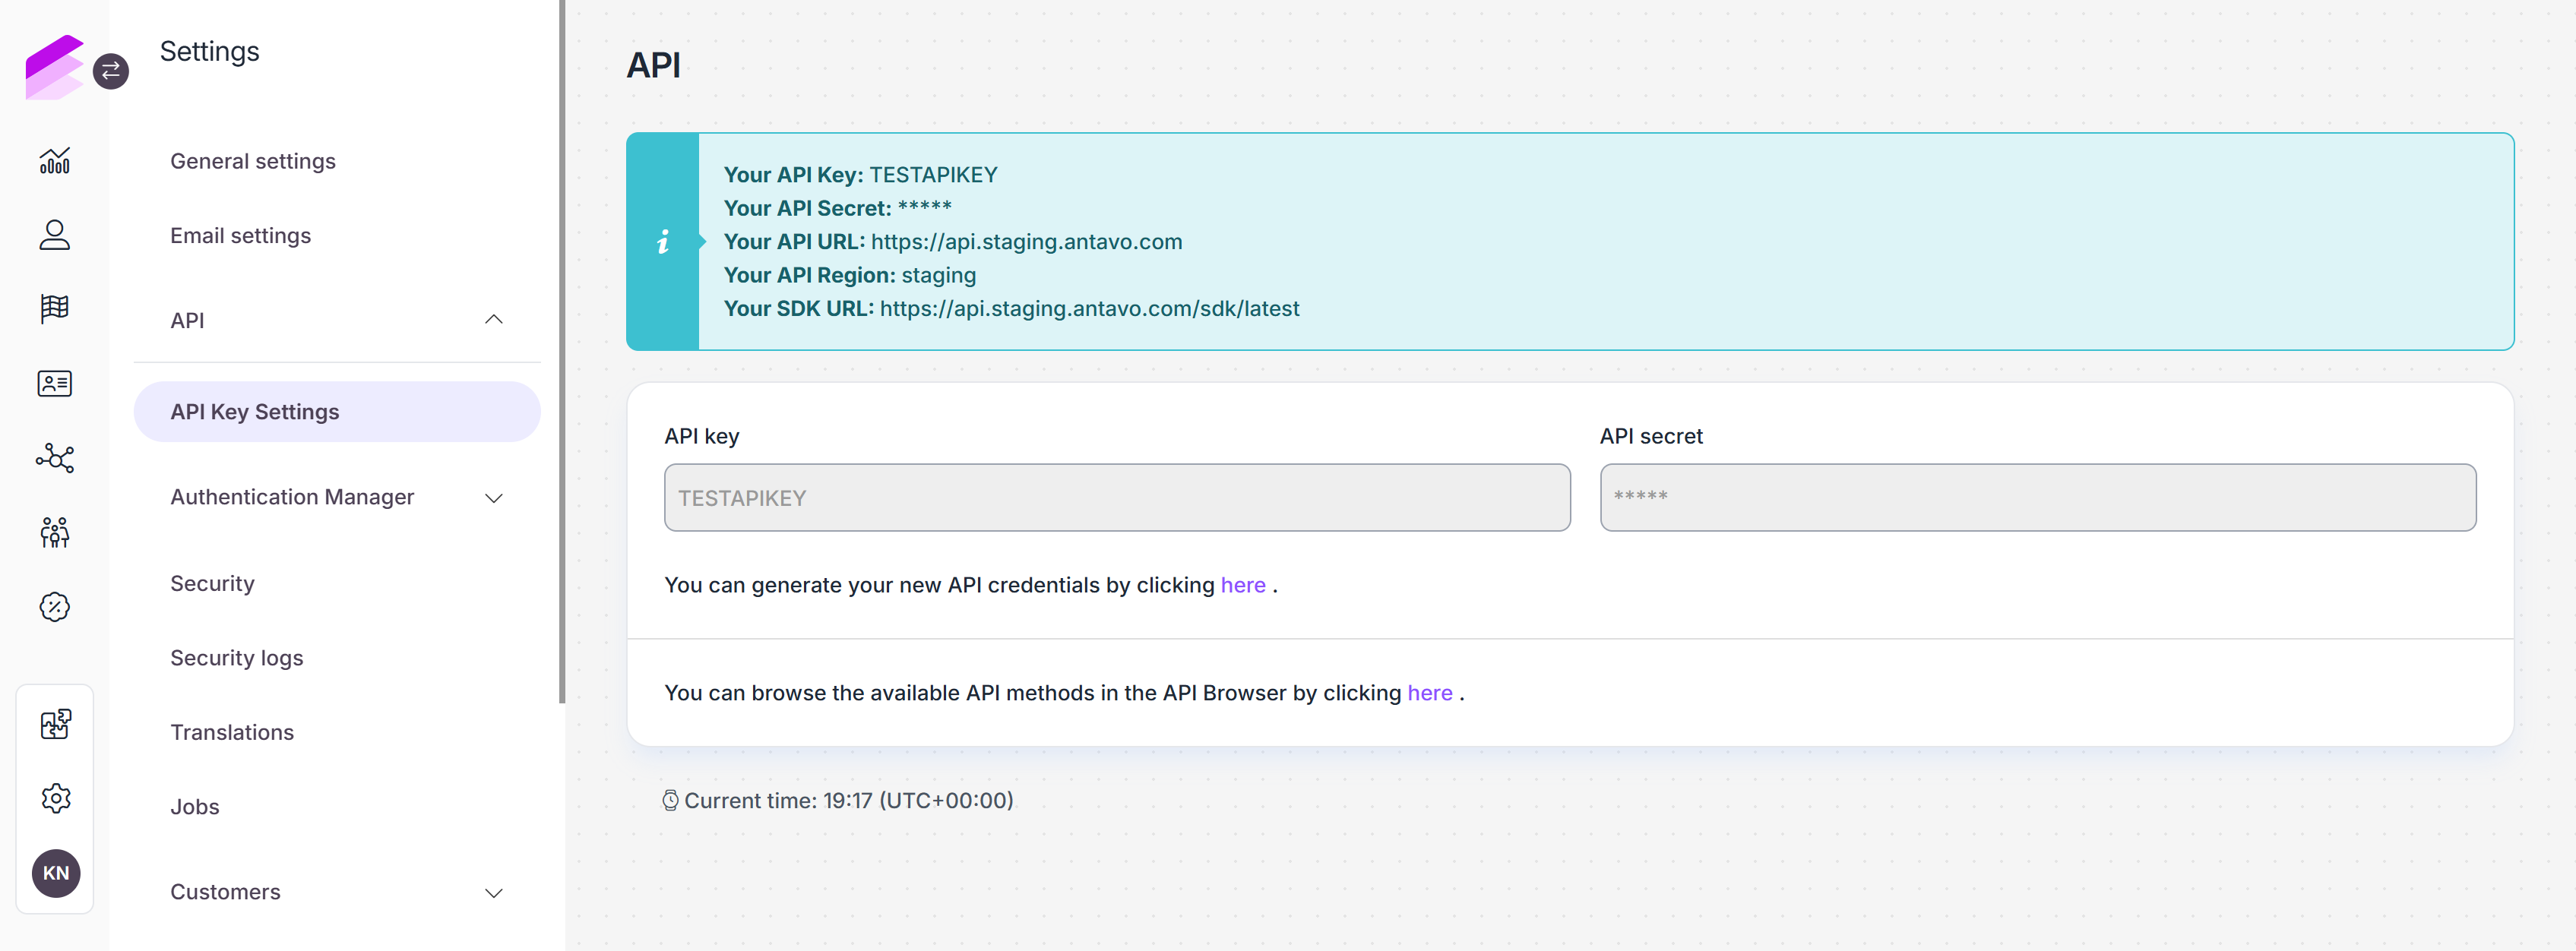
The API tab opens the page where you can retrieve the API key and secret necessary for establishing connections between your loyalty program and other integrated services, such as a newsletter provider.
For security reasons, the API secret is only accessible at the time of credential generation and is subsequently hidden from the Management UI. It’s essential to copy and securely store this information in case you need it in the future.
Please be aware that generating new API credentials will deactivate all existing connections until the new credentials are entered.
API Browser
You can also find a link to the API browser on this page, allowing your developer to browse the available API methods.
Events: Submit API events.
Customers: Access endpoints of the Customer API.
Errors: Review the complete content of requests and Antavo’s responses to failed API calls.
For security reasons, customer passwords included in requests are never exposed in the logs.
Read more in the API documentation.
IP Filter
Under the IP filter tab, you can define specific IP addresses that can access each API endpoint.
This tab is accessible only when the IP filter module has been enabled in the Management UI. Please contact the Antavo Service Desk for assistance in activating this module.
Select the API endpoint from the dropdown list
Click +
Paste the IP address or IP range (using CIDR notation) that you wish to authorize
Click the corresponding + button to add multiple addresses or ranges.
E.g., if you add192.168.1.2and192.168.0.3/24, only the 192.168.1.2 and range of 192.168.0.[0-255] IP addresses will be permitted. Otherwise, the endpoint will respond with a forbidden exception.Click Update to save your settings
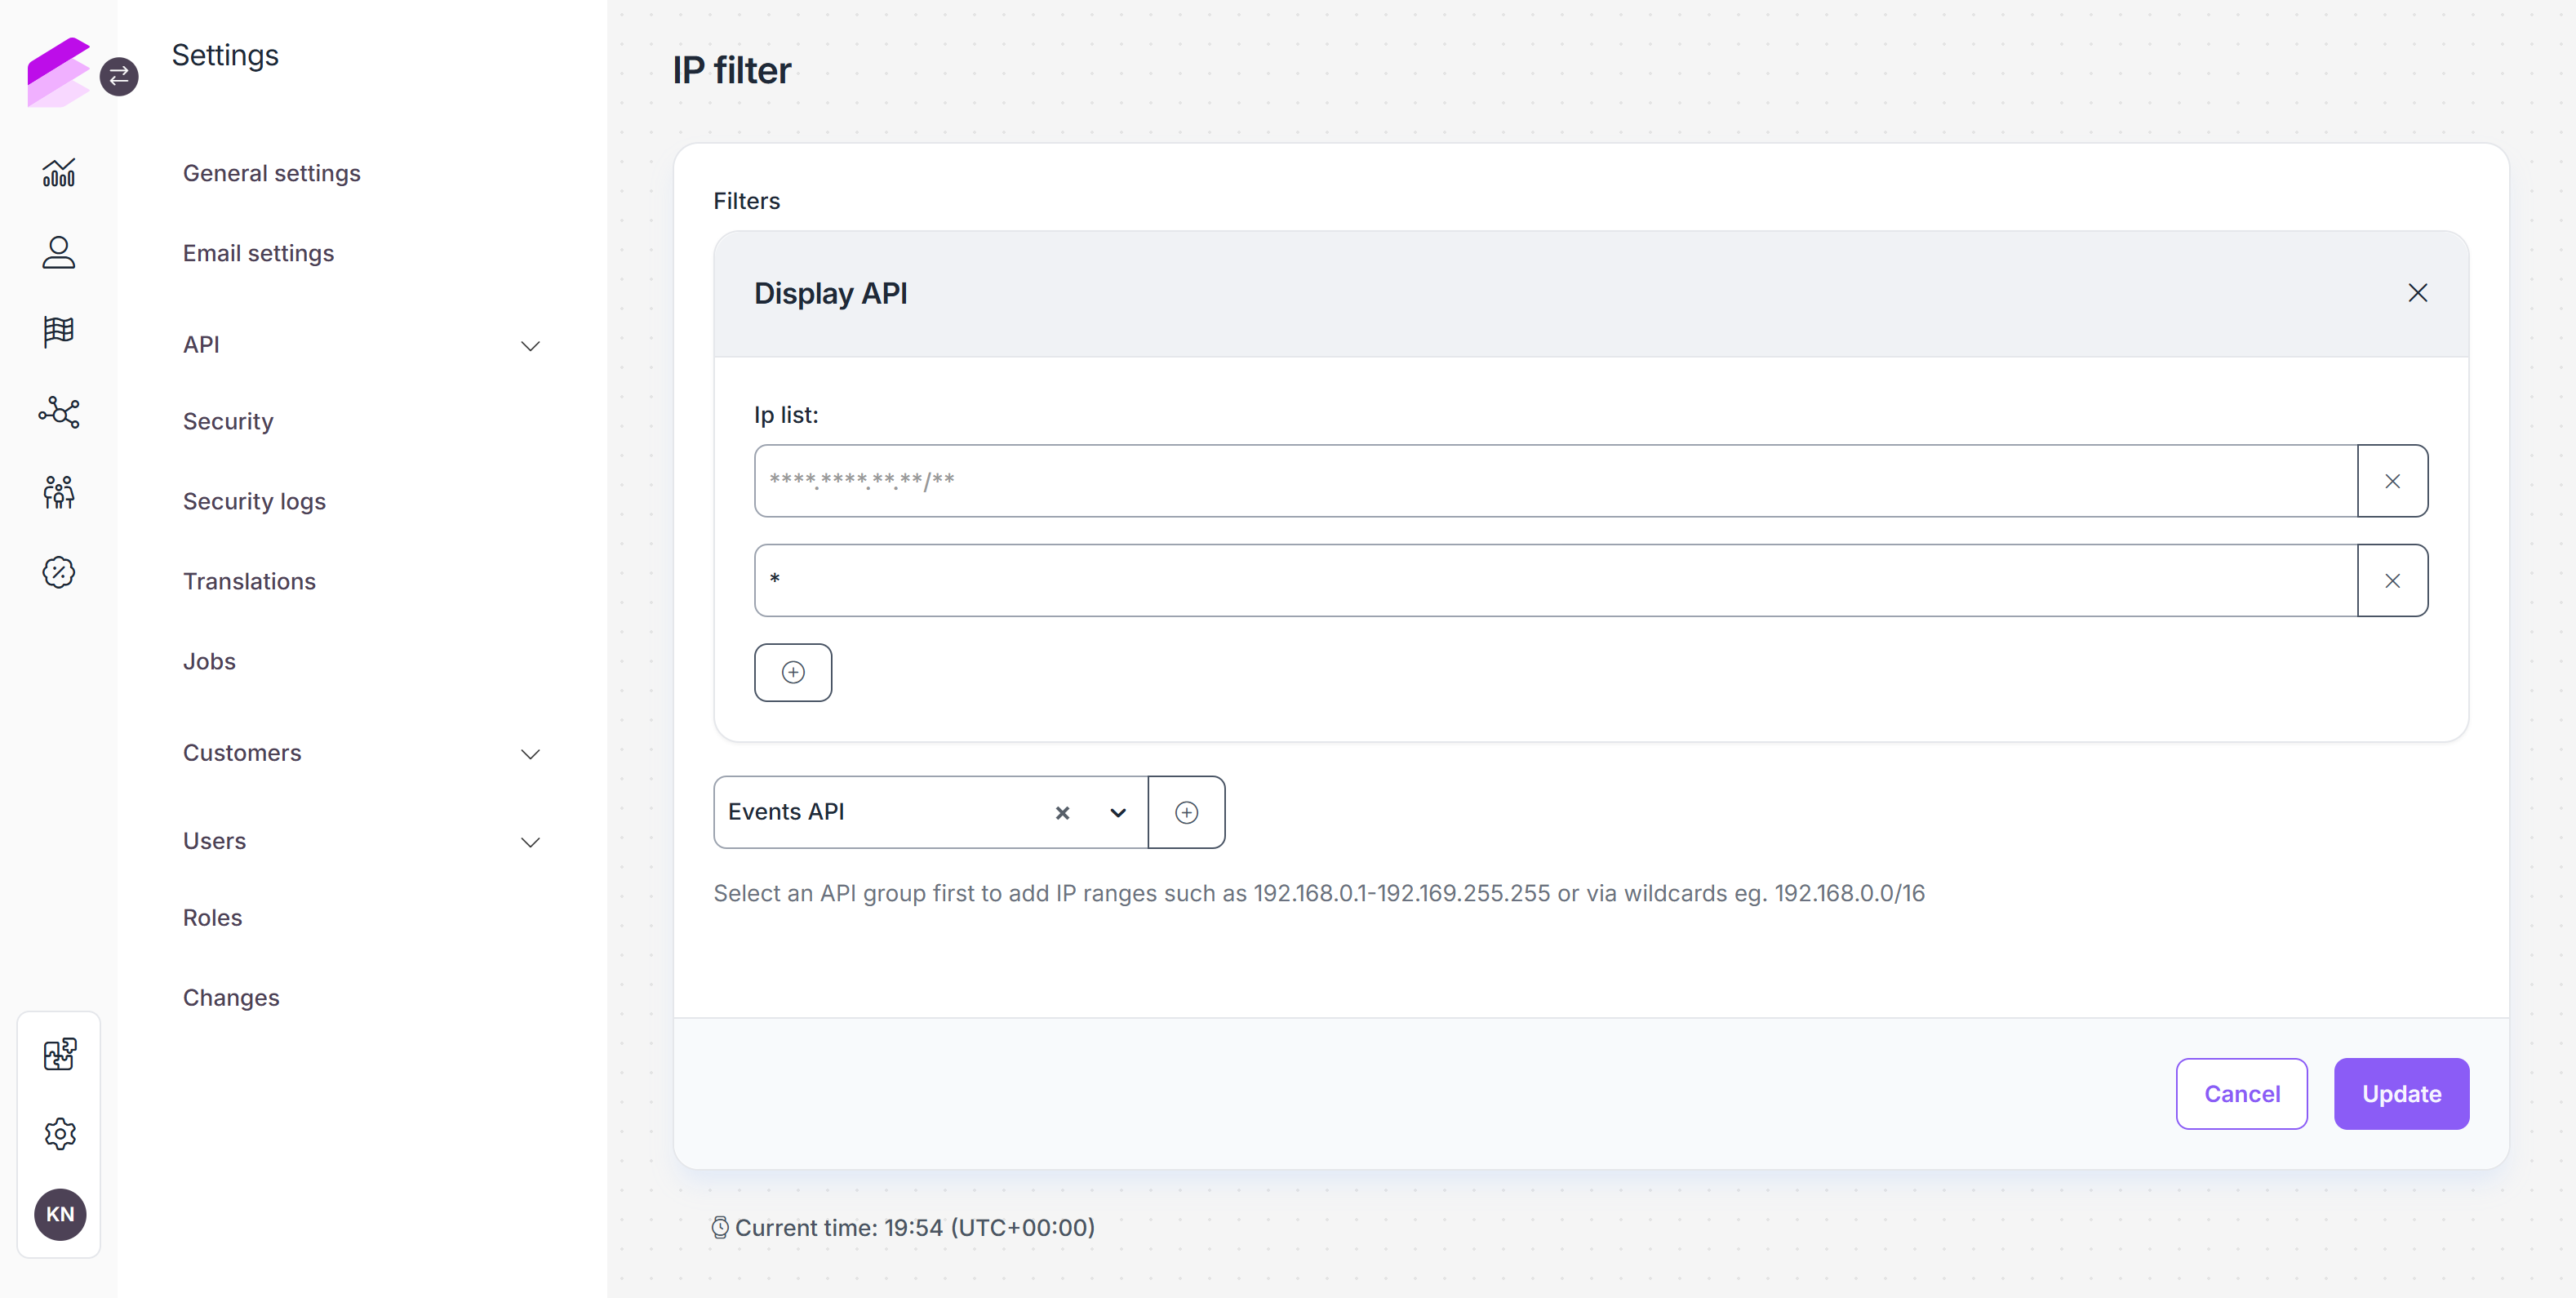
You can remove filters anytime using the X button.
Signature enforcement
The Signature enforcement tab is accessible only when the API signature check module is enabled. Please contact the Antavo Service Desk if you want to start using this feature.
If signature enforcement is enabled for an API endpoint, requests made with plain API keys will be rejected due to an authentication error. Only requests with proper signatures will be accepted and recorded. Learn how to add signatures to your API requests in the developer documentation. Use the checkboxes to enable signature enforcement for any of the available endpoints.
Challenges API
Clubs API
Coupons API
Customer API
Display API
Entities API
Events API
FAQ API
Offers API
Rewards API
Points preview API (formerly known as Workflow Campaigns API)
.png)
Before leaving the page, ensure you click Update to apply and save your changes.
Authentication Manager
The Authentication Manager allows you to create and manage credentials used for token-based authentication in the Antavo Loyalty Cloud.
These credentials are required to generate access tokens via the /v1/auth/token endpoint.
Currently, token-based authentication is used by the Async Events API, and support for additional APIs may be added in the future.
Through this interface, you can:
create authentication clients
define what APIs they can access
control token behavior and validity
revoke access when credentials are no longer needed
audit authentication-related activity
Authentication Clients
On this tab, you can create new authentication clients and manage existing ones.
Generate a new Authentication Client
To create a new authentication client:
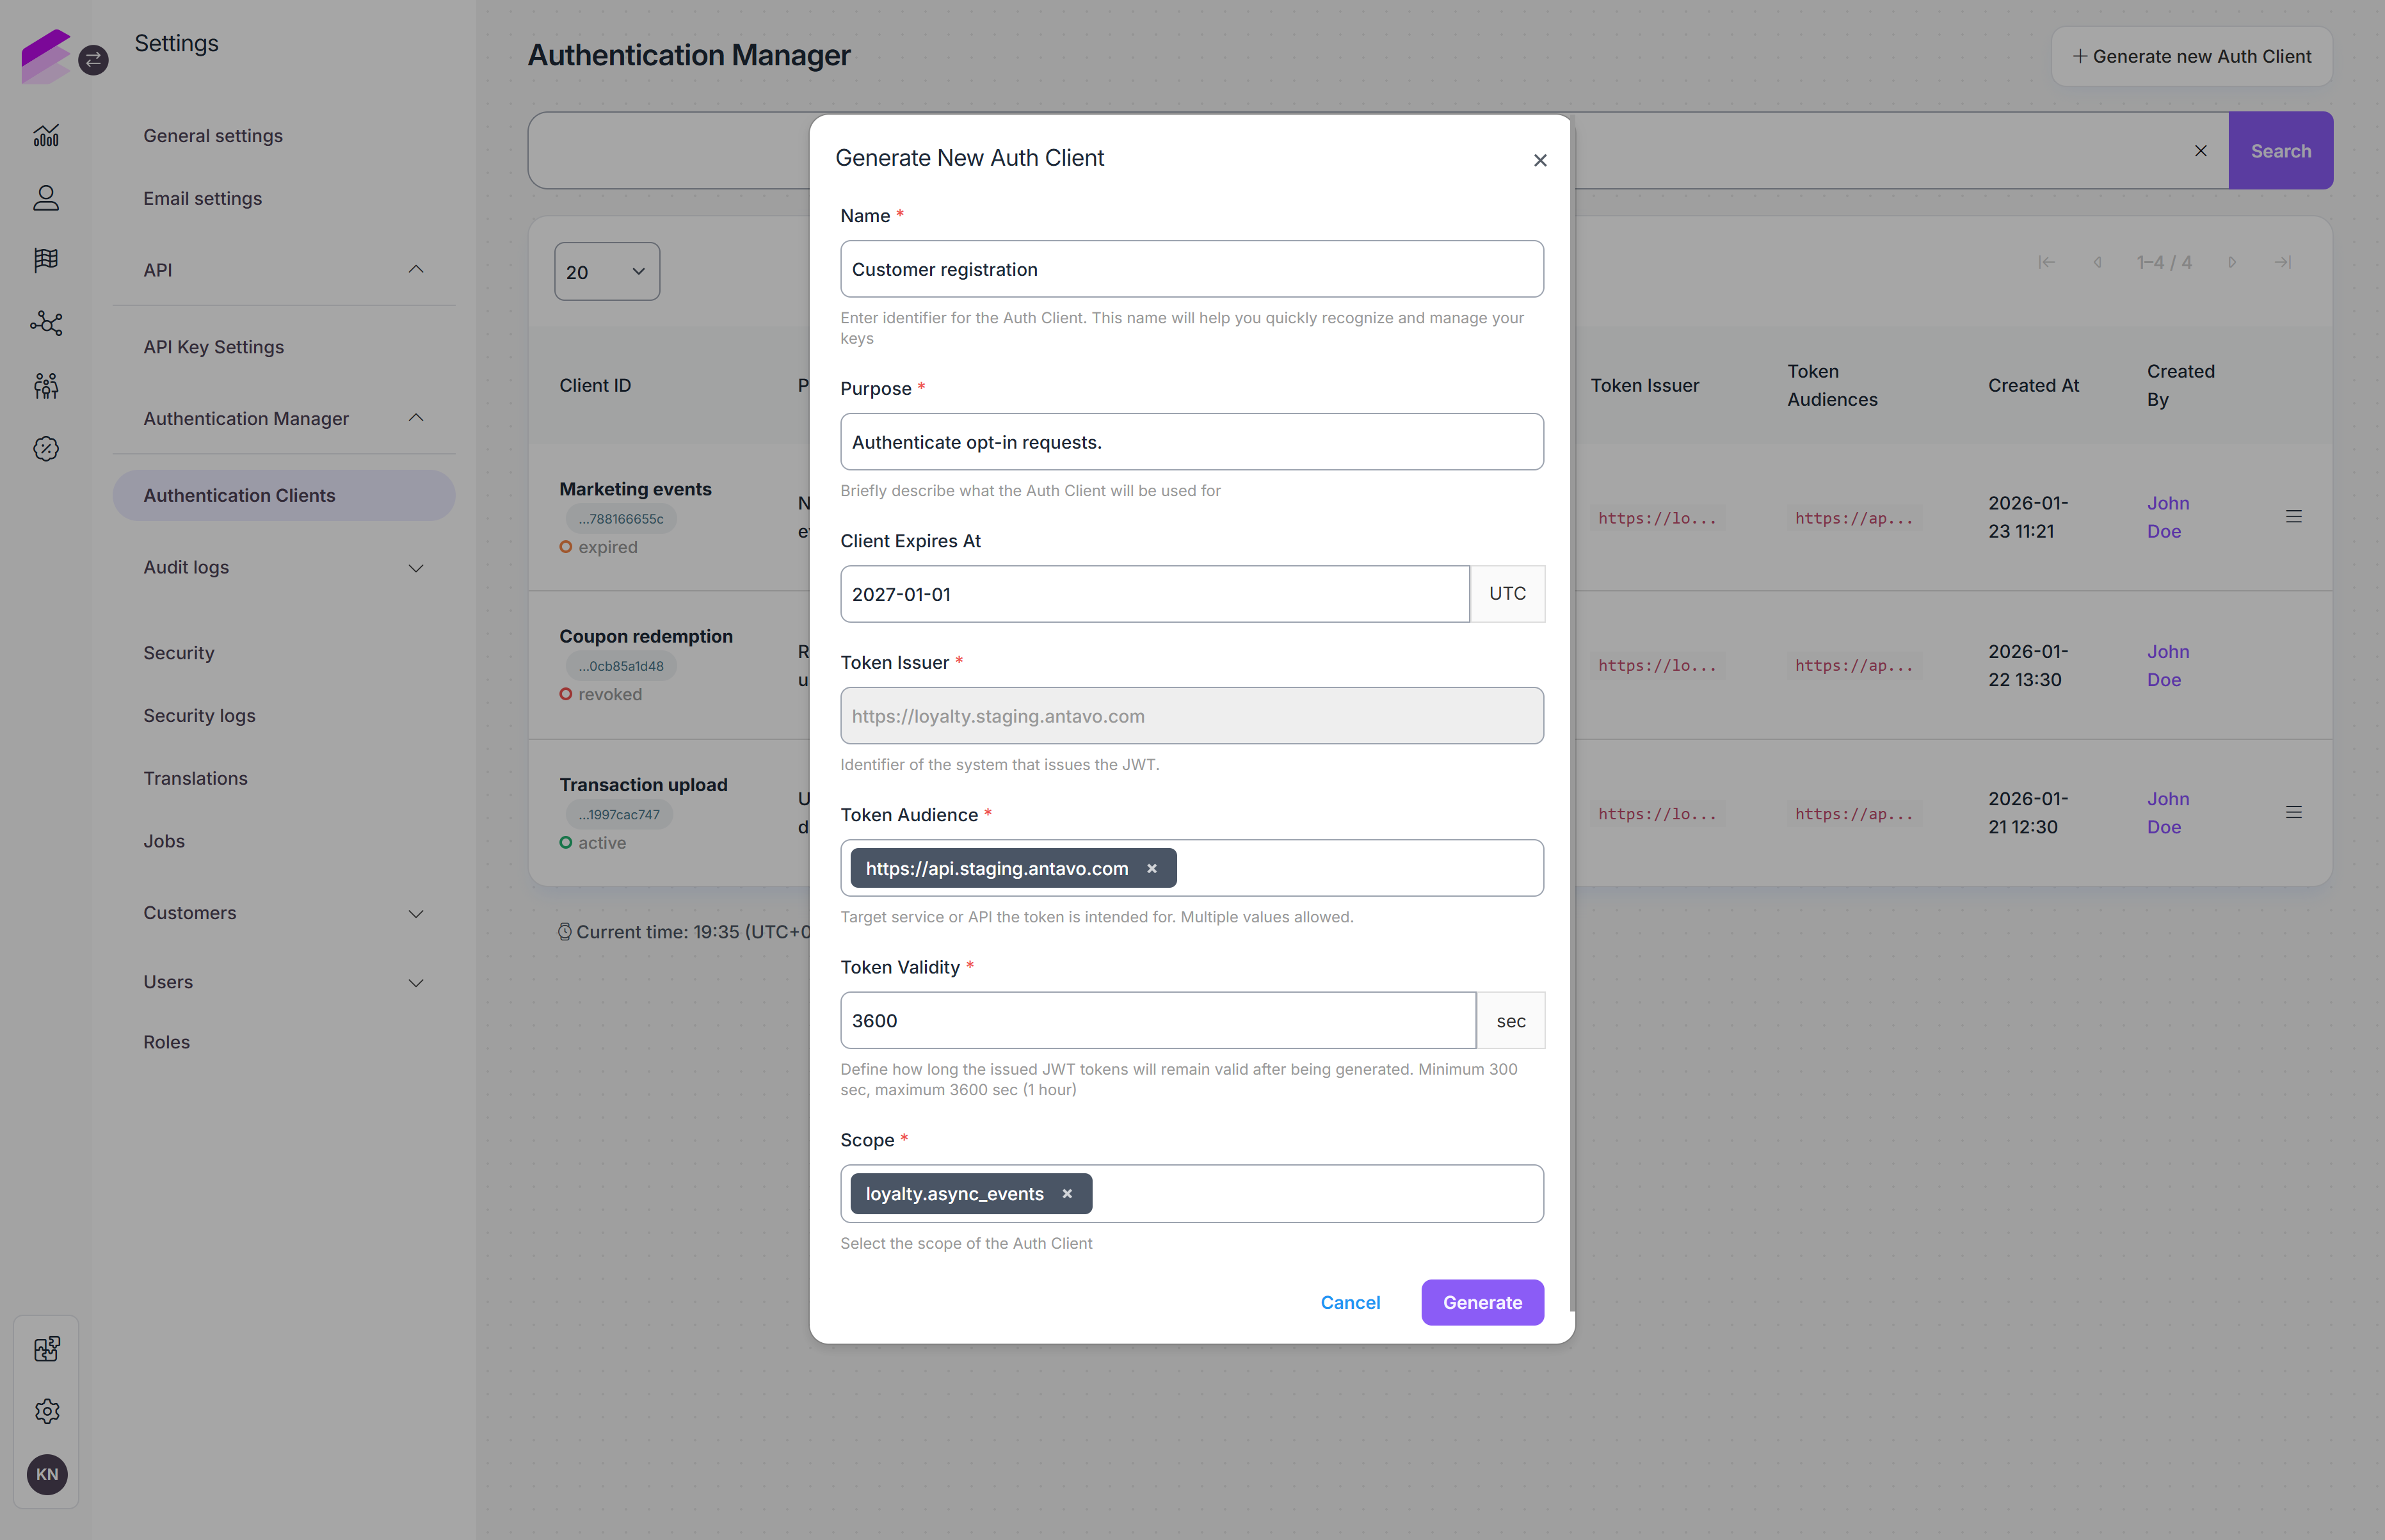
Click Generate new Auth Client in the top-right corner of the Authentication Manager.
A configuration pop-up will appear where you can define how the client should behave.
Name
A human-readable name for the authentication client.
Use a clear and descriptive name to make the client easy to identify later on the Management UI.Purpose
A short description explaining why the authentication client is created (for example, sending async events requests).
This field helps with long-term maintainability when multiple clients exist.Expiration date
Defines when the authentication client expires.
After this date, the client can no longer be used to generate new access tokens.Token issuer
Identifies the issuer of the token. This value is automatically set by the system and cannot be modified.Scope
Defines which APIs the generated access tokens can be used for.
Currently, only theloyalty.async_eventsscope is supported.Token audience
Defines the target service or API that the token is intended for.
This ensures tokens are accepted only by the appropriate backend services.
Click Generate to create the authentication client.
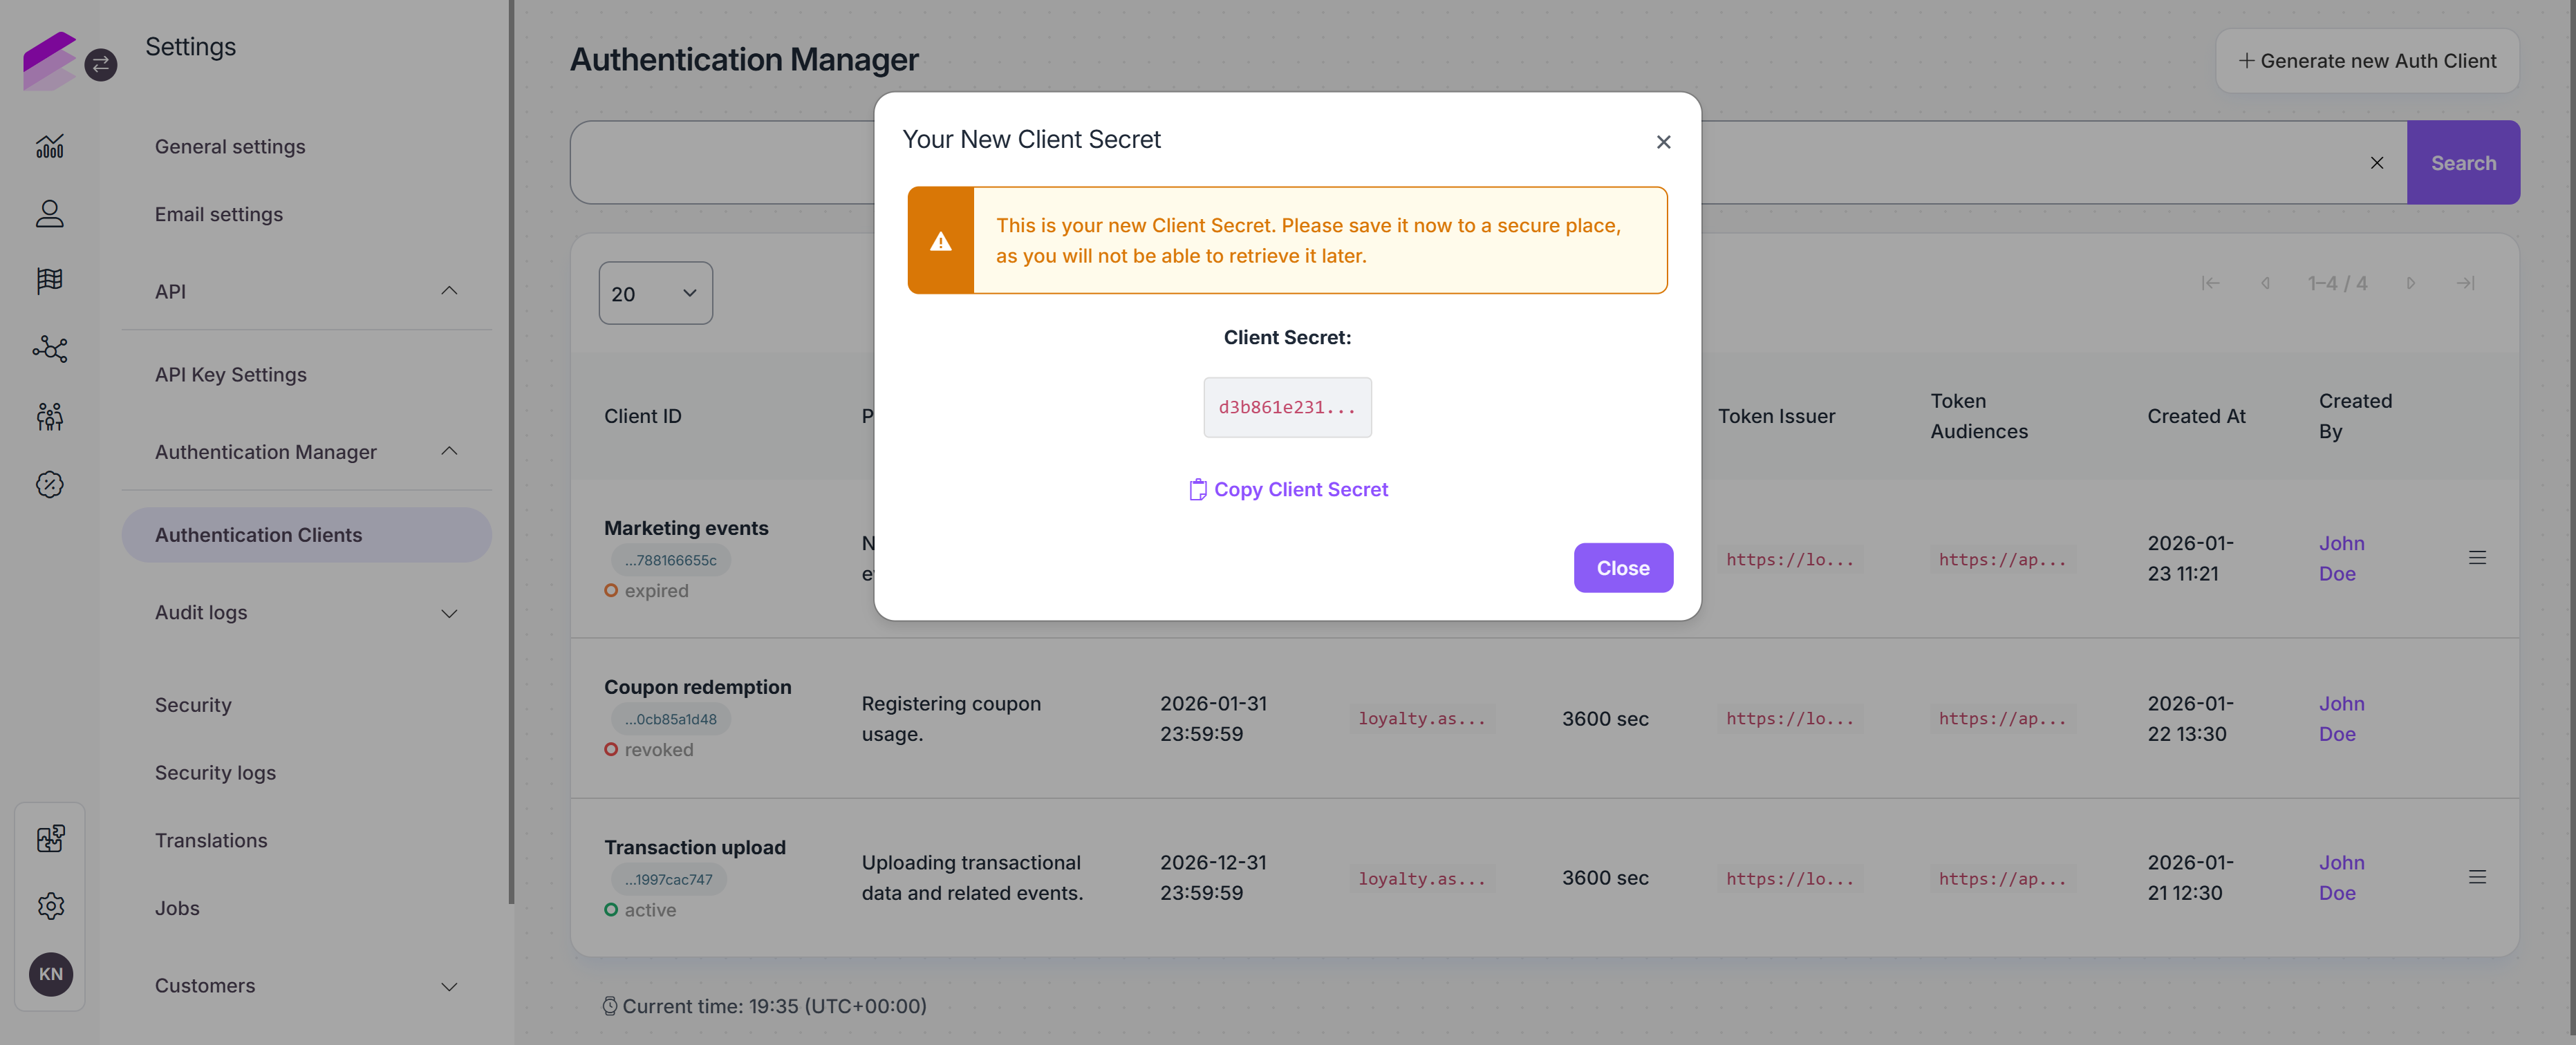
Once the client is generated:
The client secret is displayed once in a pop-up window. Make sure to store it securely, as it cannot be retrieved later.
The client ID remains visible in the authentication client list and can be accessed at any time.
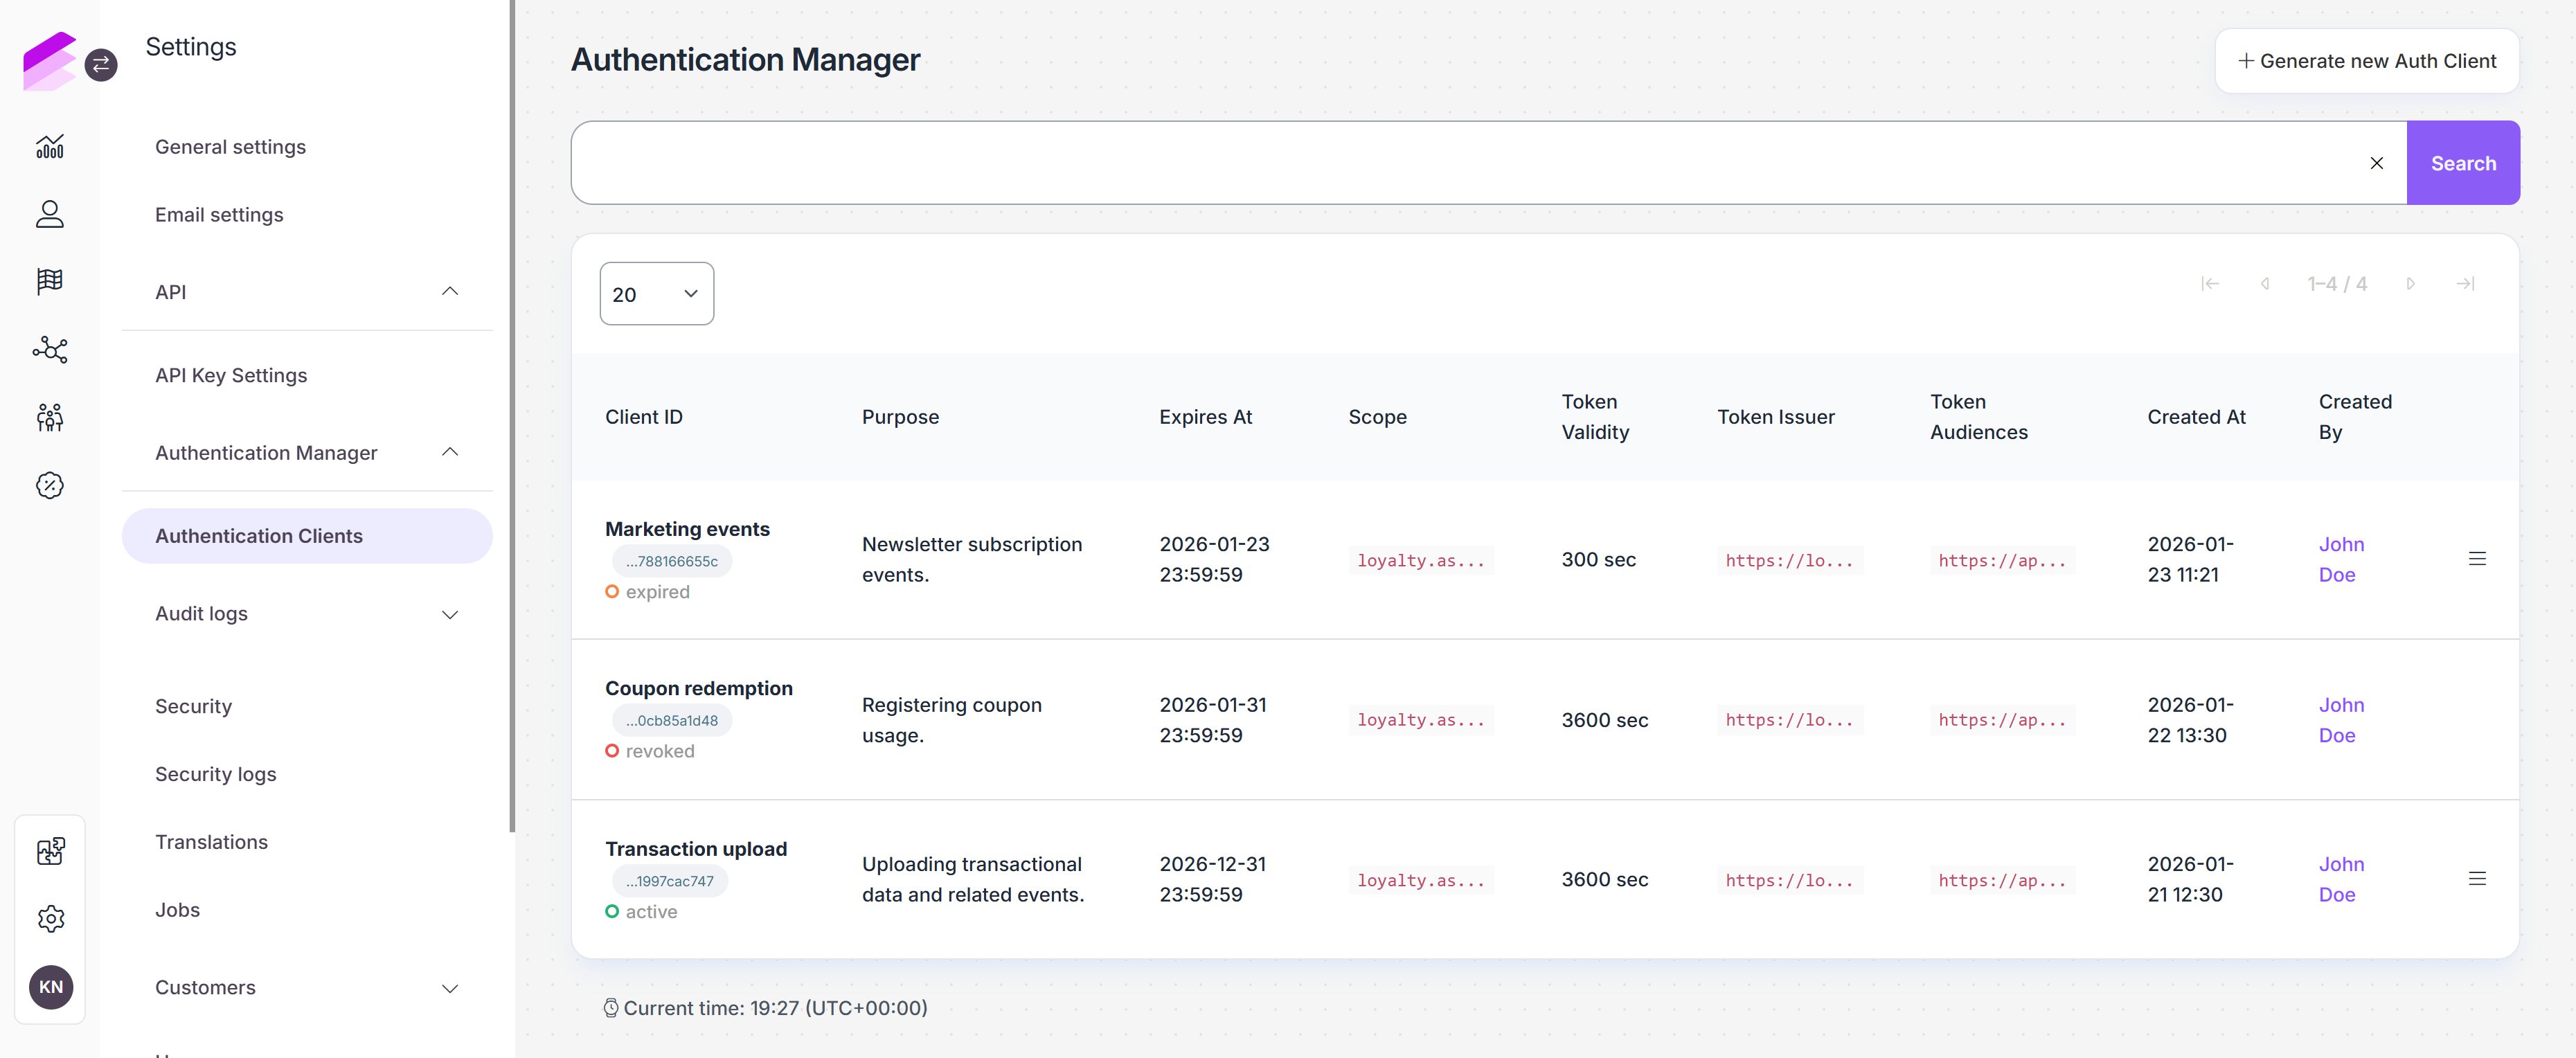
Authentication Clients list
After creating authentication clients, you can manage them from the list under the Authentication Clients tab. You can find the following information:
Client ID
Displays the client name provided during creation, along with the generated client ID.
The client ID can be copied with a single click and is used as theclient_idwhen requesting an access token via the/v1/auth/tokenendpoint.The current status of the client is also shown here:
Active: the client can be used to generate access tokens
Revoked: the client has been revoked and can no longer be used
Expired: the client has expired and can no longer be used
Purpose
Describes the intended use of the authentication client, as provided during client creation.Expires At
The date when the authentication client expires. This value is calculated based on the token validity settings defined during client creation.Scope
Defines which APIs the client can access. This is selected during client creation.Token validity
Specifies how long access tokens issued by this client. This value is automatically determined based on the environment and cannot be modified.Token issuer
The issuer associated with the tokens generated by this client. ez ugye automatikus az environment alapjánToken audiences
The service or API the token is intended for. This is selected during client creation.Created At
The date and time when the authentication client was created.Created By
The Management UI that created the authentication client.
Revoke access
If an authentication client is no longer needed, the access can be revoked.
To revoke an authentication client:
Open the hamburger menu at the end of the client’s row.
Select Revoke access.
Confirm the action in the pop-up.
Revoking an authentication client is irreversible. Once revoked, the client can no longer be used to generate access tokens.
Audit logs
The Audit logs section provides visibility into authentication-related activities. It helps you track when authentication clients are created or revoked, and when access tokens are issued or rejected by the authentication endpoint.
This information is useful for troubleshooting, security reviews, and operational monitoring.
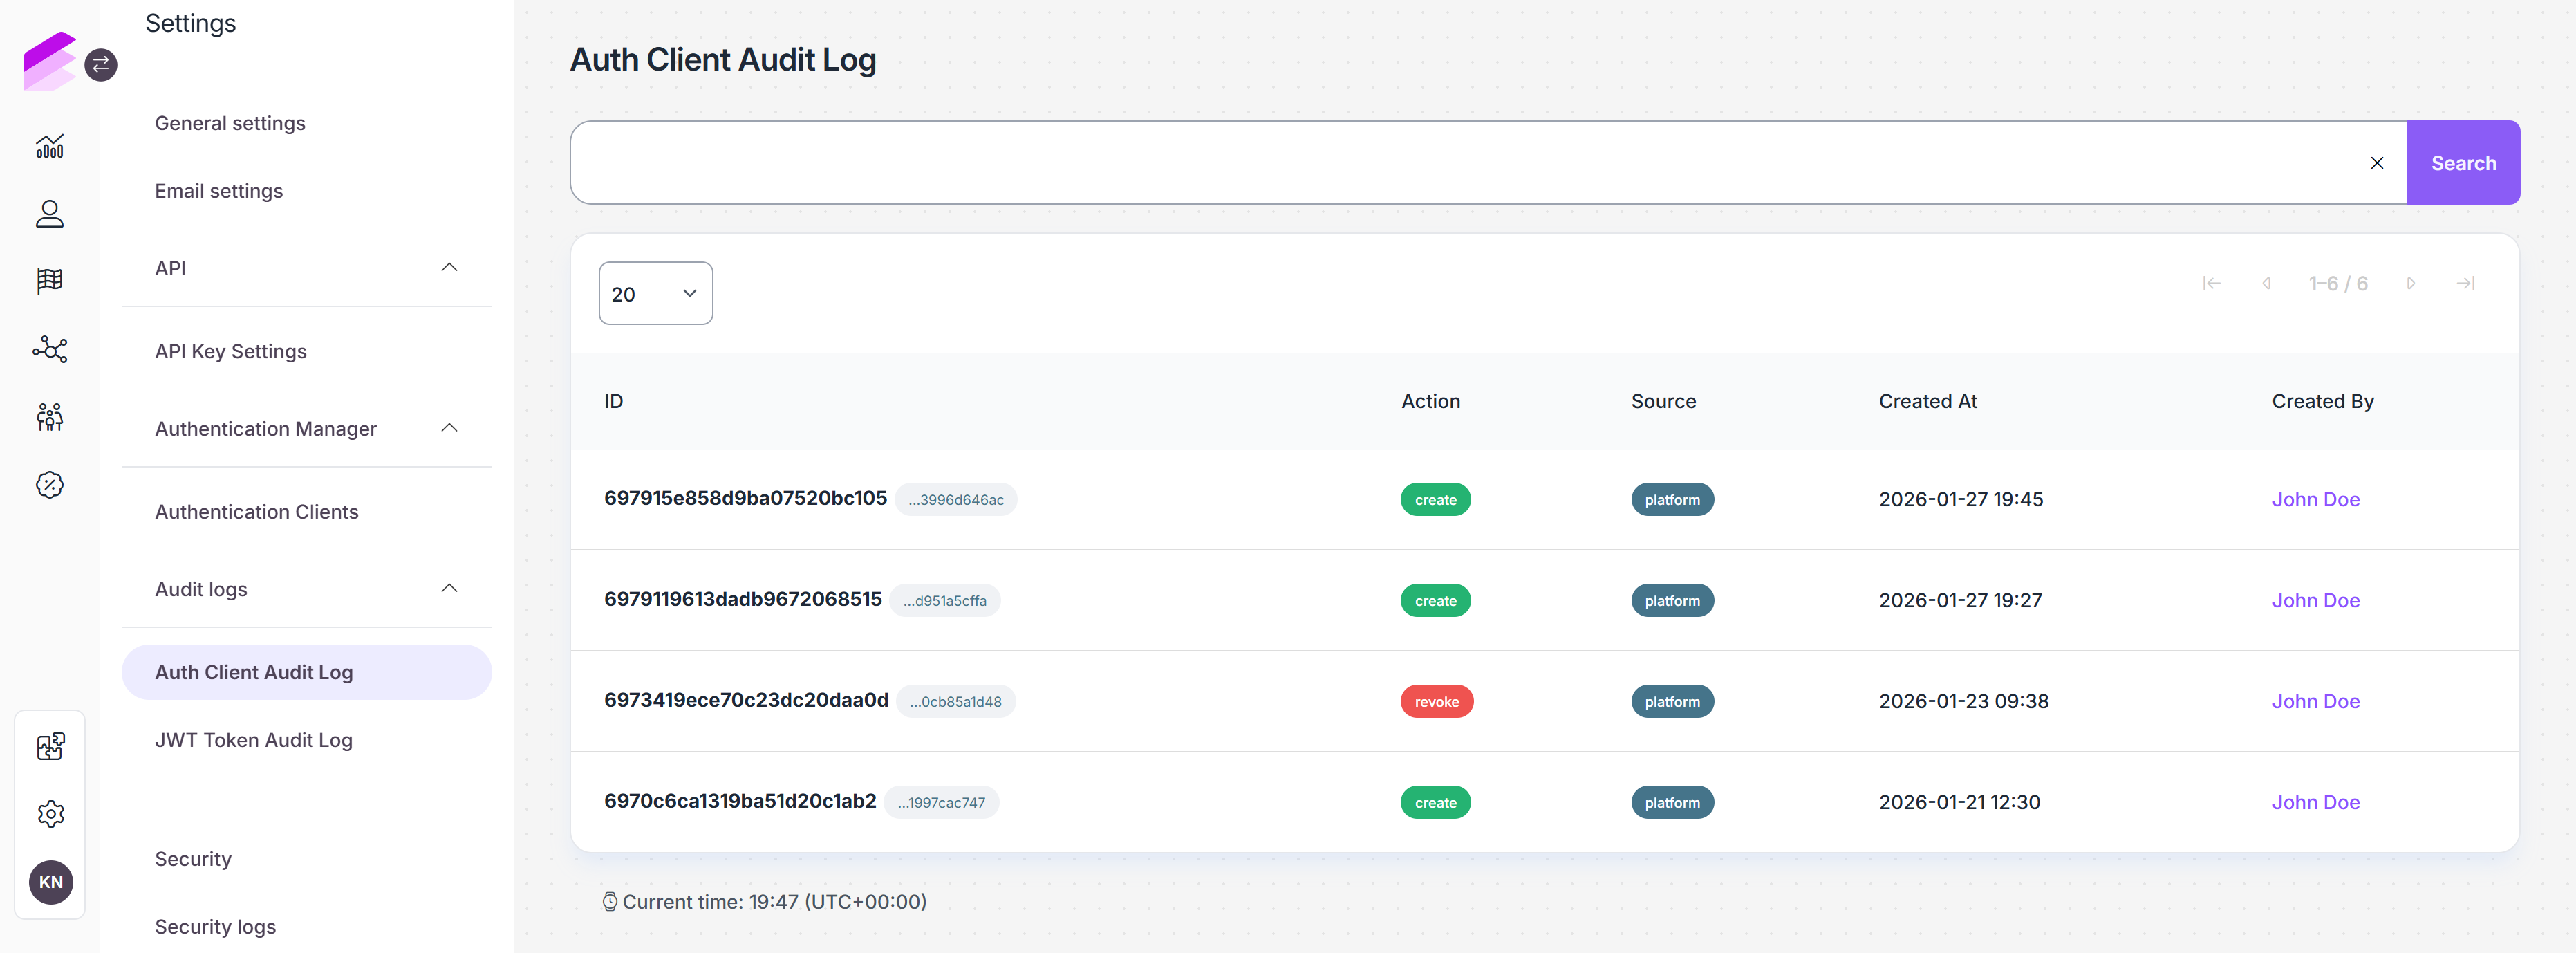
Auth Client Audit Log
The Auth Client Audit Log records lifecycle events related to authentication clients. This log includes entries when an authentication client is created or revoked.
ID
The unique identifier of the audit log entry.Next to it, the related Auth Client ID is displayed and can be copied. This identifies the authentication client that was created or revoked.
Action
The action performed on the authentication client. Create or revoke.Source
Indicates where the action was performed.Created At
The date and time when the action occurred.Created By
The user who performed the action.
JWT Token Audit Log
The JWT Token Audit Log tracks token-related events that occur when the authentication endpoint is called using authentication client credentials. This log records all successful access token generation and failed token generation attempts.
ID
The unique identifier of the audit log entry.
Next to it, the related Auth Client ID is displayed and can be copied. This identifies which authentication client was used when the token was requested.Action
Describes the outcome of the token request.
Possible values include:Issued: an access token was successfully generated
Error: the token generation failed
Created At
The date and time when the log entry was created.Metadata
Contains technical identifiers related to the token request.Error
Present only if token generation failed. Includes the error message and error code returned by the authentication endpoint.
.png)